

I wanted to show everyone how I make my pillows. These are two pillows that I made for my sister and my niece who is adopted. The quote on the pillows is very important to her!
The photos give step by step instructions for putting the pillows together. I machine embroidered the quote and trees on 12″ square backgrounds and then added 3″ borders. I made my own pillow inserts for these 18″ pillows. I hope these photos provide sufficient details. Send me a comment of contact me if you have any questions!
I also have made pillows that have a quilted front. I just layer the front over a piece of batting and backing, then I free motion quilt the layers together. The back of these pillows is the same as shown here with the fusible interfacing. My Cardinal Pillow is my favorite!
-

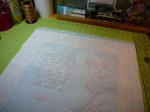
- The Front of the Pillow
-

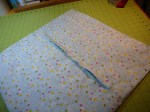
- Cut two pieces for the back of the pillow that are the same width, but 1″ longer to leave room for attaching the zipper.
-

- Iron woven fusible interfacing to the reverse side of the front and two back pieces
-

- Reverse of the Pillow Front with Fusible Interfacing
-
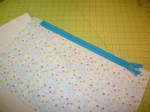
- To attach the zipper place right sides together
-
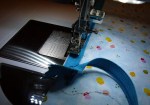
- Use your zipper foot to attach the first side of the zipper
-

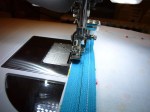
- Close the zipper to finish sewing towards the end of the seam
-

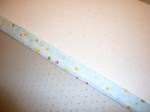
- First edge attached.
-
- Fold over 1″ of the second back piece and press
-
- Open up the folded edge of the fabric and sew 2nd edge of the zipper on with the right sides together
-

- Fold the pressed edge back and sew close to the raw edges to hold it in place
-

- Sew the two back pieces together. Be sure to catch the edge of the piece on the bottom as it is narrow!
-
- Place front on top of the back and trim the back
-

- Sew a 3/8″ or 1/2″ seam and remember to leave the zipper un-zipped!
-

- The Finished Pillow Case
-
- Back of Pillow Case
-

- The Finished Pillow
-

- and one for my Niece
-

- Finished Pillow for my Niece
