Category Archives: do good patterns

Improv with Rules!

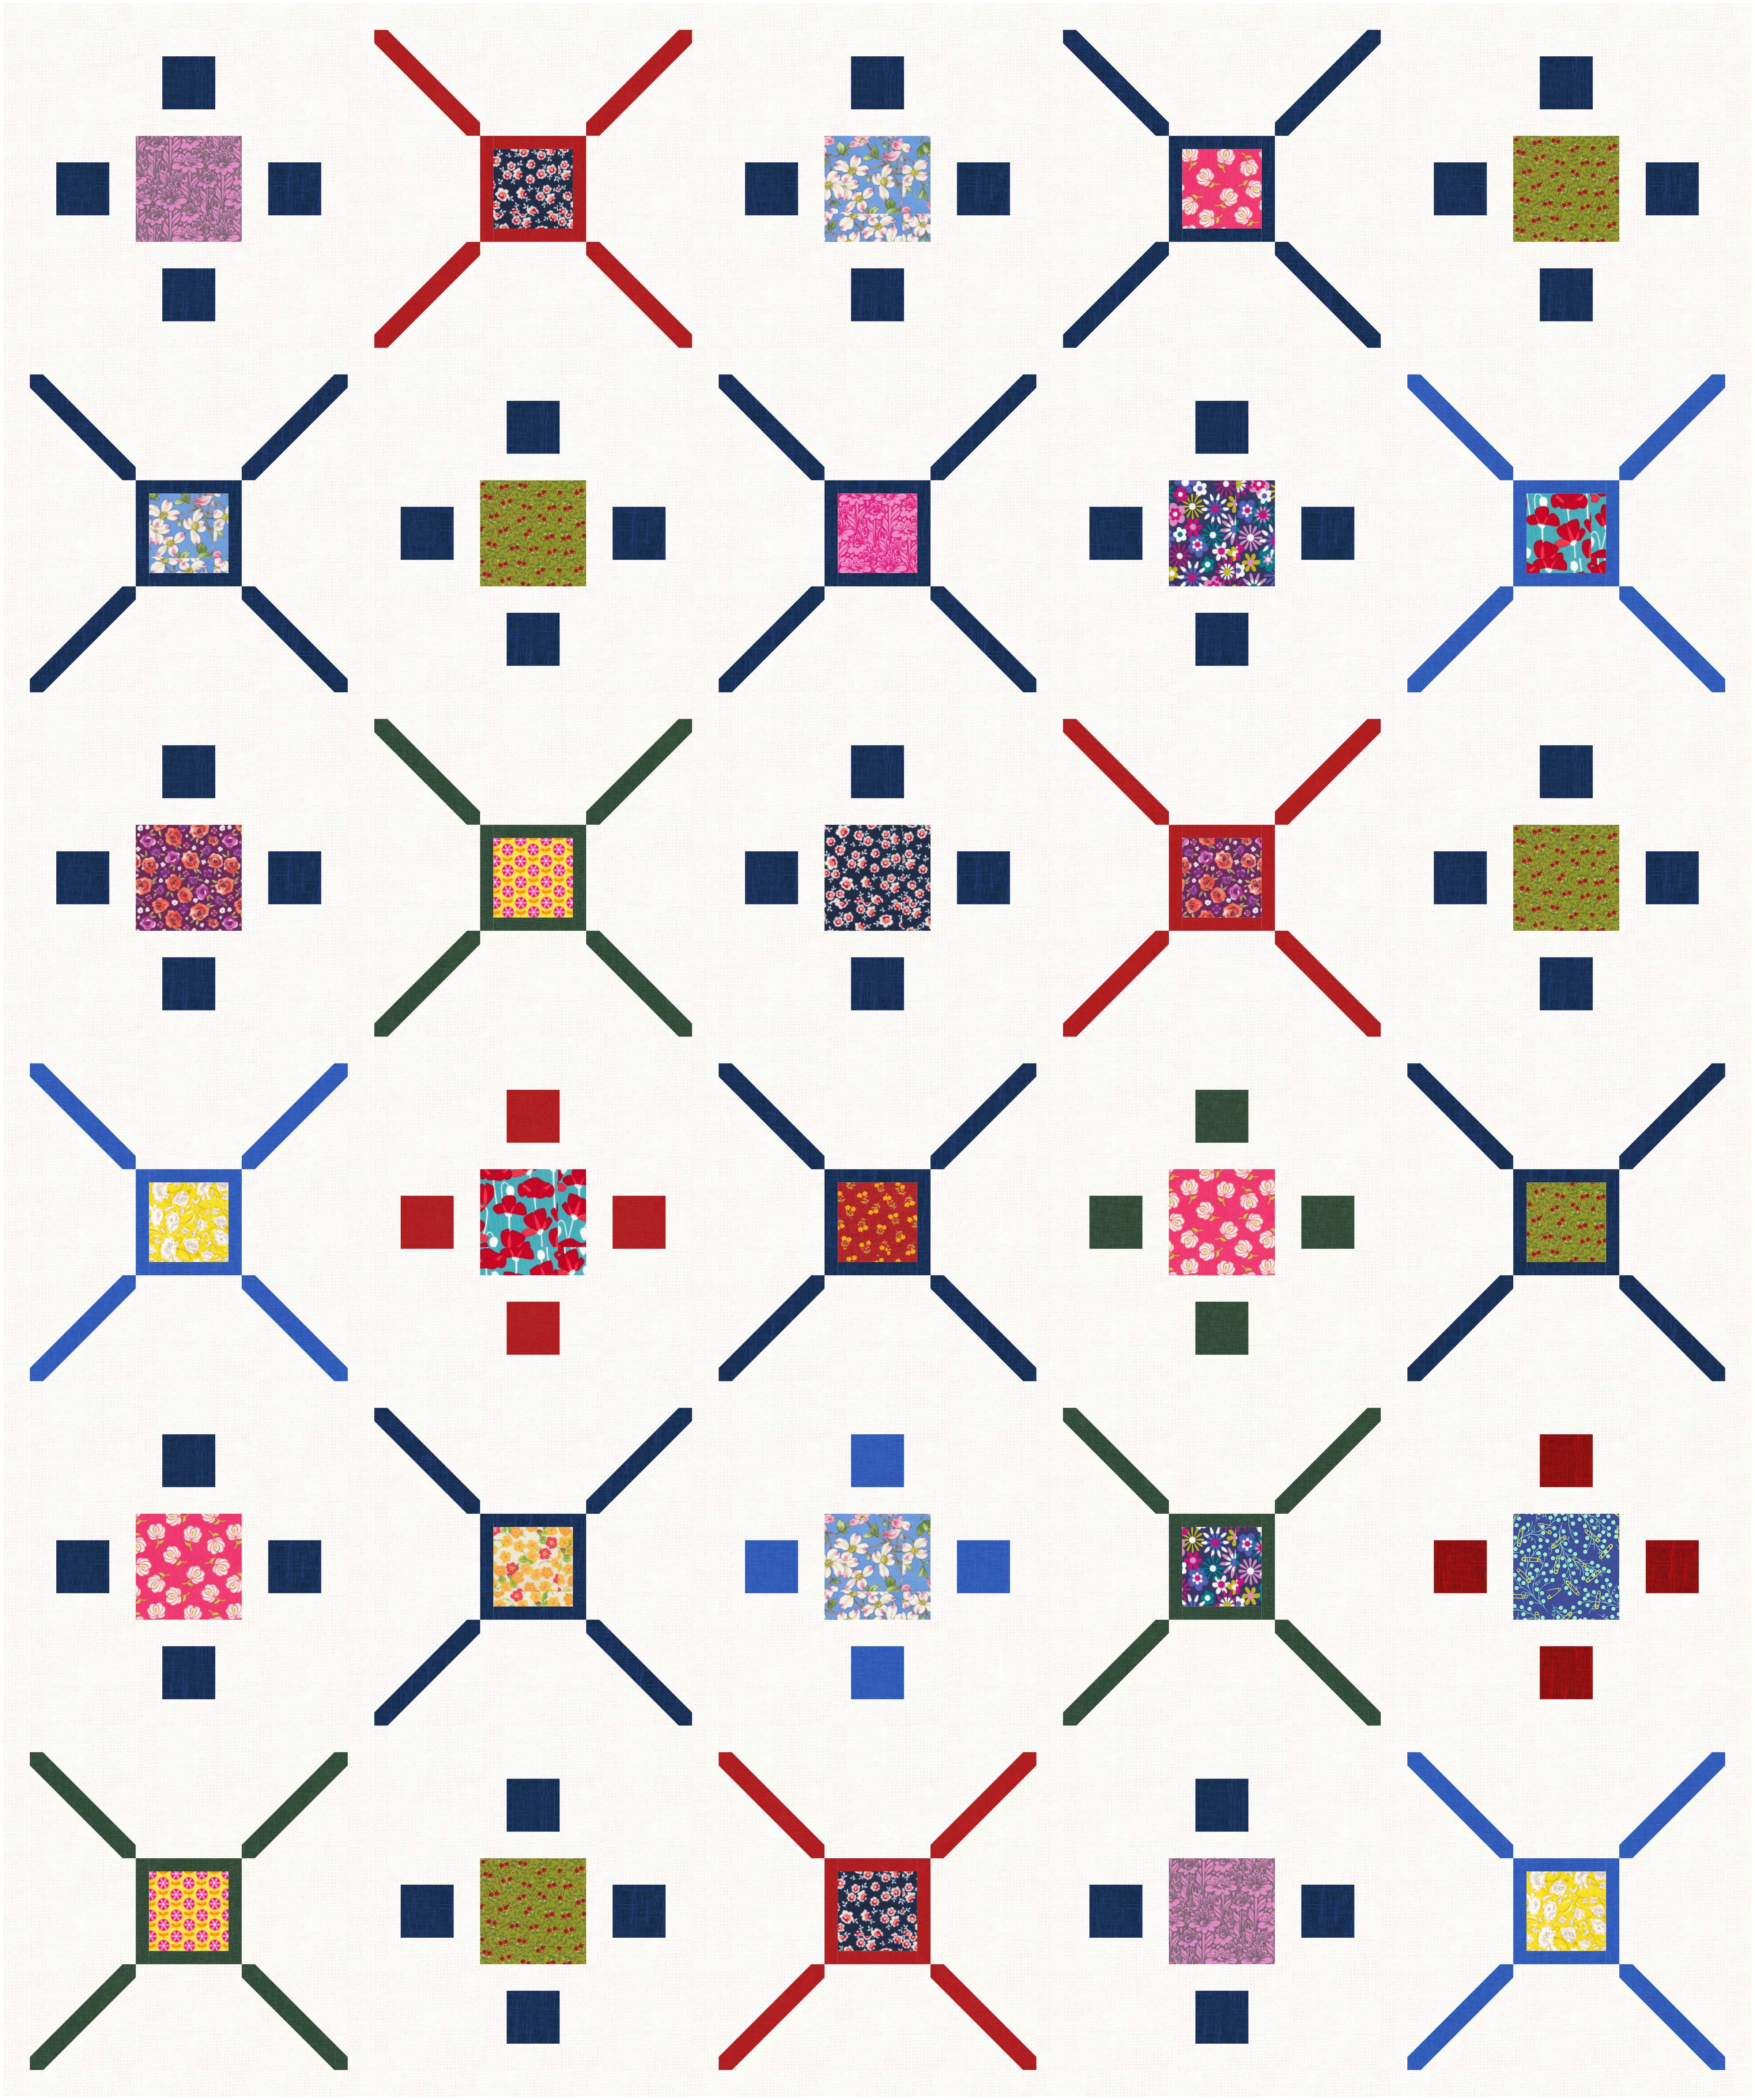
This is a block plan for my do.Good Stitches Hope Circle group. Look for us on Instagram, #dogoodstitcheshopecircle to see what we are up to.

Each block will be a 12″ block (12 1/2″ with seam allowances). It will consist of four 6″ (6 1/2″ with seam allowances) improv blocks.

Start out with four 8″ squares of fabric, two light and two dark. Use fabrics that will all work together. Also have two, three or four 8″ long strips of contrasting fabrics that are between 1″ to 1 1/2″ wide.

Layer each light fabric with a dark fabric, both sides UP! Then slice through each set, being careful not to slice too close to the edges. Next swap the fabric pieces in each pair to set up four blocks.
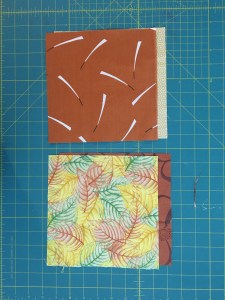
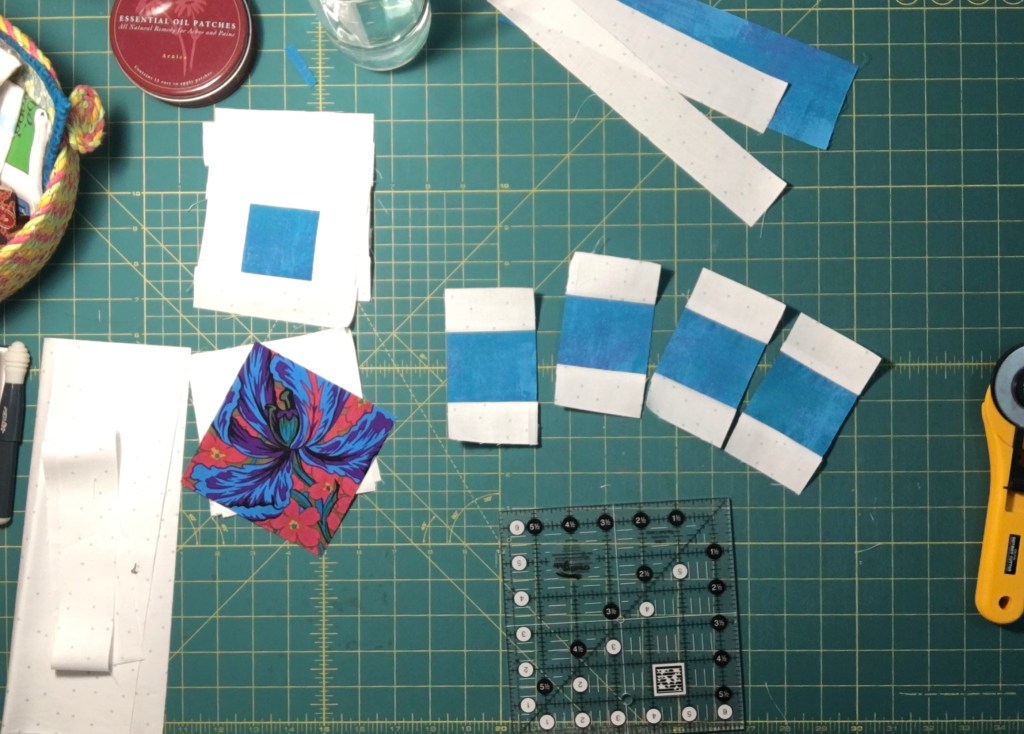
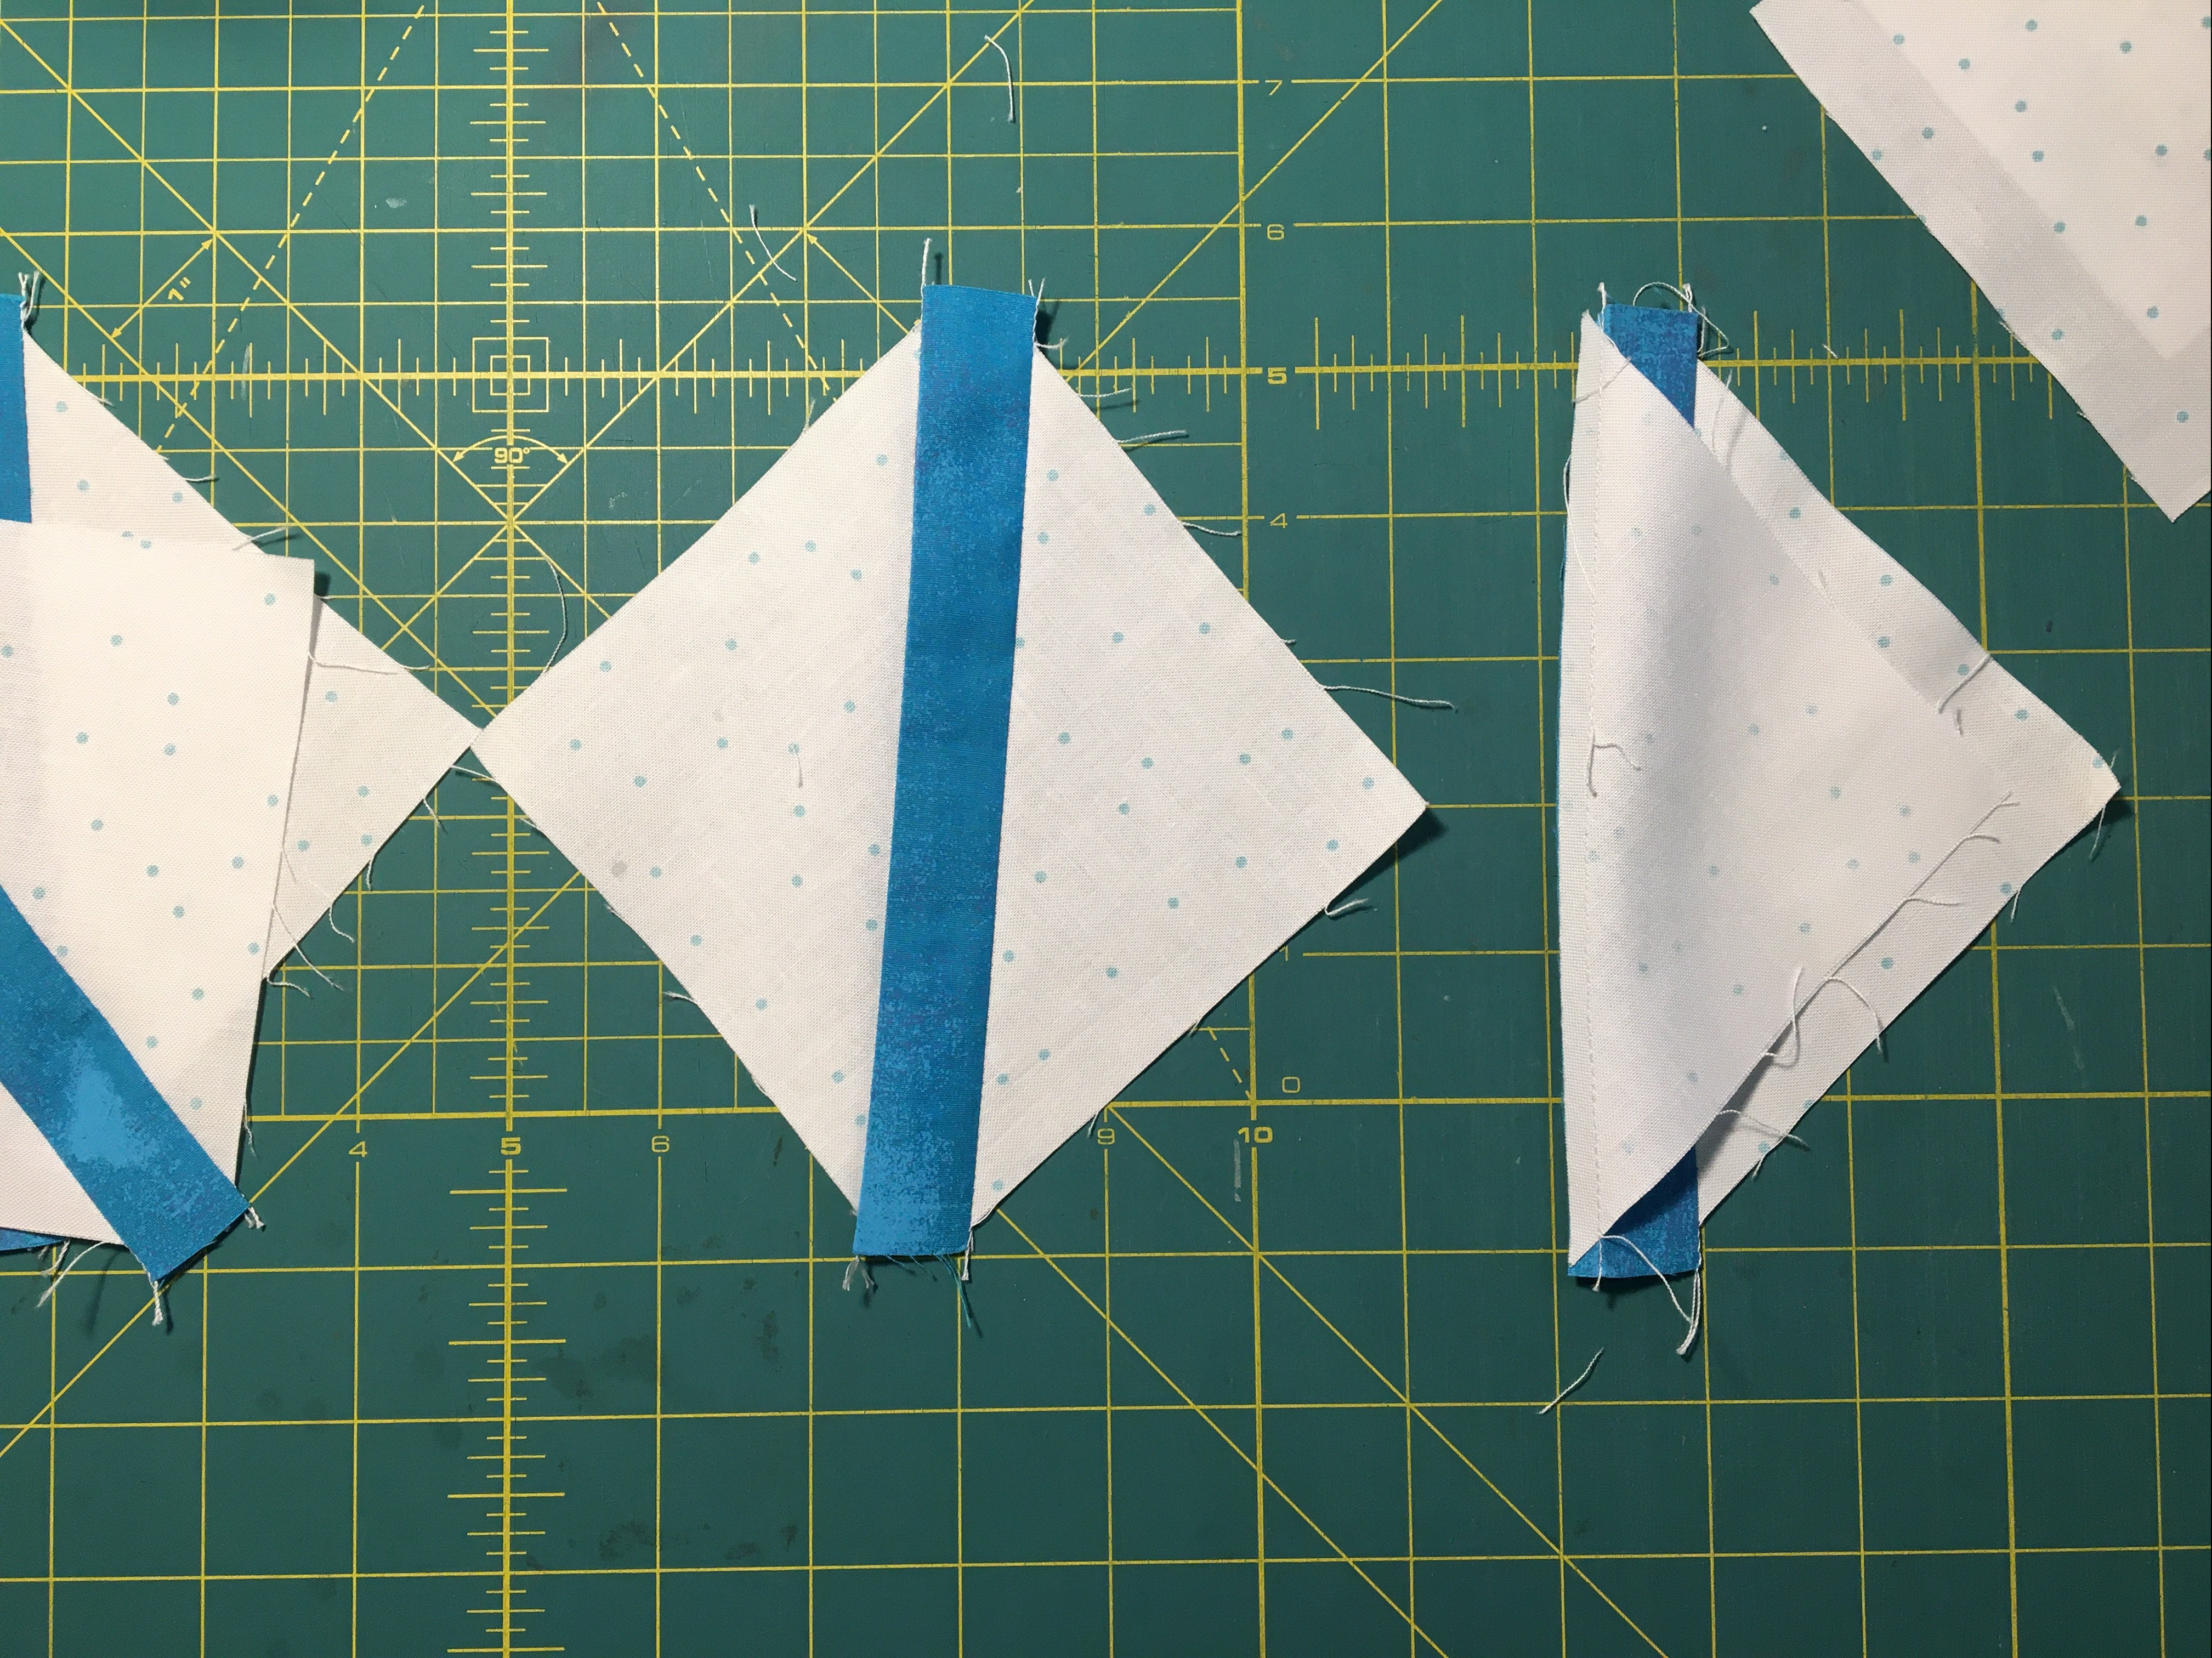
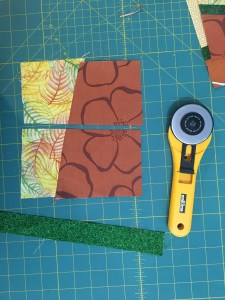
The next thing to do is add in the strips … or not! Plan to add a strip to at least two of the four blocks. Decide for yourself how many of the four you want to put strips into, and also decide how many blocks you want to slice twice, as shown below.

Not adding a strip? Just sew the two pieces for that block together. If you are adding a strip then go ahead and sew it to the edge of one of the pieces, and then sew the other piece on. If you happen to have cut a curve when slicing, just straighten it out when you are sewing the strip in.


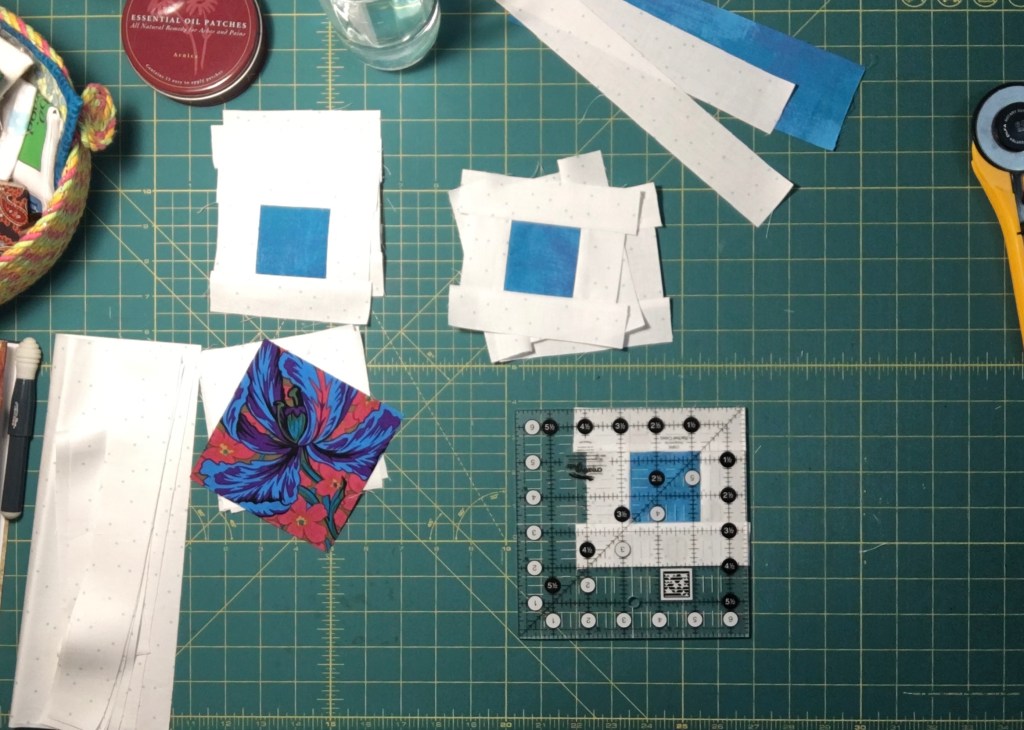
Then go ahead and trim the blocks you are finished with. I trimmed three of the four. Trim the blocks to 6 1/2″


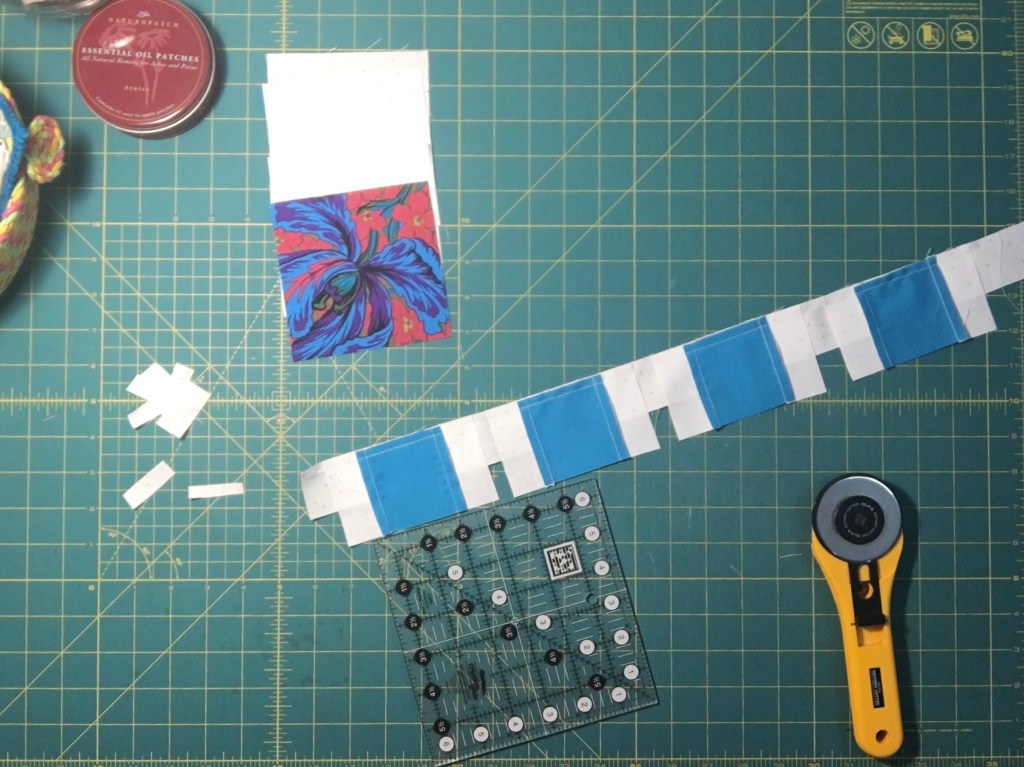
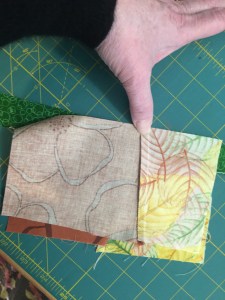
I am going to slice the fourth block again and then add a strip to it. When piecing this block you are going to want to try and line up the seams from the first slice. Just hold the seam down 1/4″ in with your thumb and flip the fabric over to see if it looks like it will line up. No worries if not perfect! No one will notice with so much going on in these blocks! Press your seams towards the strip, and then trim to 6 1/2″.


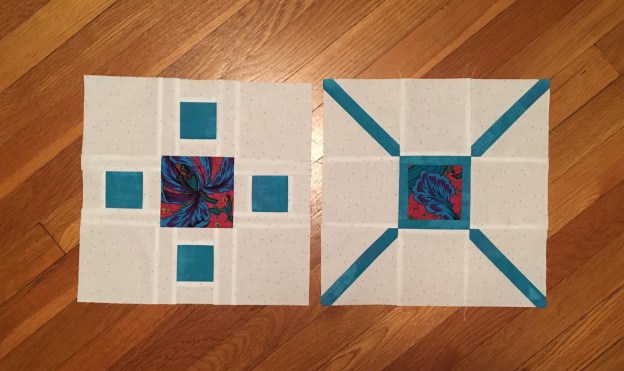
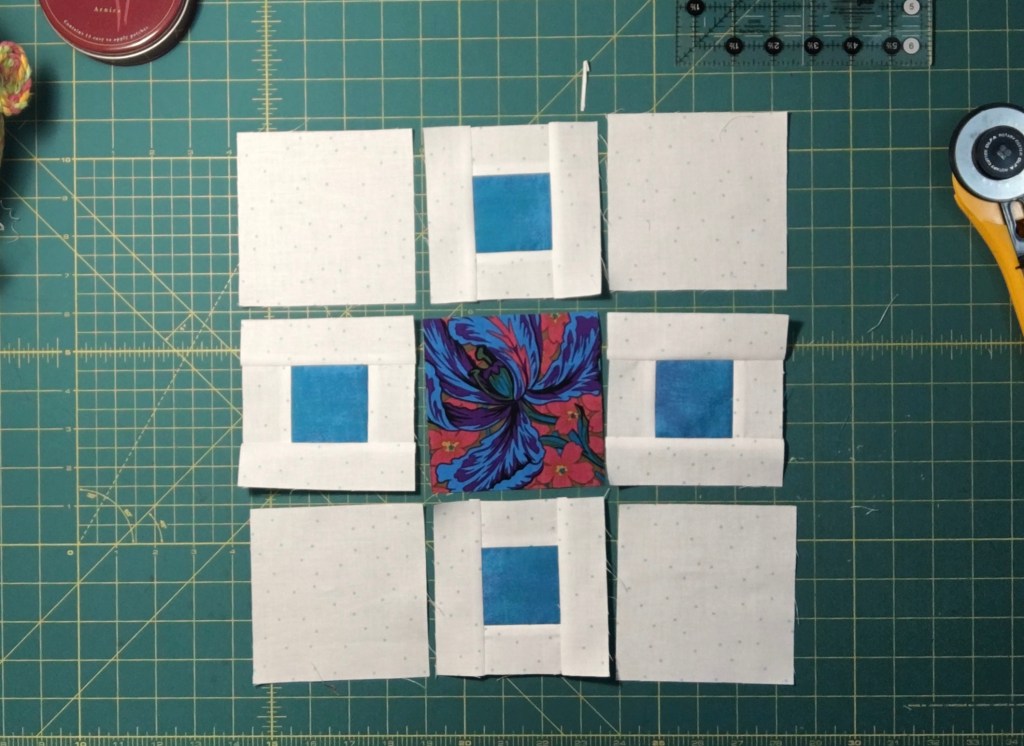
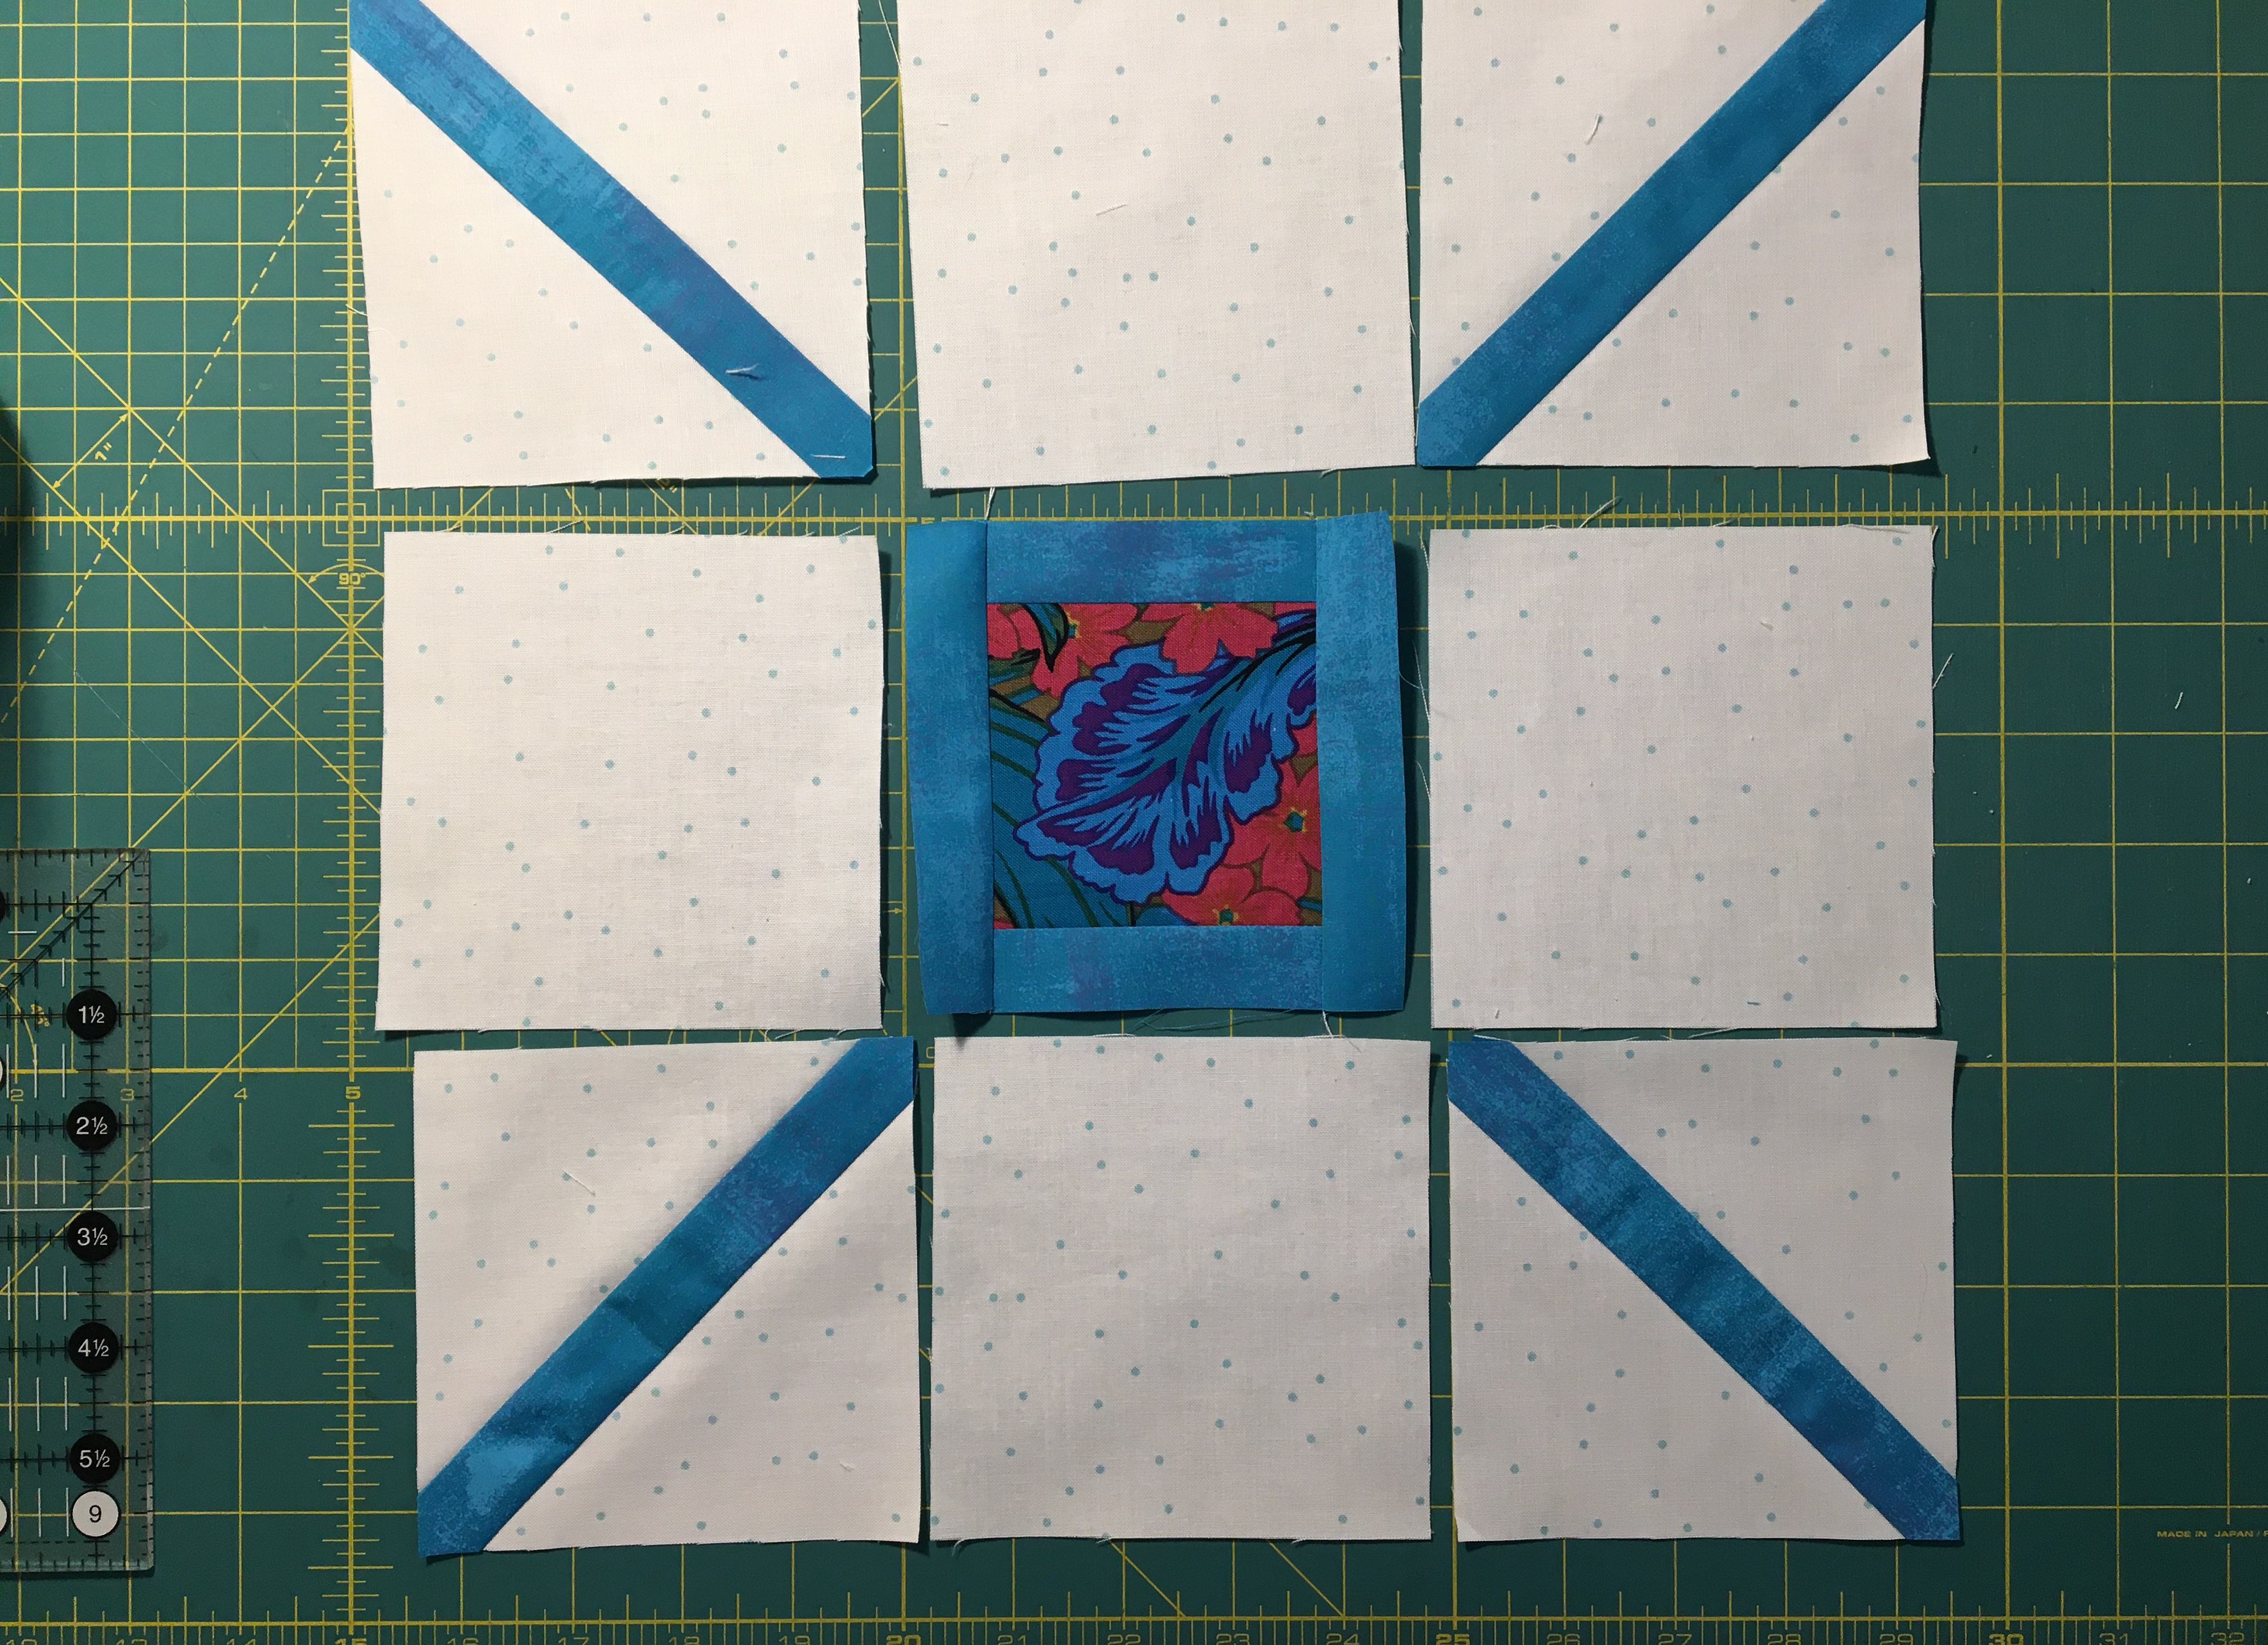
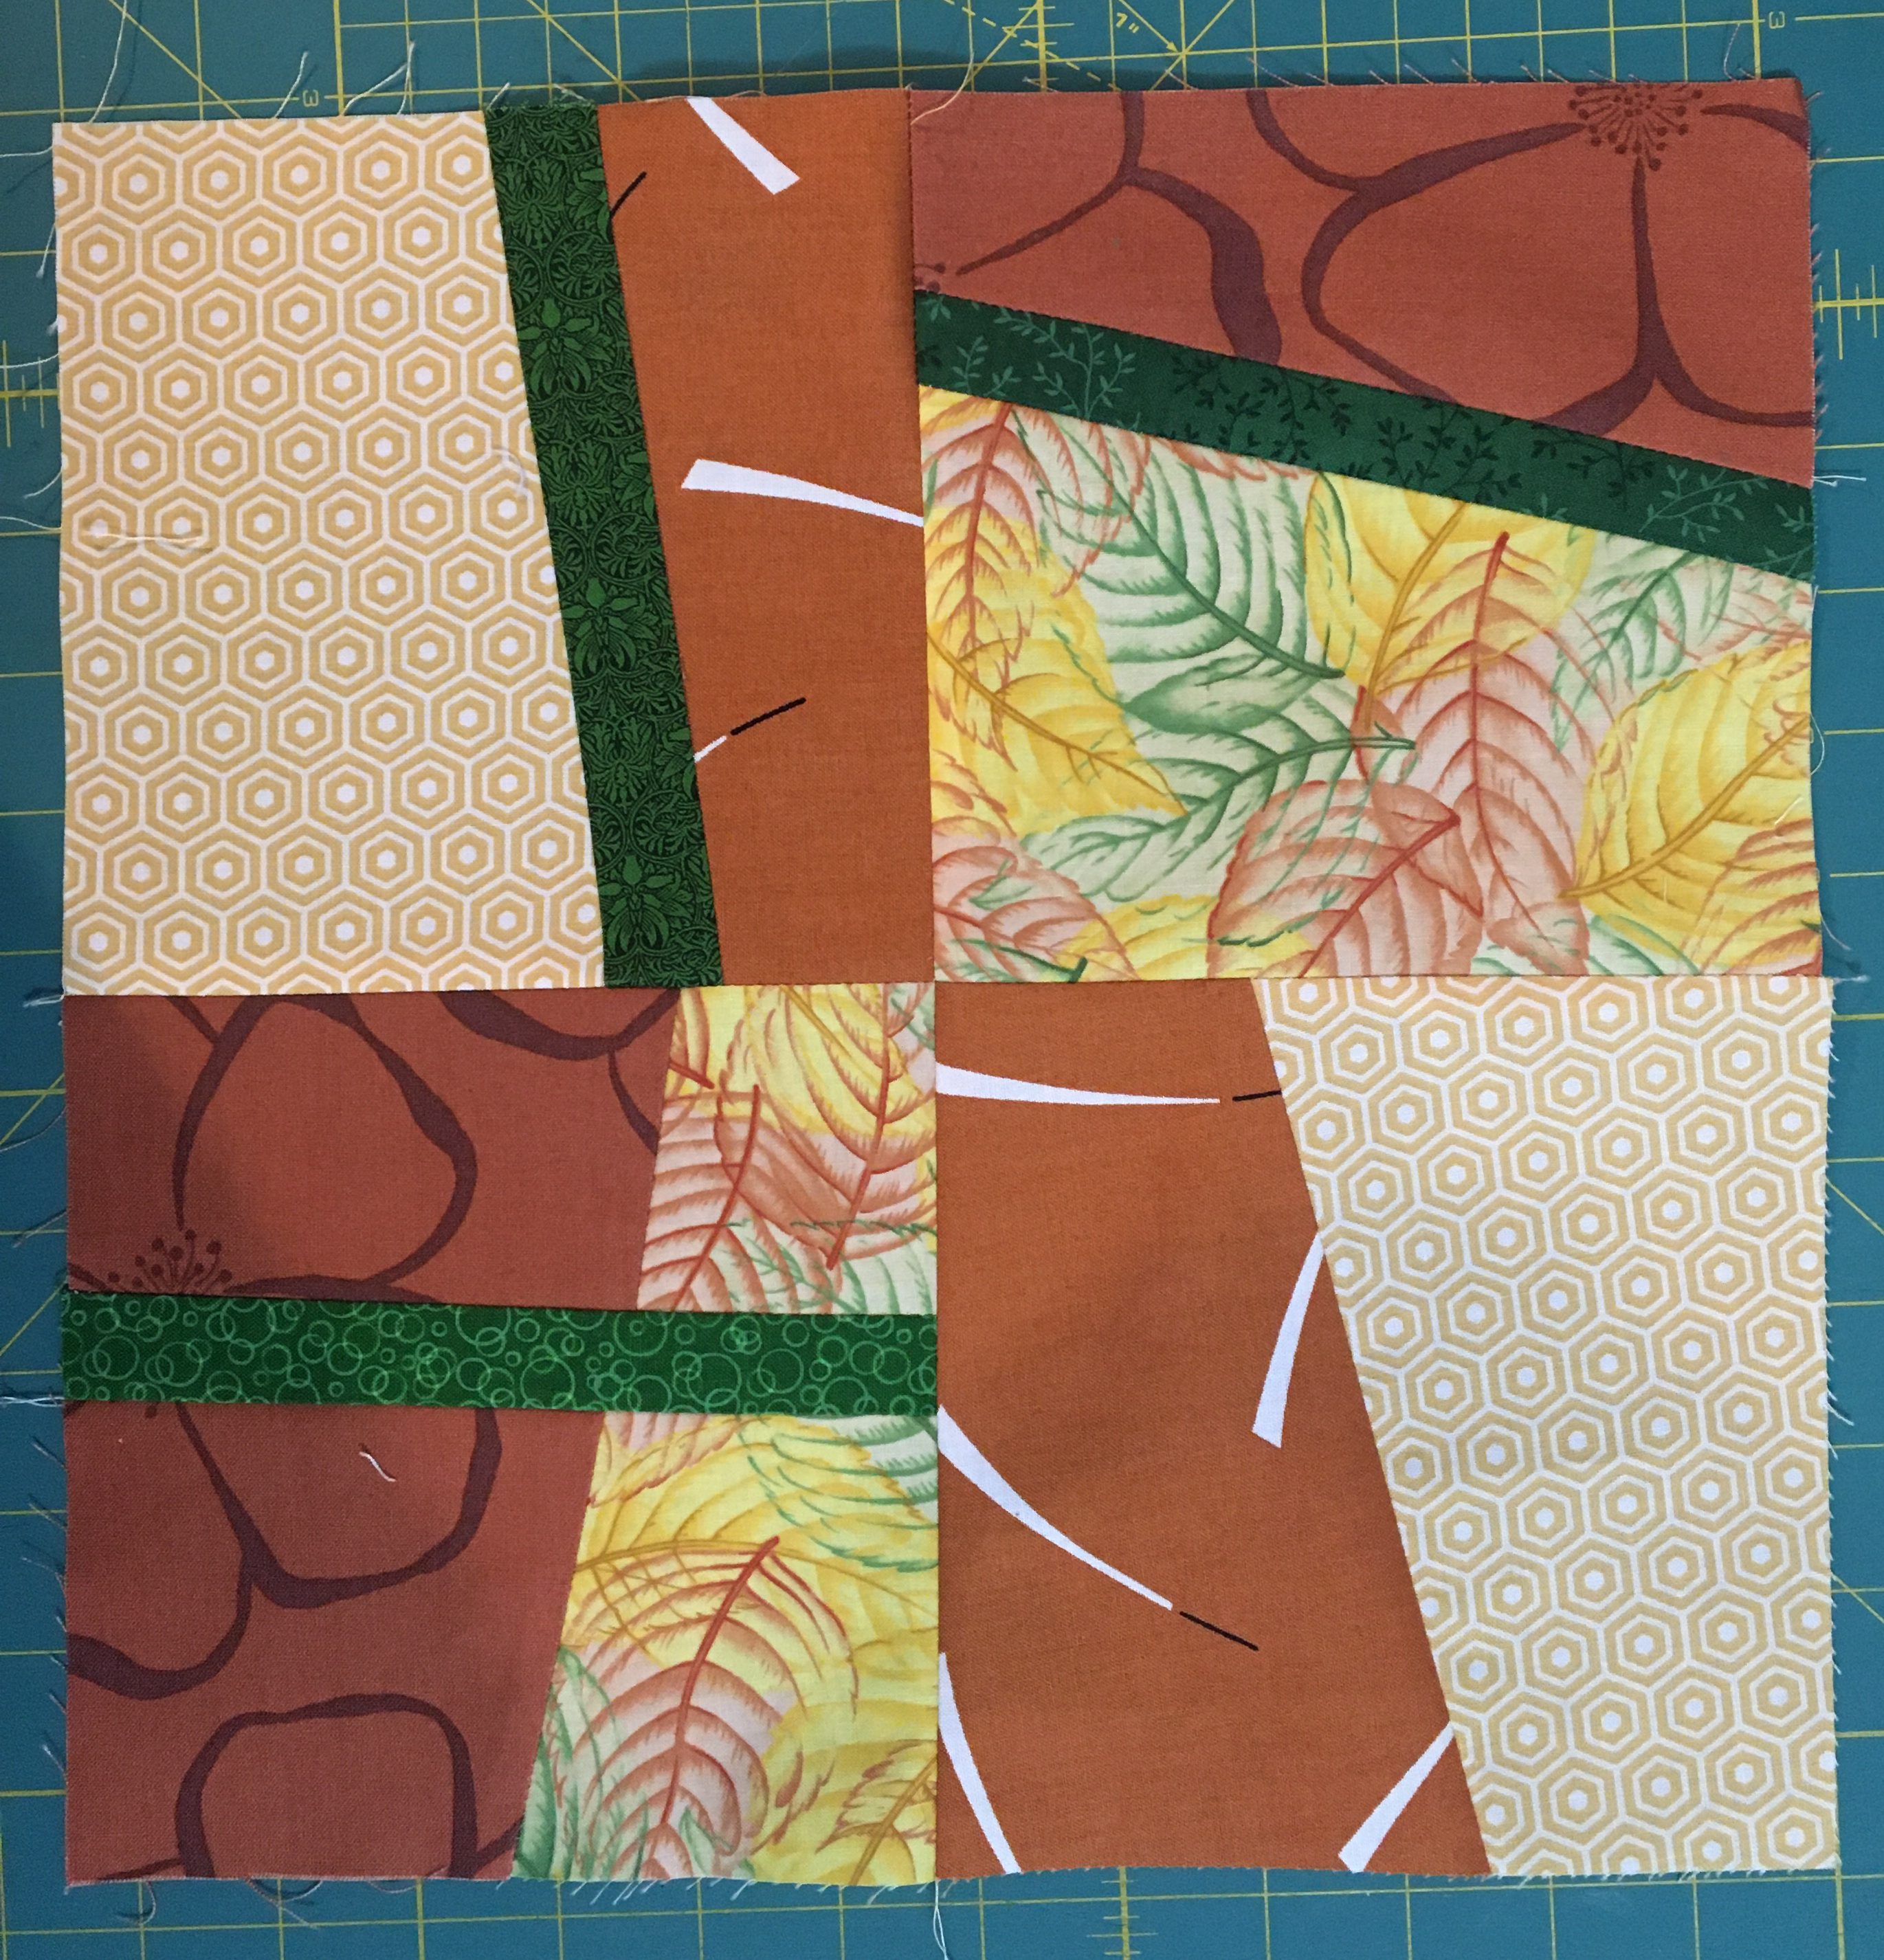
Once you have your four blocks completed play around with how you want to arrange them and then sew the four blocks together into a 12 1/2″ block. Here is my completed block:

I am asking everyone in our circle to make two 12 1/2″ blocks. One of the blocks should be predominantly cool colors (purple, blue, green), and the other should be warm (red, orange, yellow).

Here are the rest of the blocks I made to give you an idea of the different ways you can slice your blocks and arrange them.

Be Kind Bee Blocks

Hello to my Boston Modern Quilt Guild friends, and to anyone who comes across this blog post. I have put together a couple of block designs for our next Be Kind Bee quilt.

Both of these Blocks finish to 12″ square.

Here are instructions for the X Block:

Fabric and Cutting:  For these blocks please select a white or white on white fabric, a dark solid or dark blender fabric and a medium print fabric. 

White Fabric: You will need to cut 8 pieces that are 1 ½” x 2 ½” and cut 8 pieces that are 1 ½” x 4 ½” or use a strip piecing method as shown below and start with 1 1/2″ width of fabric strips. 

You will then need to cut 4 squares that are 4 ½” x 4 ½”

Dark Fabric: Cut 4 squares that are 2 ½” x 2 ½”

Print Fabric:  1 square 4 ½” x 4 ½”

First I cut out all of the pieces for the block. I just cut 1 1/2″ strips for the pieced 4 1/2″ squares and then sewed the blue squares to the strips before cutting. After sewing the strips on all four sides I trimmed these to 4 1/2″ square. I then arranged the squares into three rows as shown. Complete each row and then sew the three rows together.

Press the seams towards the white squares in the top and bottom rows and towards the print square in the center row.  When sewing the rows together press the seams towards the print square.


Here are instructions for the Twinkle Block:

Fabric and Cutting:  For these blocks please select a white or white on white fabric, a dark solid or dark blender fabric and a medium print fabric. 

White Fabric: You will need 1 Width of Fabric (WOF) strip that is 4 ½” wide. Cut 8 pieces that are 4 ½” x 4 ½” squares.  Cut FOUR of the squares in half on the diagonal.

Dark Fabric: 1 WOF strip that is 1 ¼” wide and 1 WOF strip that is 1” wide. From the 1 ¼” wide strip cut 4 pieces that are 1 ¼” x 6 ½”. Cut 4 pieces that are 1” x 3 ½” from the 1” wide strip.

Print Fabric:  1 square 3 ½” x 3 ½”

Piecing:

Sew a tringle to each 1 ¼” x 6 ½” piece as shown. Then sew another triangle to the other edge of the 1 ¼” x 6 ½” piece as shown.  Trim each of the four blocks to 4 ½” x 4 ½”.  Press the seams towards the dark fabric for these units.

Sew the two 1” x 3½” pieces to the top and bottom of the 3½” x 3½” print piece, then sew the two 1” x 4½” pieces to the sides.  Press the seams towards the dark fabric for these units.

Arrange these pieces and sew together into three rows as shown.  Press the seams towards the solid white squares in the top and bottom rows and towards the solid square in the center row.  When sewing the rows together press the towards the print square.

The thought is that we will create a quilt with this that will end up looking something like this:

Let’s see what we come up with!

Do Good Block September 2019

Size: 10” Finished

Please make at least two blocks.

Fabric:

Four 5” squares – Dark Bright Colors – Prints and/or Solids

Four 5” x 1 ½” pieces – Light Pastel Colors – Prints and/or Solids

One 1 ½” x 1 ½” square – Dark Bright – Print and/or Solid

Arrange pieces as shown:

Sew 3 rows:

Sew rows together:

Finished Blocks: