Category Archives: Class

Progression Panel Quilt

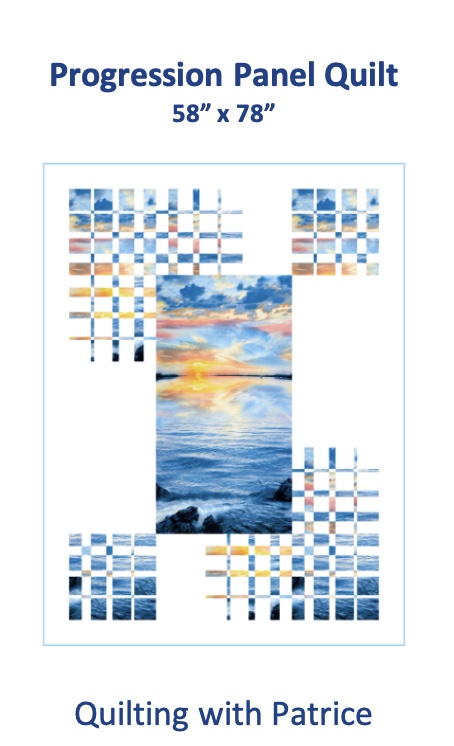
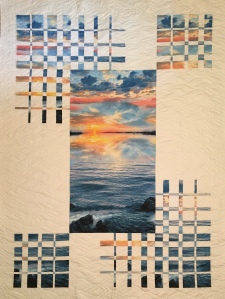
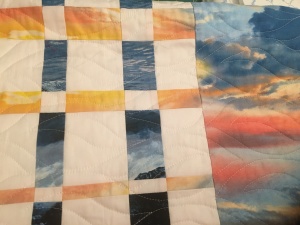
Here is another project that I recently finished.  This quilt uses 3 panels. Two of the panels are cut into strips with background fabric using the Ricky Tims Convergence block technique.

I will eventually be teaching the process in a workshop at Quilters Common in Wakefield, but for now the pattern is available at the shop, or you can purchase a digital version of the pattern in my etsy shop.


I quilted this with a pantograph.  The one I used is called flames, but I loaded the quilt on my longarm frame so that the panto actually looks like clouds/waves to complement the panel.


Improv Placemats

I have been playing with improv blocks and arranging them together to make placemats. This is going to be a workshop at Quilters Common in Wakefield, MA as soon as we can be comfortable and safe in the cozy classroom area there. It is a fun way to introduce folks to improv if they haven’t tried it yet.


Improv with Rules!

This is a block plan for my do.Good Stitches Hope Circle group. Look for us on Instagram, #dogoodstitcheshopecircle to see what we are up to.

Each block will be a 12″ block (12 1/2″ with seam allowances). It will consist of four 6″ (6 1/2″ with seam allowances) improv blocks.

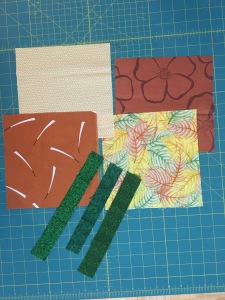
Start out with four 8″ squares of fabric, two light and two dark. Use fabrics that will all work together. Also have two, three or four 8″ long strips of contrasting fabrics that are between 1″ to 1 1/2″ wide.

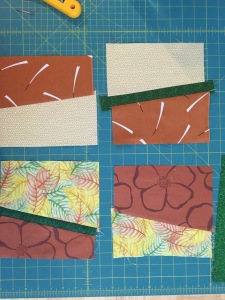
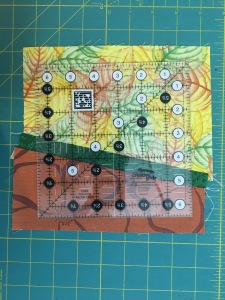
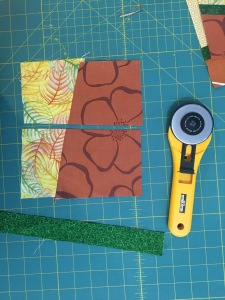
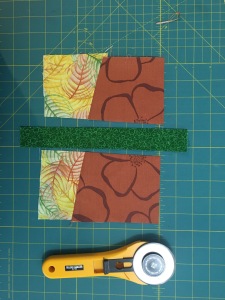
Layer each light fabric with a dark fabric, both sides UP! Then slice through each set, being careful not to slice too close to the edges. Next swap the fabric pieces in each pair to set up four blocks.

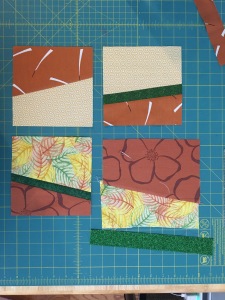
The next thing to do is add in the strips … or not! Plan to add a strip to at least two of the four blocks. Decide for yourself how many of the four you want to put strips into, and also decide how many blocks you want to slice twice, as shown below.

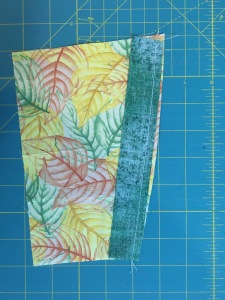
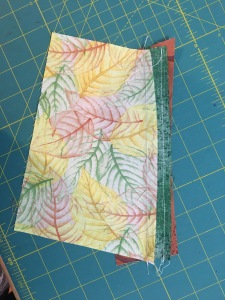
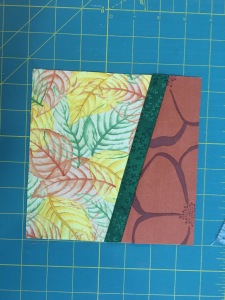
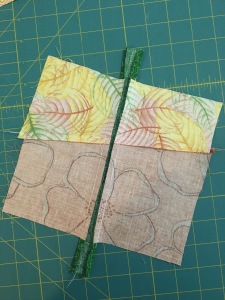
Not adding a strip? Just sew the two pieces for that block together. If you are adding a strip then go ahead and sew it to the edge of one of the pieces, and then sew the other piece on. If you happen to have cut a curve when slicing, just straighten it out when you are sewing the strip in.


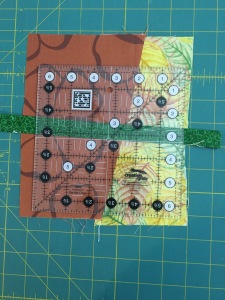
Then go ahead and trim the blocks you are finished with. I trimmed three of the four. Trim the blocks to 6 1/2″


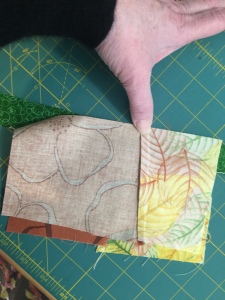
I am going to slice the fourth block again and then add a strip to it. When piecing this block you are going to want to try and line up the seams from the first slice. Just hold the seam down 1/4″ in with your thumb and flip the fabric over to see if it looks like it will line up. No worries if not perfect! No one will notice with so much going on in these blocks! Press your seams towards the strip, and then trim to 6 1/2″.


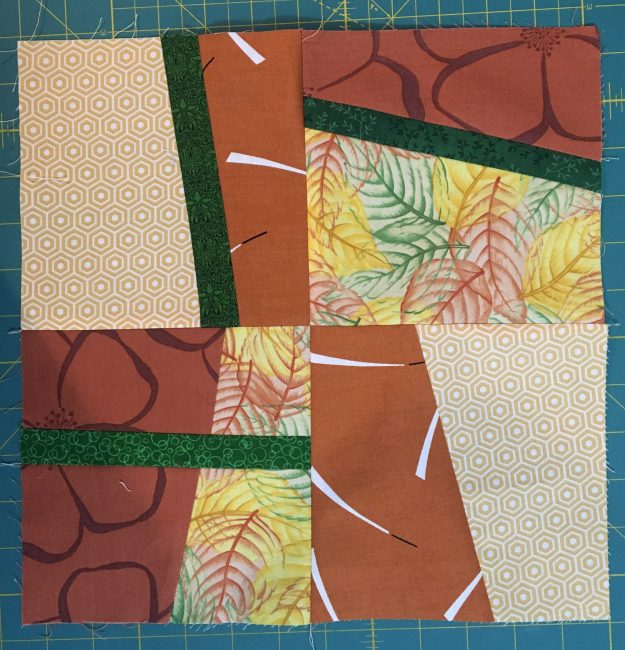
Once you have your four blocks completed play around with how you want to arrange them and then sew the four blocks together into a 12 1/2″ block. Here is my completed block:

I am asking everyone in our circle to make two 12 1/2″ blocks. One of the blocks should be predominantly cool colors (purple, blue, green), and the other should be warm (red, orange, yellow).

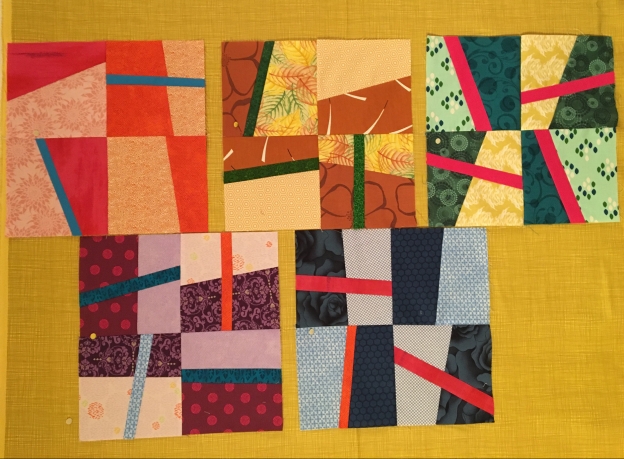
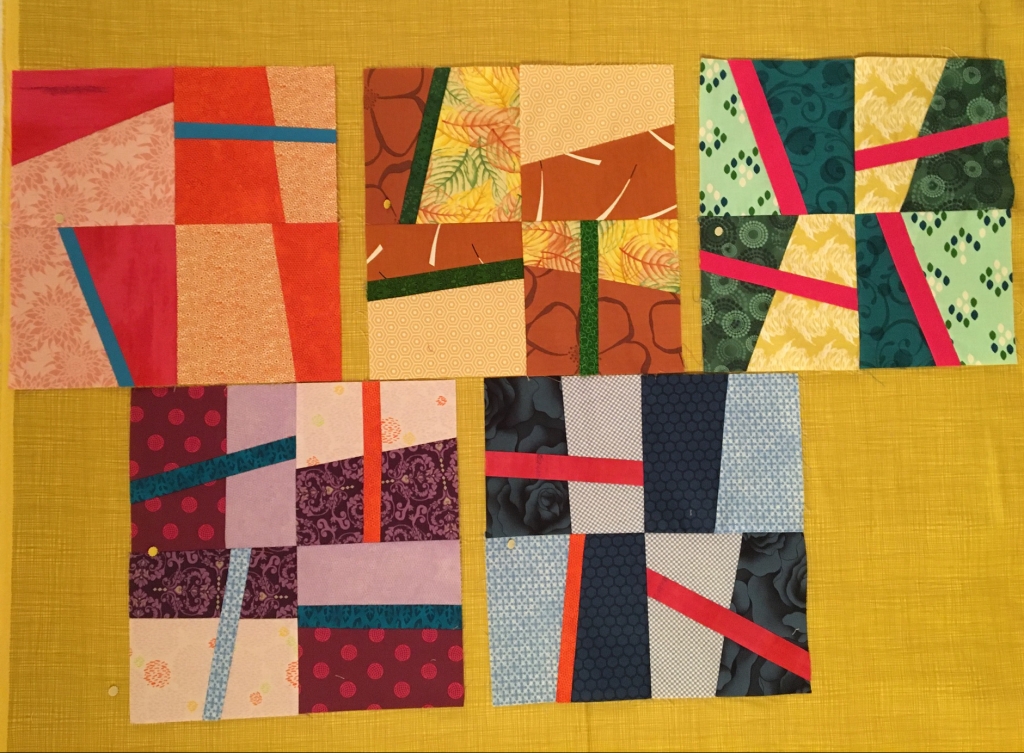
Here are the rest of the blocks I made to give you an idea of the different ways you can slice your blocks and arrange them.

Christmas Kaleidoscope Quilt Stack and Wack Method

This is a tutorial for Jason Yenter’s Winter Twist One-Fabric Kaleidoscope Quilt Pattern.  The pattern is available from and uses fabric from In the Beginning.

Cutting Kaleidoscope Fabric:

Cut 6 Repeats of the Fabric.  Each repeat is about 24″ long.

Cut each repeat of the fabric into 4 border strip pieces.  Cut 2″ from the edge of each brown cable.  You will have 24 border pieces that are approximately 24″ x 9 1/2″.

Group these into 3 sets, each with 8 layers of fabric.  Line up the layers in each set by putting a straight pin straight through the same place in the fabric design on each layer.  Run a second pin through all layers next to the first pin to hold the layers in place.  Repeat this process 3 or four more times along the length of the strip.

Trim the strip sets to 8 1/2″ wide.  This is easiest to do with an 8 1/2″ wide ruler.  From each strip set cut at least 3 sets of triangles using a 45 degree triangle ruler with a 8 1/2″ cutting line on the ruler.  Make sure the ruler has flat top at the triangle point.

Make sure to cut 4 sets that have the cable at the base of the triangles and 5 that have the cable at the point.  Cut selectively to get different areas of and colors from the fabric design.  You should be able to get at least 4 sets of triangles from each set so you will have enough fabric for at least 12 blocks.  This will let you pick and choose which ones you want to use and allows for errors in cutting, as well.

Piecing:

Take 4 of the sets of the triangles with the cable at the point of the triangle and separate them into sets of 5 for the side blocks and sets of 3 for the corners.

Refer to the pattern diagrams for piecing the blocks.

For each of the 5 center blocks sew four pairs of triangle pieces together.  Then sew two sets together, and then the two halves together.  I prefer to press all my seams open for these blocks.

You will have four blocks with the cable on the bottom, and one with the cable at the point. This one is the center block.

For the Side Blocks sew two pairs together.  Then sew the two halves together.  To finish sew a fifth triangle to one side of the block.  I press seams open except for the last triangle.  That seam is pressed towards that 5th triangle.

For each of the corner blocks sew a pair of triangles together and then sew the third triangle to one side of the block.  Press the seams open.

Cutting and Piecing the Block Corners:

To make it easier to piece the corners I cut oversized pieces and then trim the block afterwards.

Cut three 6″ strips.  Then cut 20 6″ squares from these strips.  Cut each square in half on the diagonal.  You will have 40 triangles for the block corners.

Refer to the pattern diagrams for piecing these corner triangle pieces.

After sewing these corner triangles you will need to trim the blocks.  Leave a 1/4″ seam when trimming.  A 16 1/2″ square ruler makes this much easier to do.

You can trim the side and corner blocks before you sew them into the quilt top.  Be careful!  Make sure to leave a 1/4″ seam.  I used a 24″ long ruler to make this cut.  For the side pieces: Place the block with outside triangles to your right. Line the bottom edge of the  block up on the 45 degree line on your cutting board or on your ruler and cut 1/4″ past the center and through the triangles on the ouside.  Pictures work best ….

Corner Blocks:  line the longest straight edge up on the 45 degree line on your cutting mat.  Line your 16 1/2″ Square ruler up so that it is 1/4″ away from the center of the outside triangles and cut.

Once all the blocks are prepared arrange them and sew them in diagonal rows as explained in the pattern.

When matching the seams as you sew the blocks together you can fold back the seam to see if you are lining things up correctly.  Pin in place when you have the seams matched up.

If you cut the corner blocks before piecing the rows please be careful to piece the ends so that you leave a seam allowance for the border.

Borders:  cut the remaining yardage into four 8 1/2″ wide border pieces that are each the length of the remaining fabric.  Start by cutting 1/4″ away from the cable design for each of the four pieces.  Then trim each to 8 1/2″ wide.  The best way to manage the fabric is to roll it up and unroll as you cut along the length of the fabric.  Be careful!

Follow the pattern instructions for sewing on the borders.

I pressed the border seams away from the border, but you will have to press the corners towards the border when cutting the mitered corners, then press them back towards the blocks after sewing the corners together.  Here is a photo showing how to trim the ends of the borders.

Please note that becuase of the larger size of these blocks they are not going to be very flat.  The triangles are on the bias and stretched no matter how much best press I used!  My sewing machine cooperated and I was able to ease the fullness into the seams when piecing, but you can see puckering at the seams.

Let’s see how this looks after the top is quilted!

Barbados Bag

I am so glad I found time to take a class at Quilters Common yesterday.  Thank you Pat for doing such a great job of guiding us through the process of making the Pink Sand Beach Designs Barbados Bag.  We all had great success getting our bags put together during the class.  The pattern has lots of pictures and step by step instructions, but it always helps to get confirmation that you are doing the right thing when there are so many details.  And, I discovered how to put tabs on the ends of the zippers, which makes for a much more finished look. Can’t believe how easy it is to do!

If you get this pattern the only suggestion I have is to prepare the tabs for attaching the D rings to the bag separately rather than cutting them from the strap, and don’t use the fusible fleece for these tabs.  Use the durabond on both sides.  This makes it easier to fold the ends over.  Also, I used hardware to make my bag adjustable for wearing over the shoulder or cross body.

It’s a well written pattern and makes a versatile little bag with just the right amount of structure to it.  I am already thinking of other fabric choices for a second one.

Boston Modern Quilt Guild Retreat

I spent the weekend at the Franciscan Guest House in Kennebunk, ME at a retreat with the Boston Modern Quilt Guild.  Quite the quilting adventure.  The accommodations were a bit rustic, but that just added to the feeling of being away at Quilt Camp!  The Gymnasium we were working in was the best with lots of sunshine streaming in and plenty of goodies to munch on.

P1030568

I decided to use my Denyse Schmidt Chicopee 2 1/2 inch strips.  I hope Kate Spain does not mind that I used her Good Fortune pattern!  The pattern is quite intricate and one should not participate in Happy Hour when trying to puzzle through which sashing goes with which type of block … unless one has a seam ripper!

arrangecolums chicopee

I was amazed at the productivity of everyone.  I was happy to get my one project to quilt top stage, but people were going from fabric to quilt or going from project to project.  And, there was also lots of great improvisational piecing taking place.

I also have to thank Janis for inviting me on her road trip to Mardens.  My fabric haul was modest at 25.75 yards with an average cost of $3.30 a yard!  What an amazing place with lots of ultra modern fabric for no more than $4.50 a yard and then there were those bins with fabric for only $1.50 a yard … good designer fabric!  Woot Woot!!

mardens

Kerryn Bag Class

Yesterday I taught the Kerryn Tote Bag class at Quilter’s Common in Wakefield, MA.

I had two students and Colette also joined us to work on a shop sample.

Joyce and Nancy finished their bags, and Colette almost finished hers.  I have to thank Colette for a couple of great ideas …

1.  Add fusible interfacing to one of the lining pocket pieces to add more stability to the inside pocket section.

2.  To shape the bottom of the bag:  After sewing the pocket sectioning seams from “pocket top” to “pocket top”, sew two seams from one side to the other of the 36″ x 21″ bag and lining pieces.  The seams should be 3″ apart in the center of the bag and lining pieces.

It was great fun spending the day sewing with the ladies at the shop.  I may be teaching the class again sometime in the future and will post when that is scheduled.  In the mean time the pattern is for sale as a downloadable file in my Craftsy Shop.


Dear Jane August Blocks

August Jane Blocks

Good Grief.  It’s nearly the end of August and I still haven’t shared my Jane Blocks.

I enjoyed putting these blocks together … not too much applique this month.  Just the handle of the basket, which I did by machine. Not sure if that was a good idea or not, but it looks okay.  I used steam a seam and ironed the handle in place and then machine sewed along the edges.


Modern Jane

Despite all of the projects I am working on, I could not resist signing up for the Jane Stickle quilt group at Quilter’s Common.  I started a Jane quilt a few years ago using reproduction fabrics but I only got four blocks done before I gave up on the idea.

img_3169

This time around I am feeling more confidant with a few more years of piecing experience and a sewing machine (Bernina 830) that makes it a lot easier to be precise … which is absolutely necessary with these small 4 1/2″ blocks .  I have decided to go with modern fabrics this time and I am using a pale gray fabric for the background.

I have a collection of Kaffe Fassett fabrics and also just purchased three sets of 6 1/2″ squares of Kaffe and Philip Jacobs fabrics.  I think the 6 1/2″ squares will be perfect for the Dear Jane blocks … 5″ squares would be too small for the blocks that require 2 or more 2 3/4″ square pieces from the same fabric.

I am already ahead of my first attempt attempt at Dear Jane.  I have finished four squares and a triangle.  I make no promises about keeping up with the pace and I don’t plan to make this a Dear Jane Blog … but, I will post updates as I go along!

Landscape Applique Class

I have been wanting to do a little art quilt of my house for awhile now.  I was thinking in terms of pieces cut and sewn together, but when Quilters Common was offering a class by Sue Colozzi featuring landscaping with raw edge applique I decided to give that a try.  The class project was a house … a standard center entrance colonial.  My house is a rather unique L shaped cape with a garage underneath.  Very 50’s!

Not to be deterred I decided to go ahead, with encouragement from Sue, and used a picture of my house for the project.  But, I needed to enlarge the picture and rearrange things a bit.  I did not want the tree in front of the house!  I started with an acrylic painting that I had done, enlarged that and then referred to a photo taken in the summer.  I had to add the squirrel, but Bob wanted me to put a car in the driveway …. of course he did!  Maybe next time.

I am happy with the result, which I think is nicer than the painting.  I work better with fabric!

Of course, I still need to take the time to finish this quilt.  The edges of each piece need to be sewn down, borders added and the whole thing needs to be quilted.  My plan is to use my embroidering method, which will mean taking the time to scan the quilt and “program” the stitches and then let my embroidery machine finish it for me!

If you decide to try this here is the method I used for fusing the shapes to the background.  I first drew the house, then I scanned the drawing and printed a  mirror image of it.  I then took a sheet of Steam a Seam 2, which is a doubled sided fusible web, and traced the shapes from the mirror image, grouping shapes by color.  Then I cut out each group of pieces and fused it to the back of the appropriate fabric.  Then I cut out the individual pieces and used the original drawing for a guide to place the pieces on the background fabric.

drawings