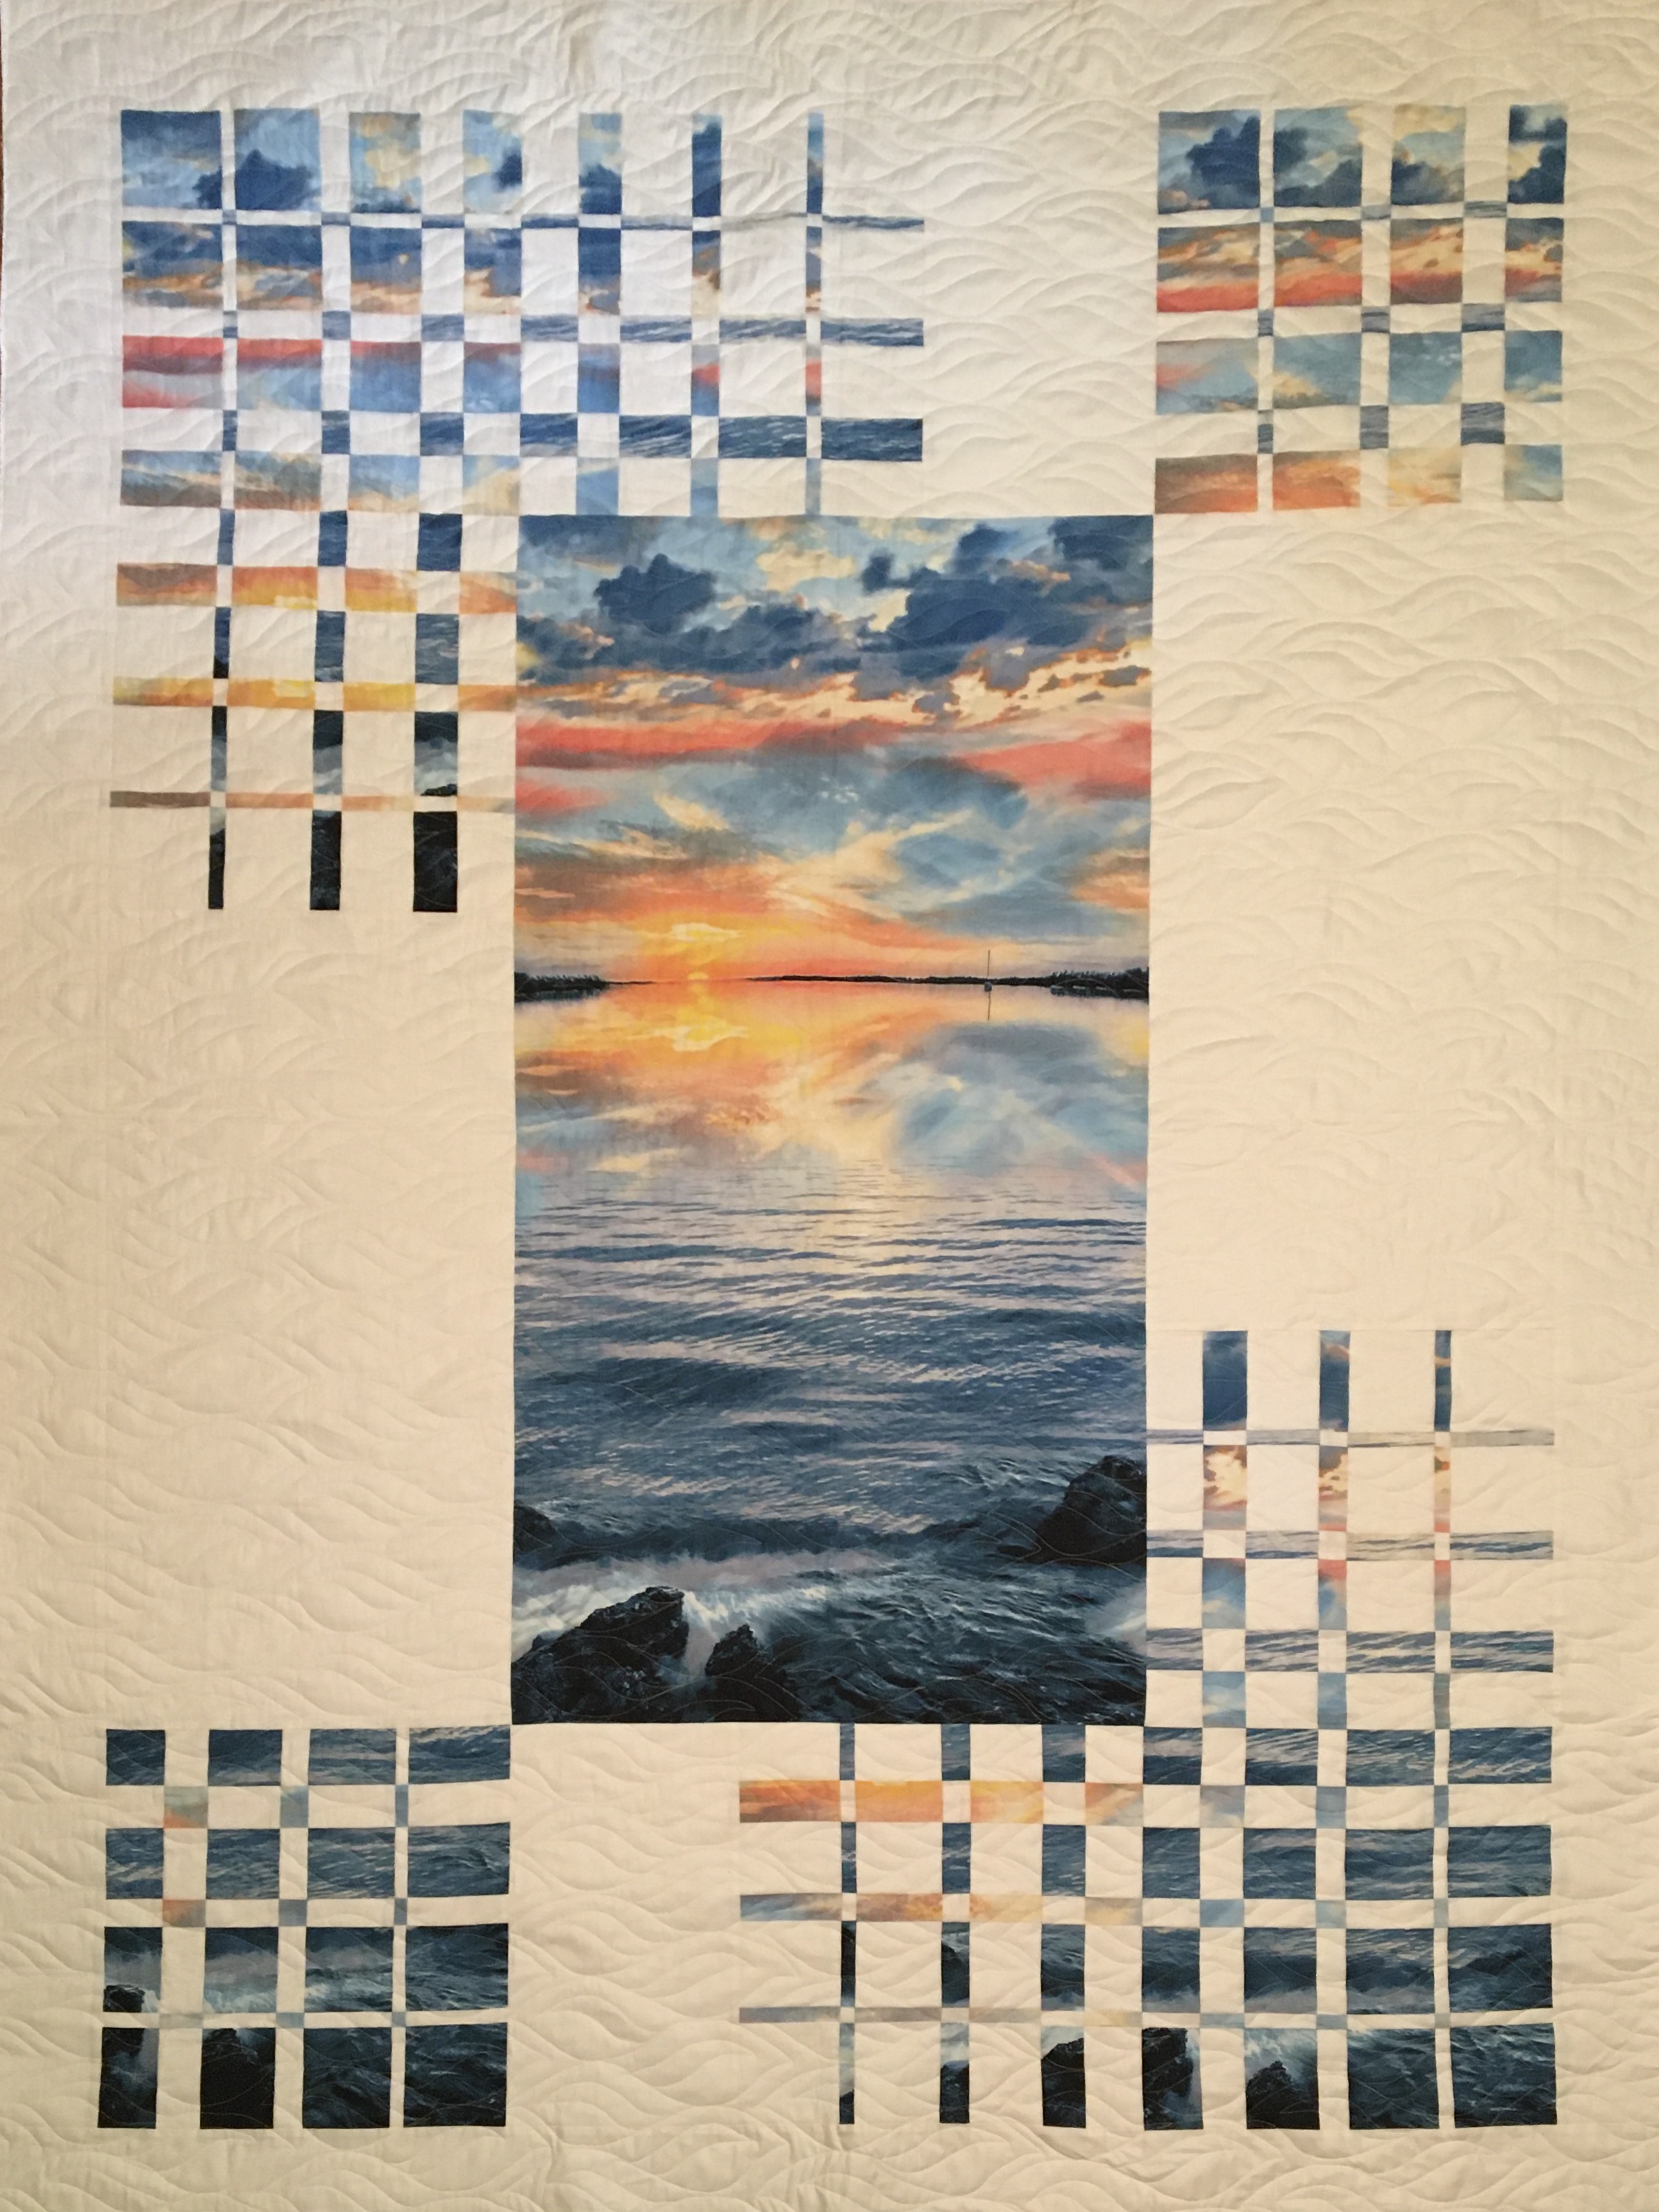
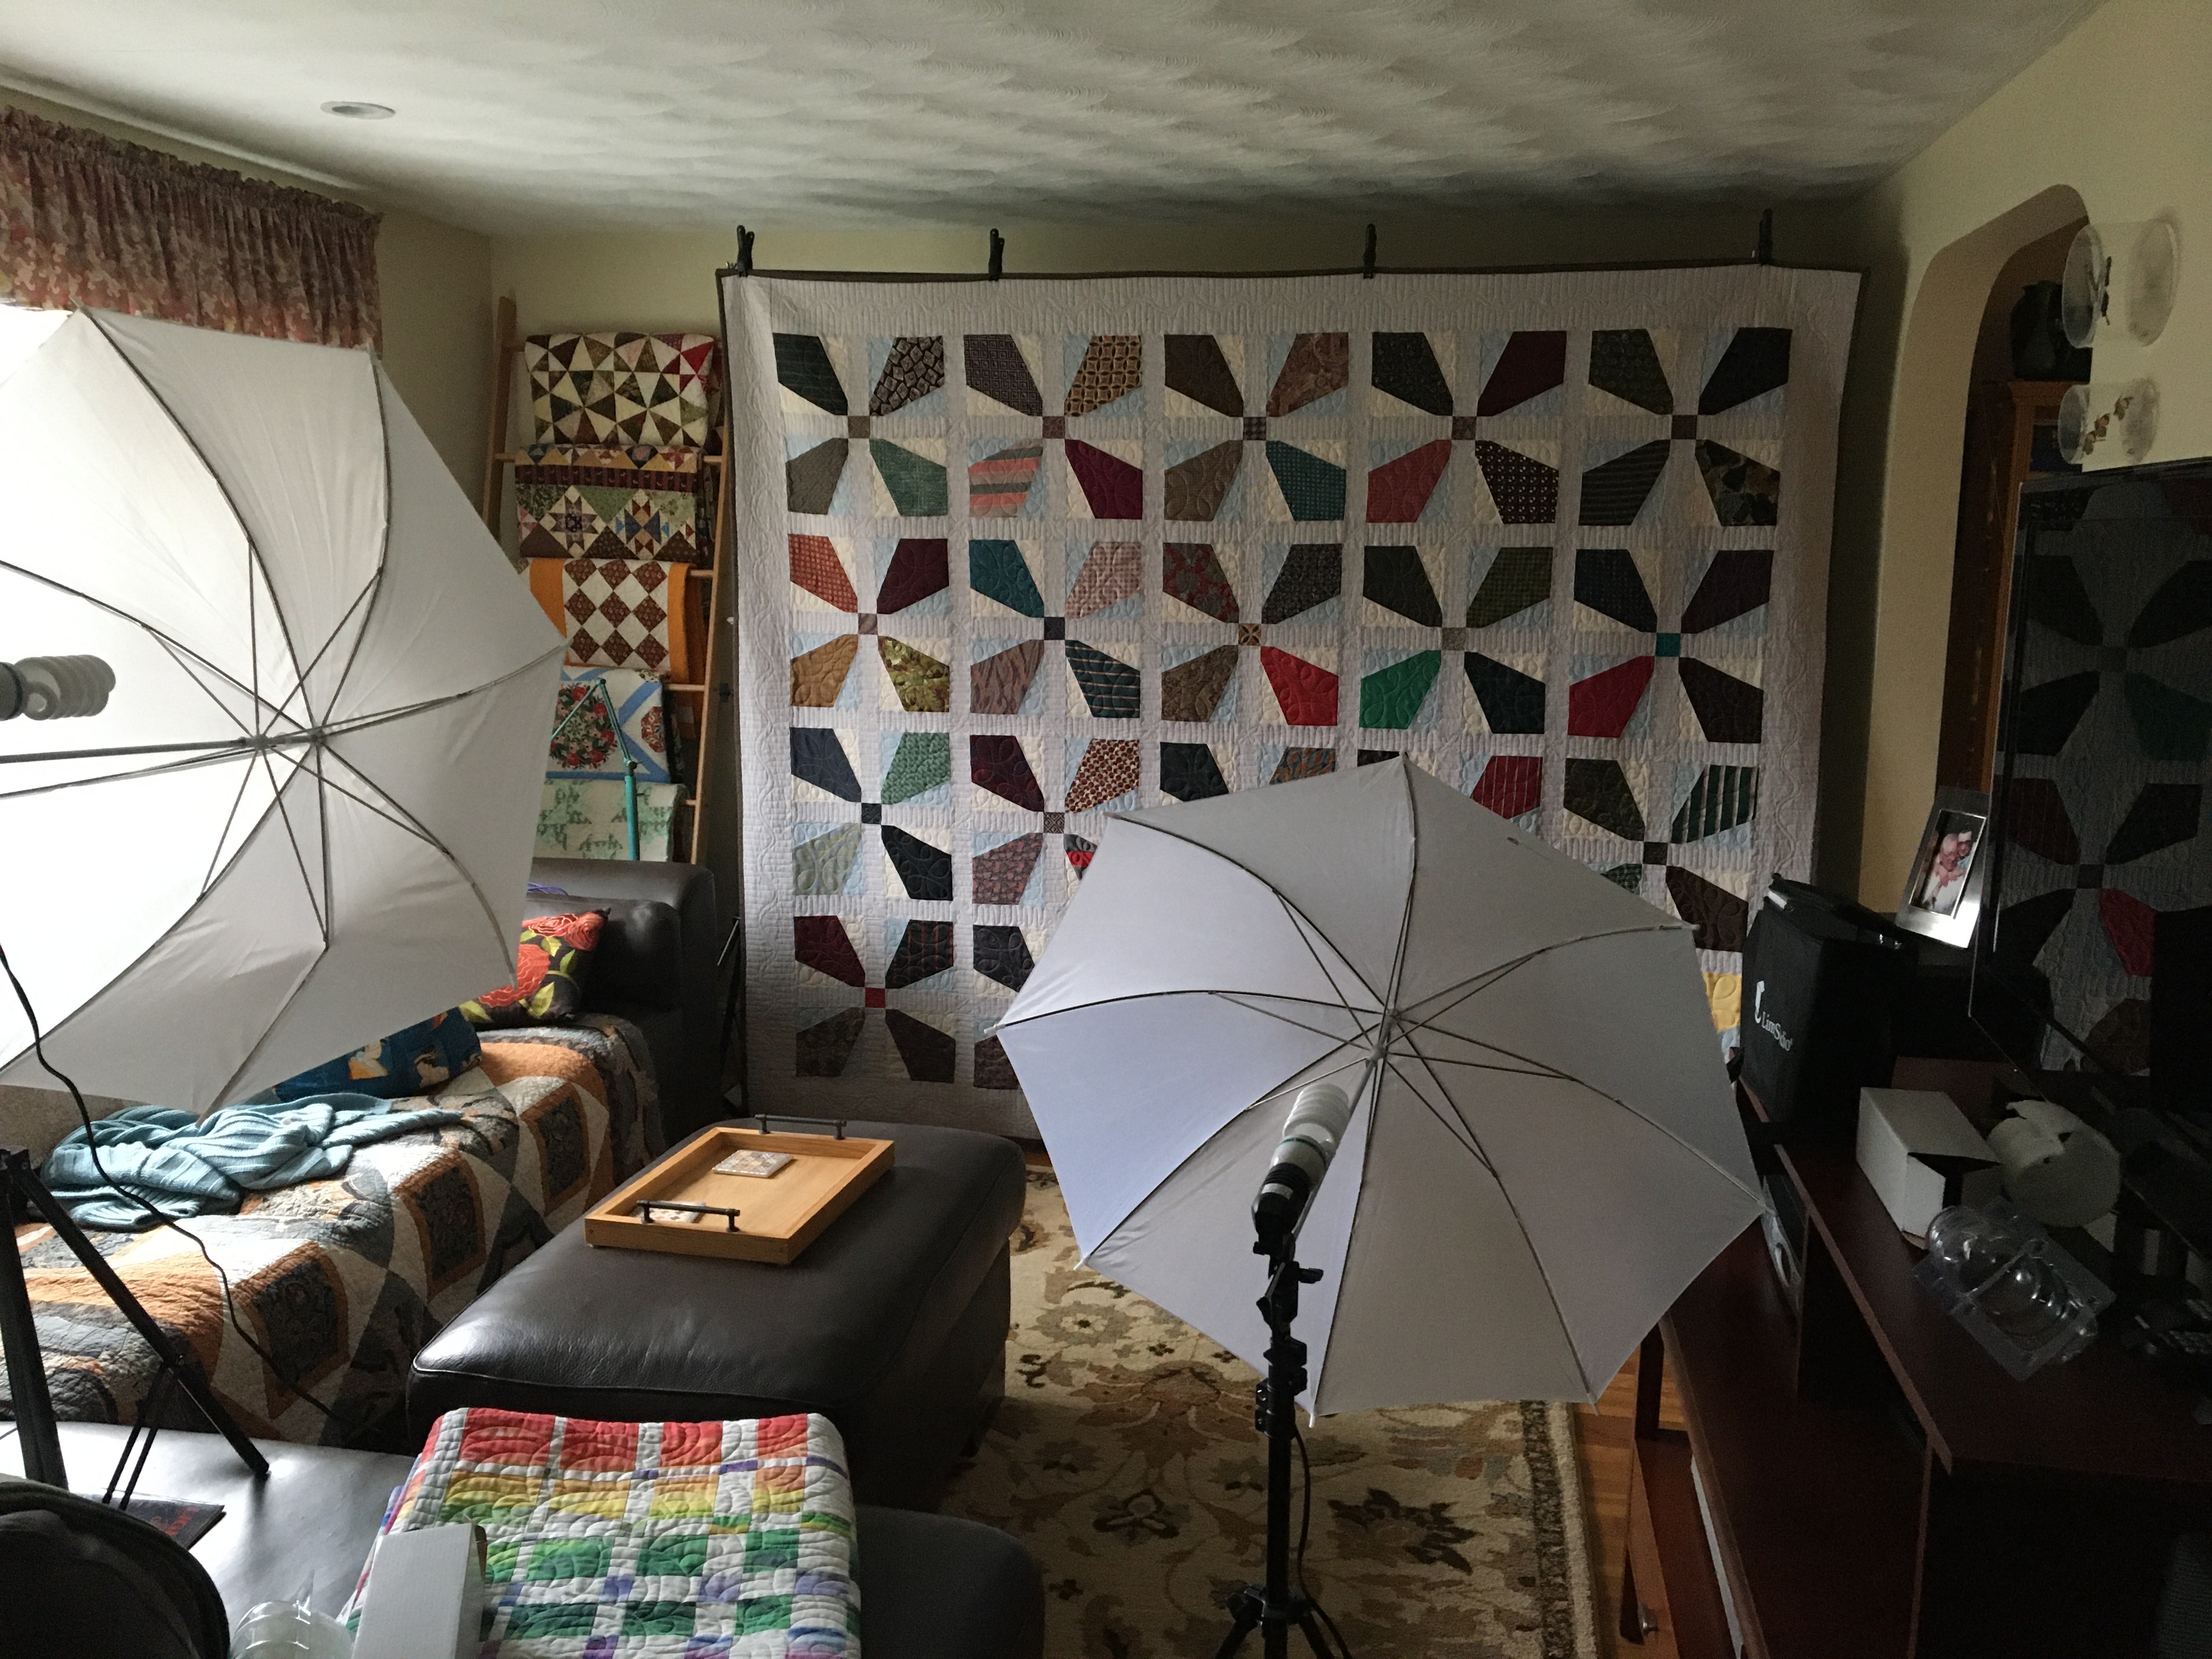
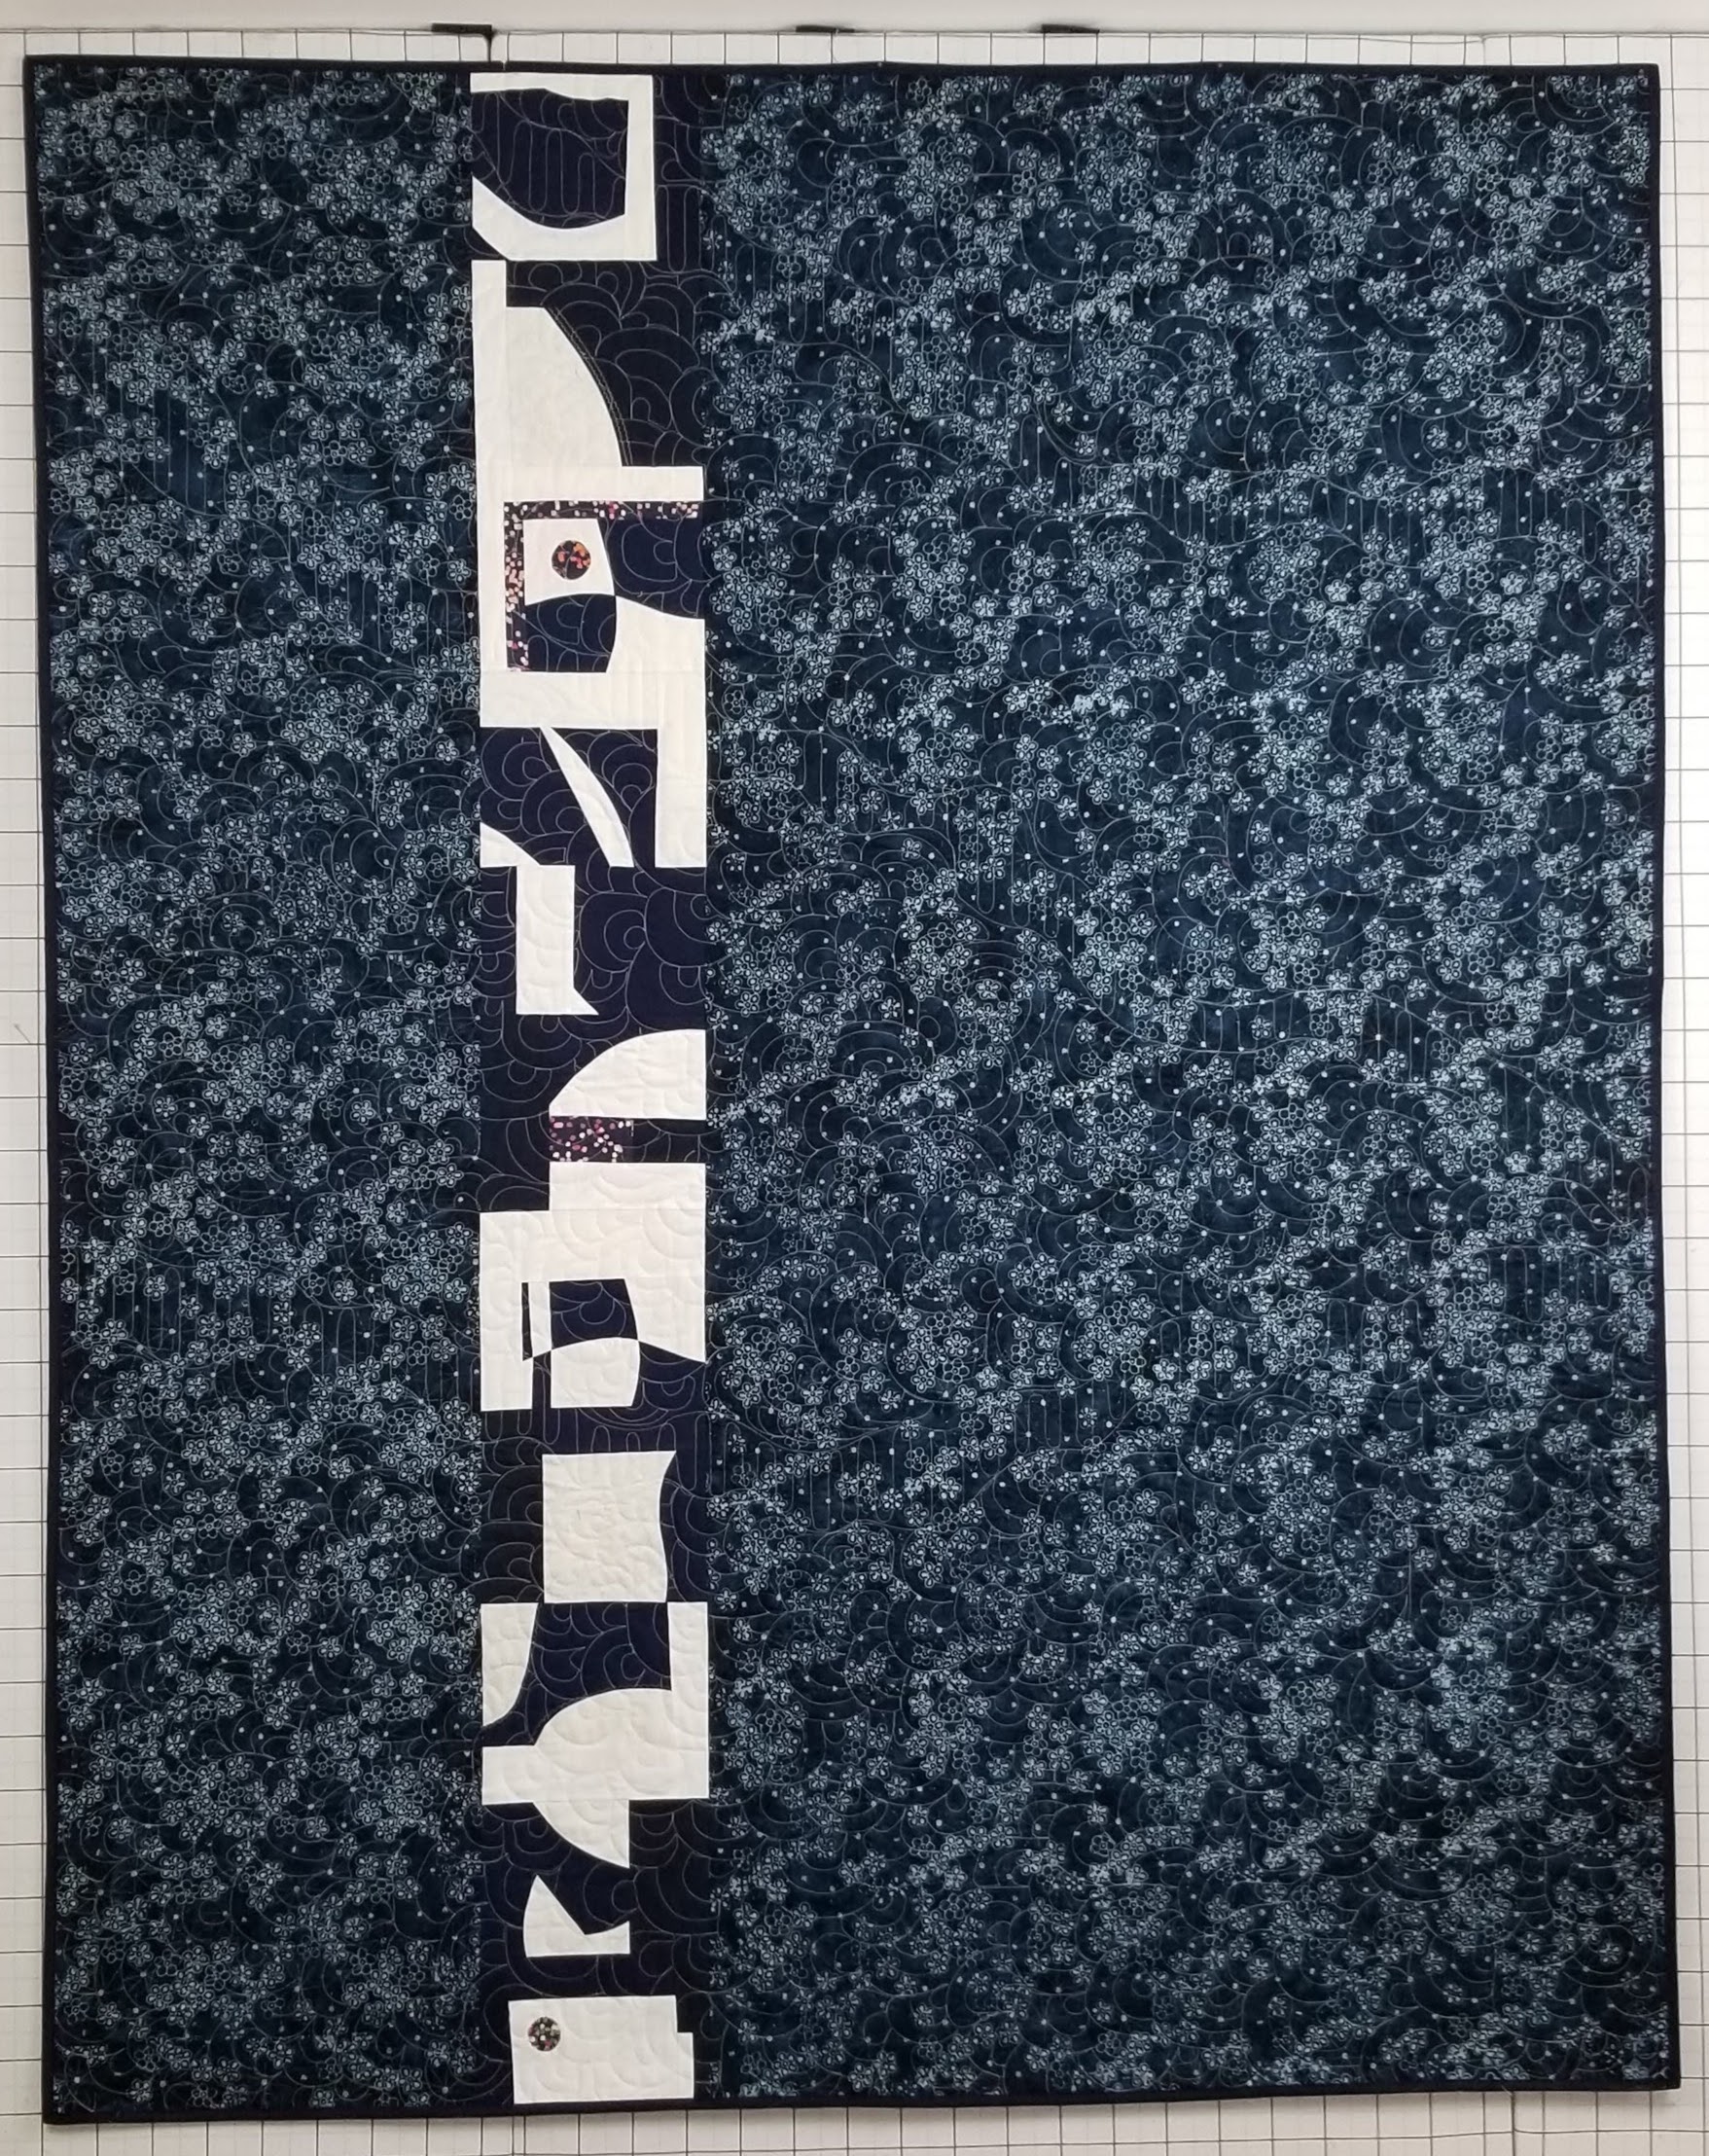
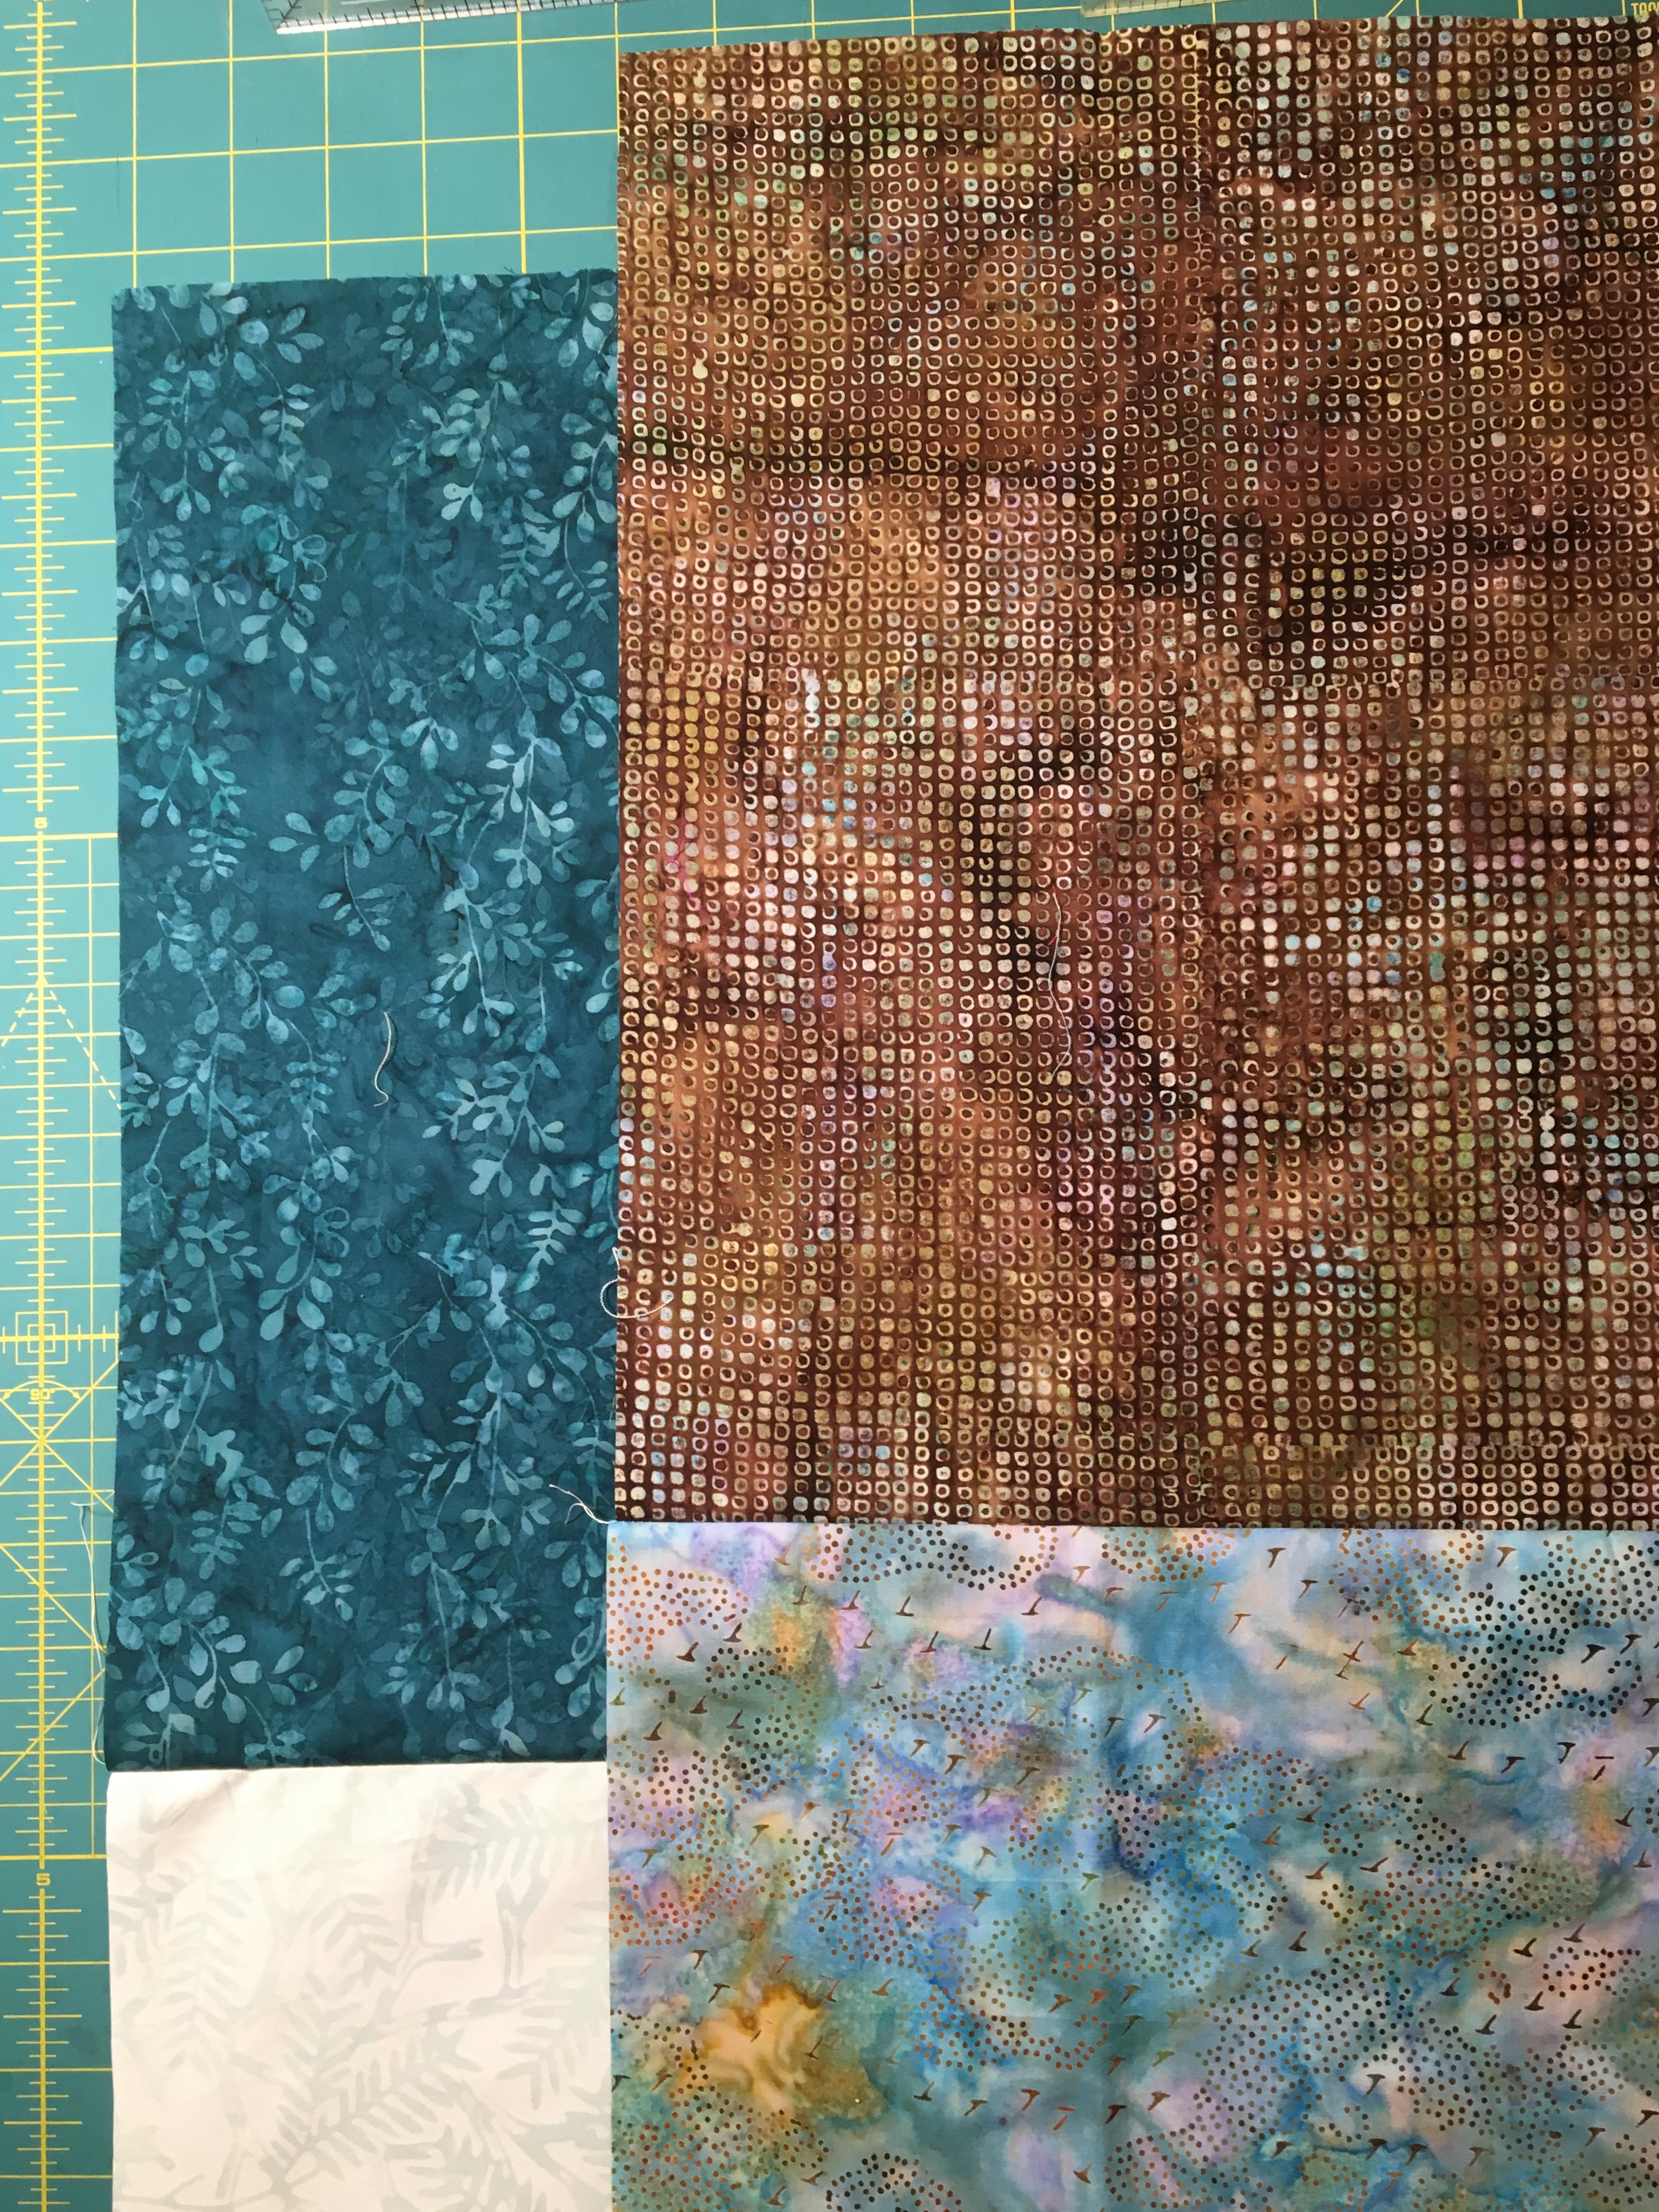
Here is another project that I recently finished. This quilt uses 3 panels. Two of the panels are cut into strips with background fabric using the Ricky Tims Convergence block technique.
I will eventually be teaching the process in a workshop at Quilters Common in Wakefield, but for now the pattern is available at the shop, or you can purchase a digital version of the pattern in my etsy shop.
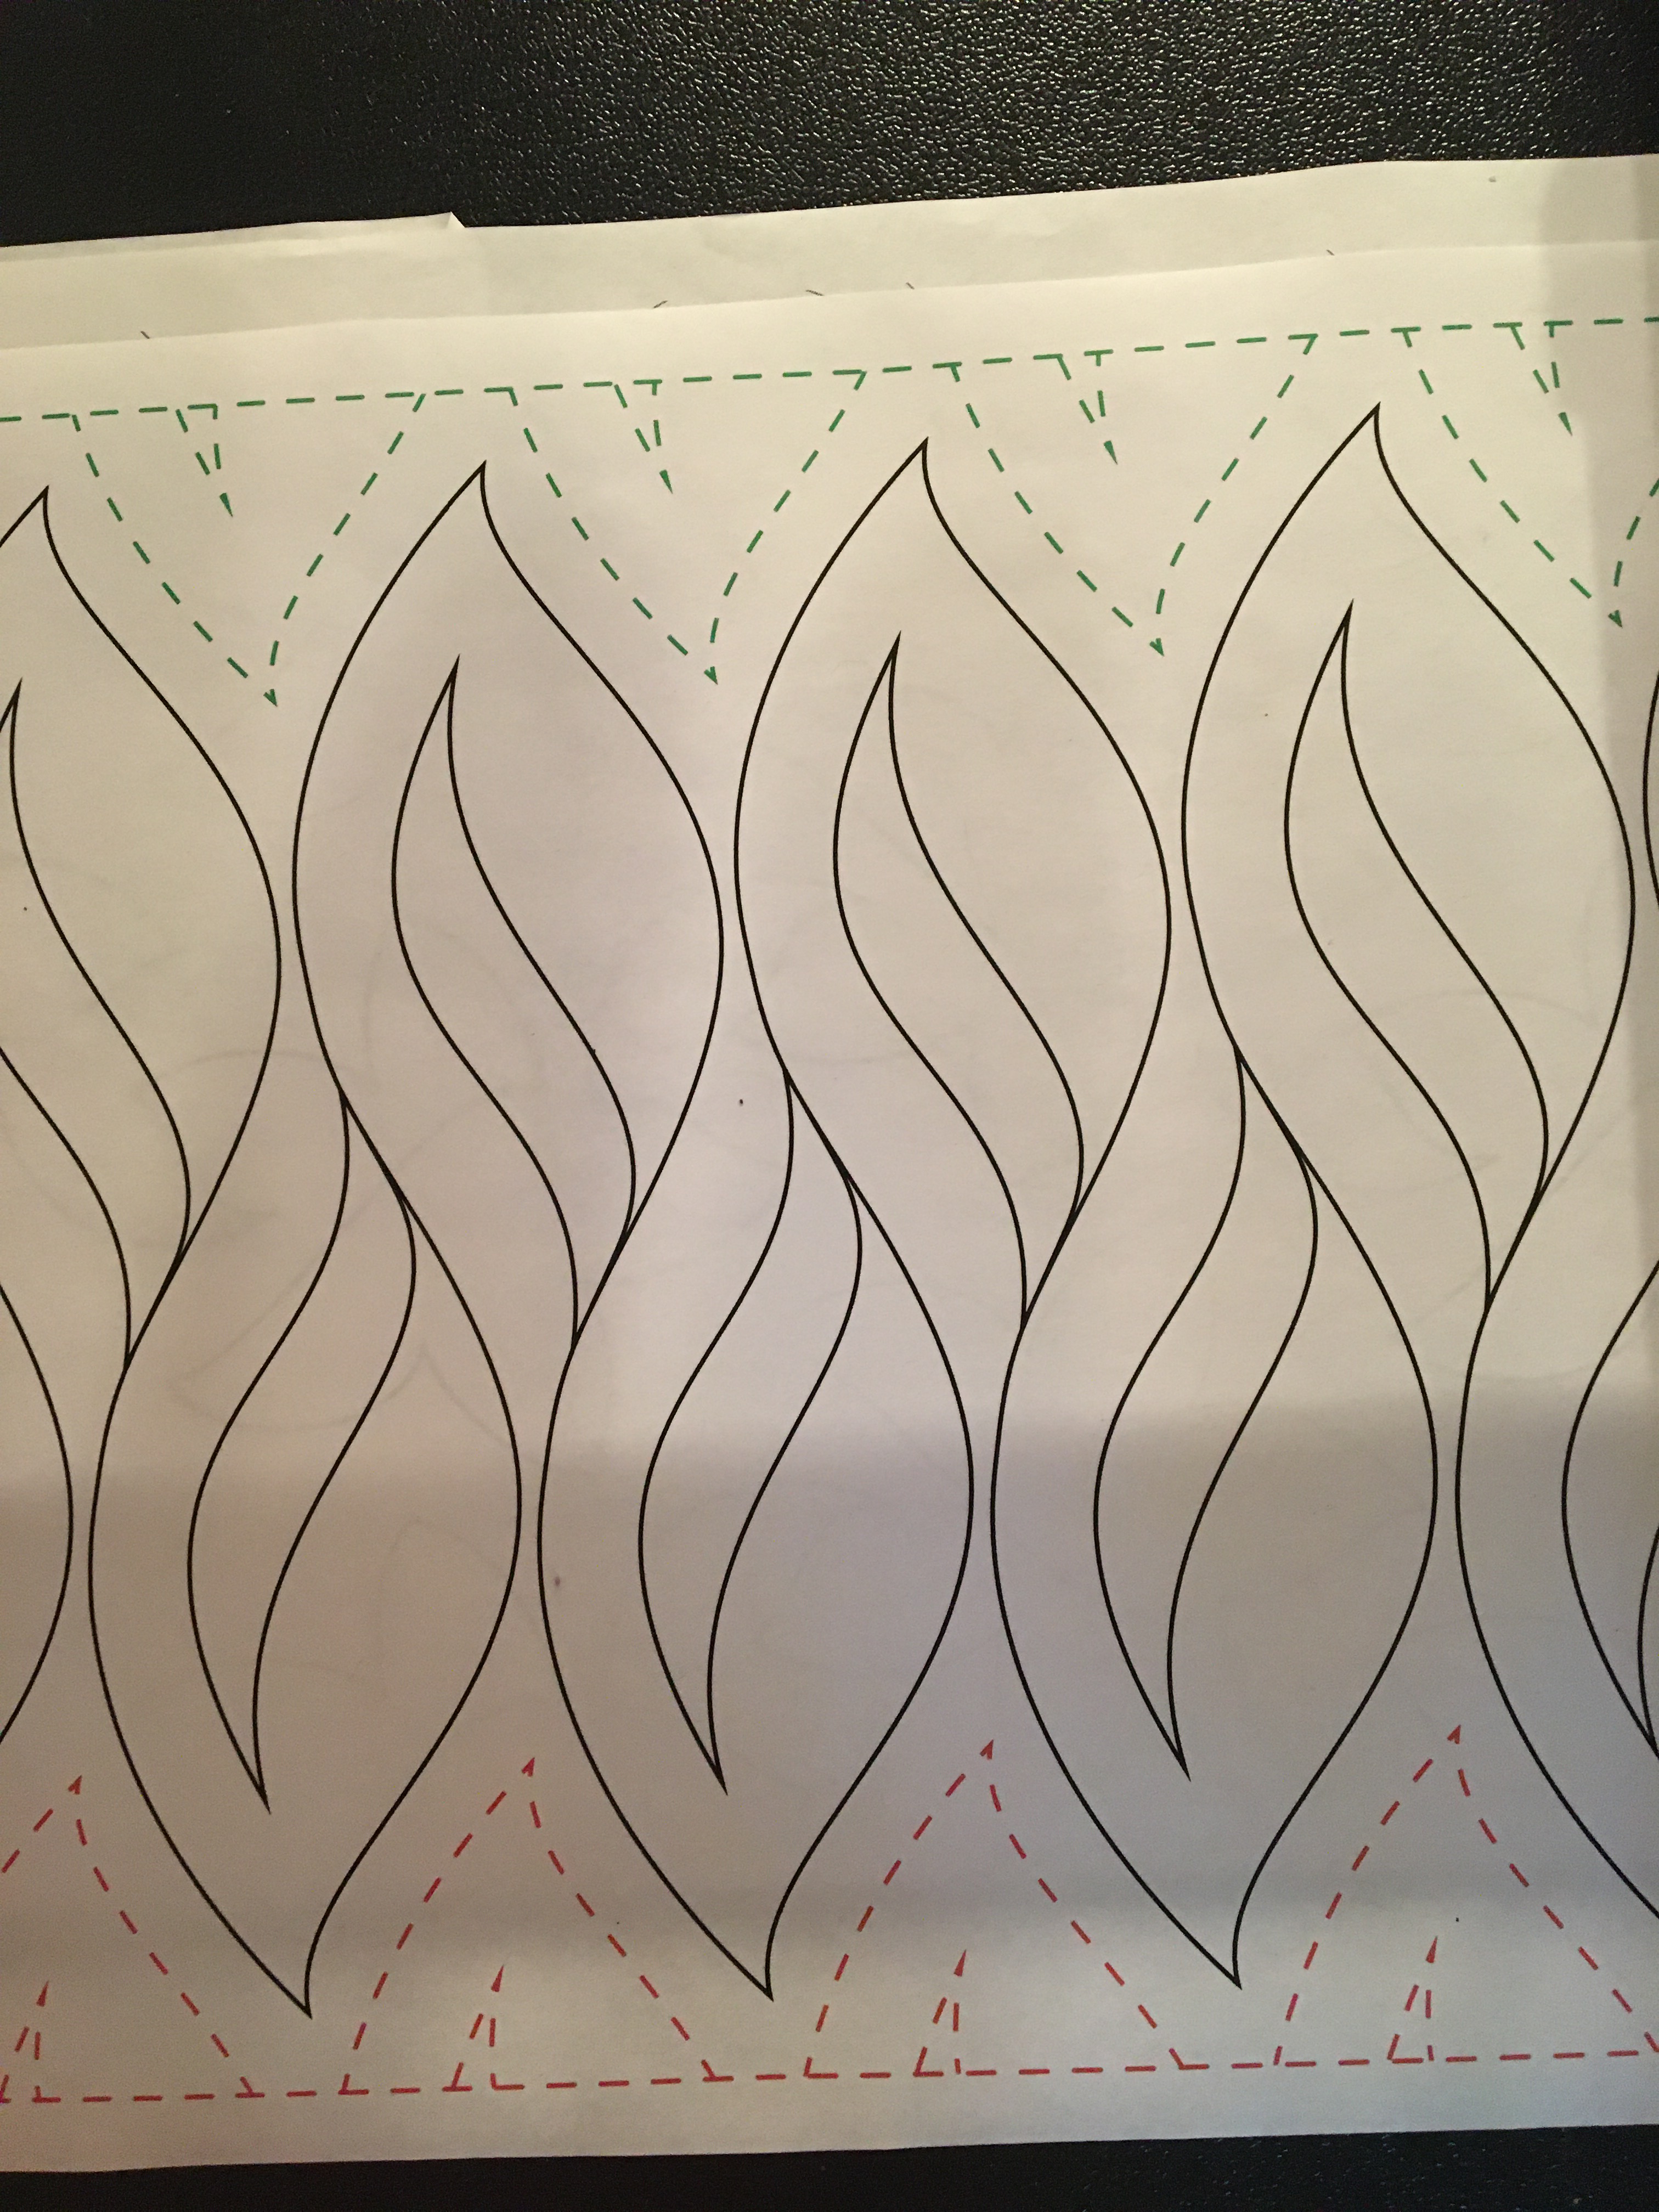
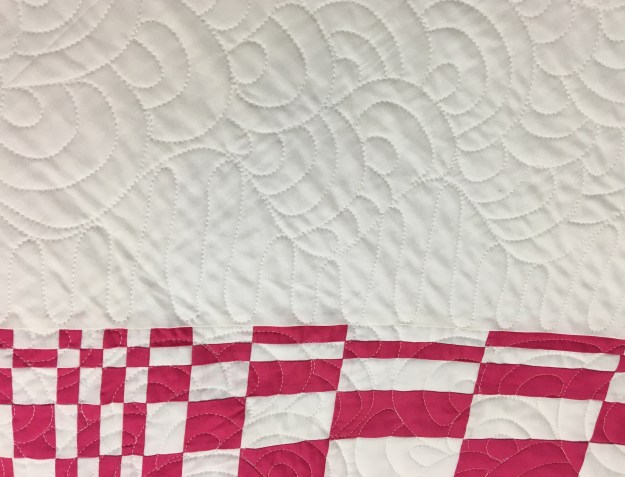
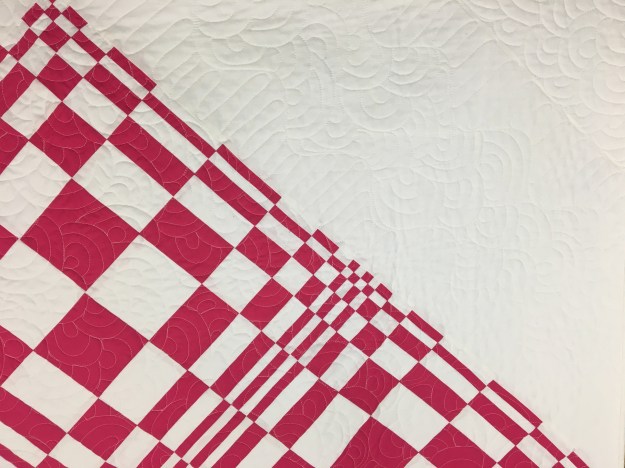
I quilted this with a pantograph. The one I used is called flames, but I loaded the quilt on my longarm frame so that the panto actually looks like clouds/waves to complement the panel.
I have been playing with improv blocks and arranging them together to make placemats. This is going to be a workshop at Quilters Common in Wakefield, MA as soon as we can be comfortable and safe in the cozy classroom area there. It is a fun way to introduce folks to improv if they haven’t tried it yet.
I meant to do a post to celebrate winning a best long arm quilting award from the Spring Mancuso show. The show was virtual so this involved sending them photos for judging. This is the Quilt I made for Tom which is discussed further in this previous post.
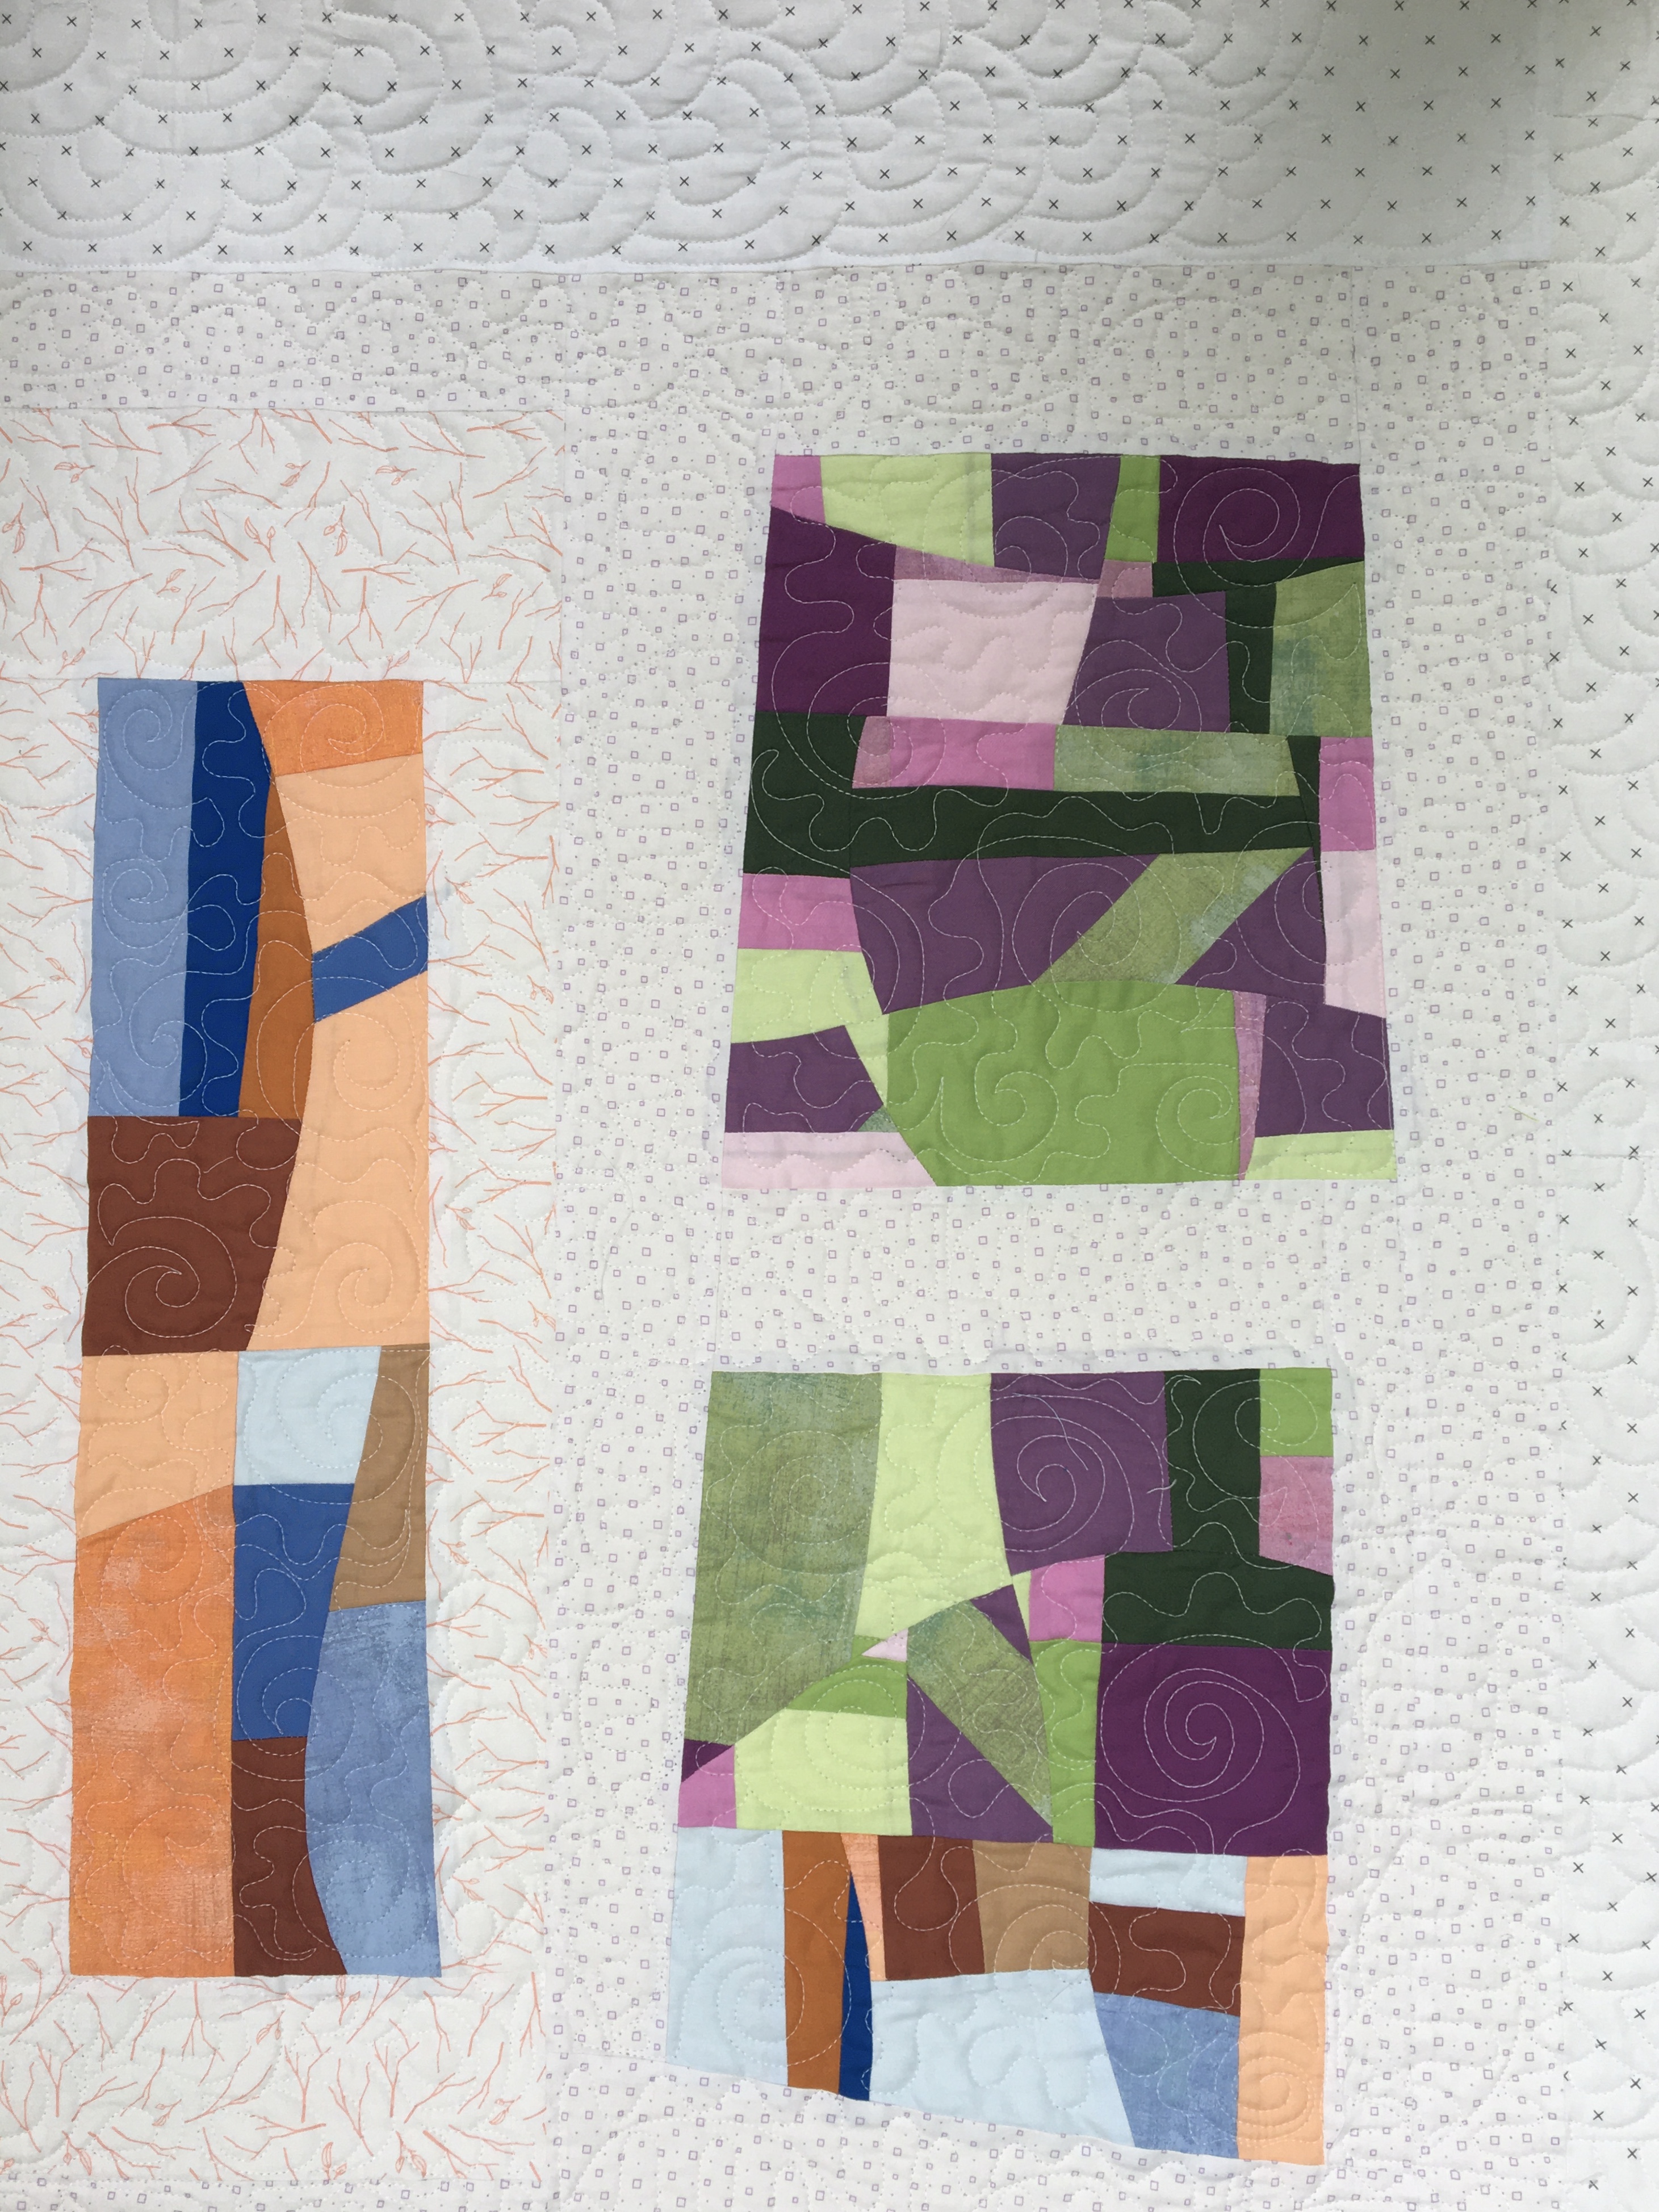
I am taking a virtual quilting workshop that is basically a lot of fun, BUT, the instructor is relying on the traditional Red, Yellow and Blue color wheel for choosing the colors to use in our quilts.
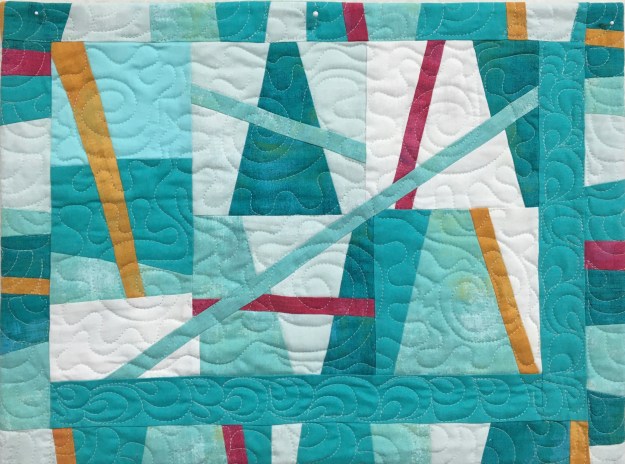
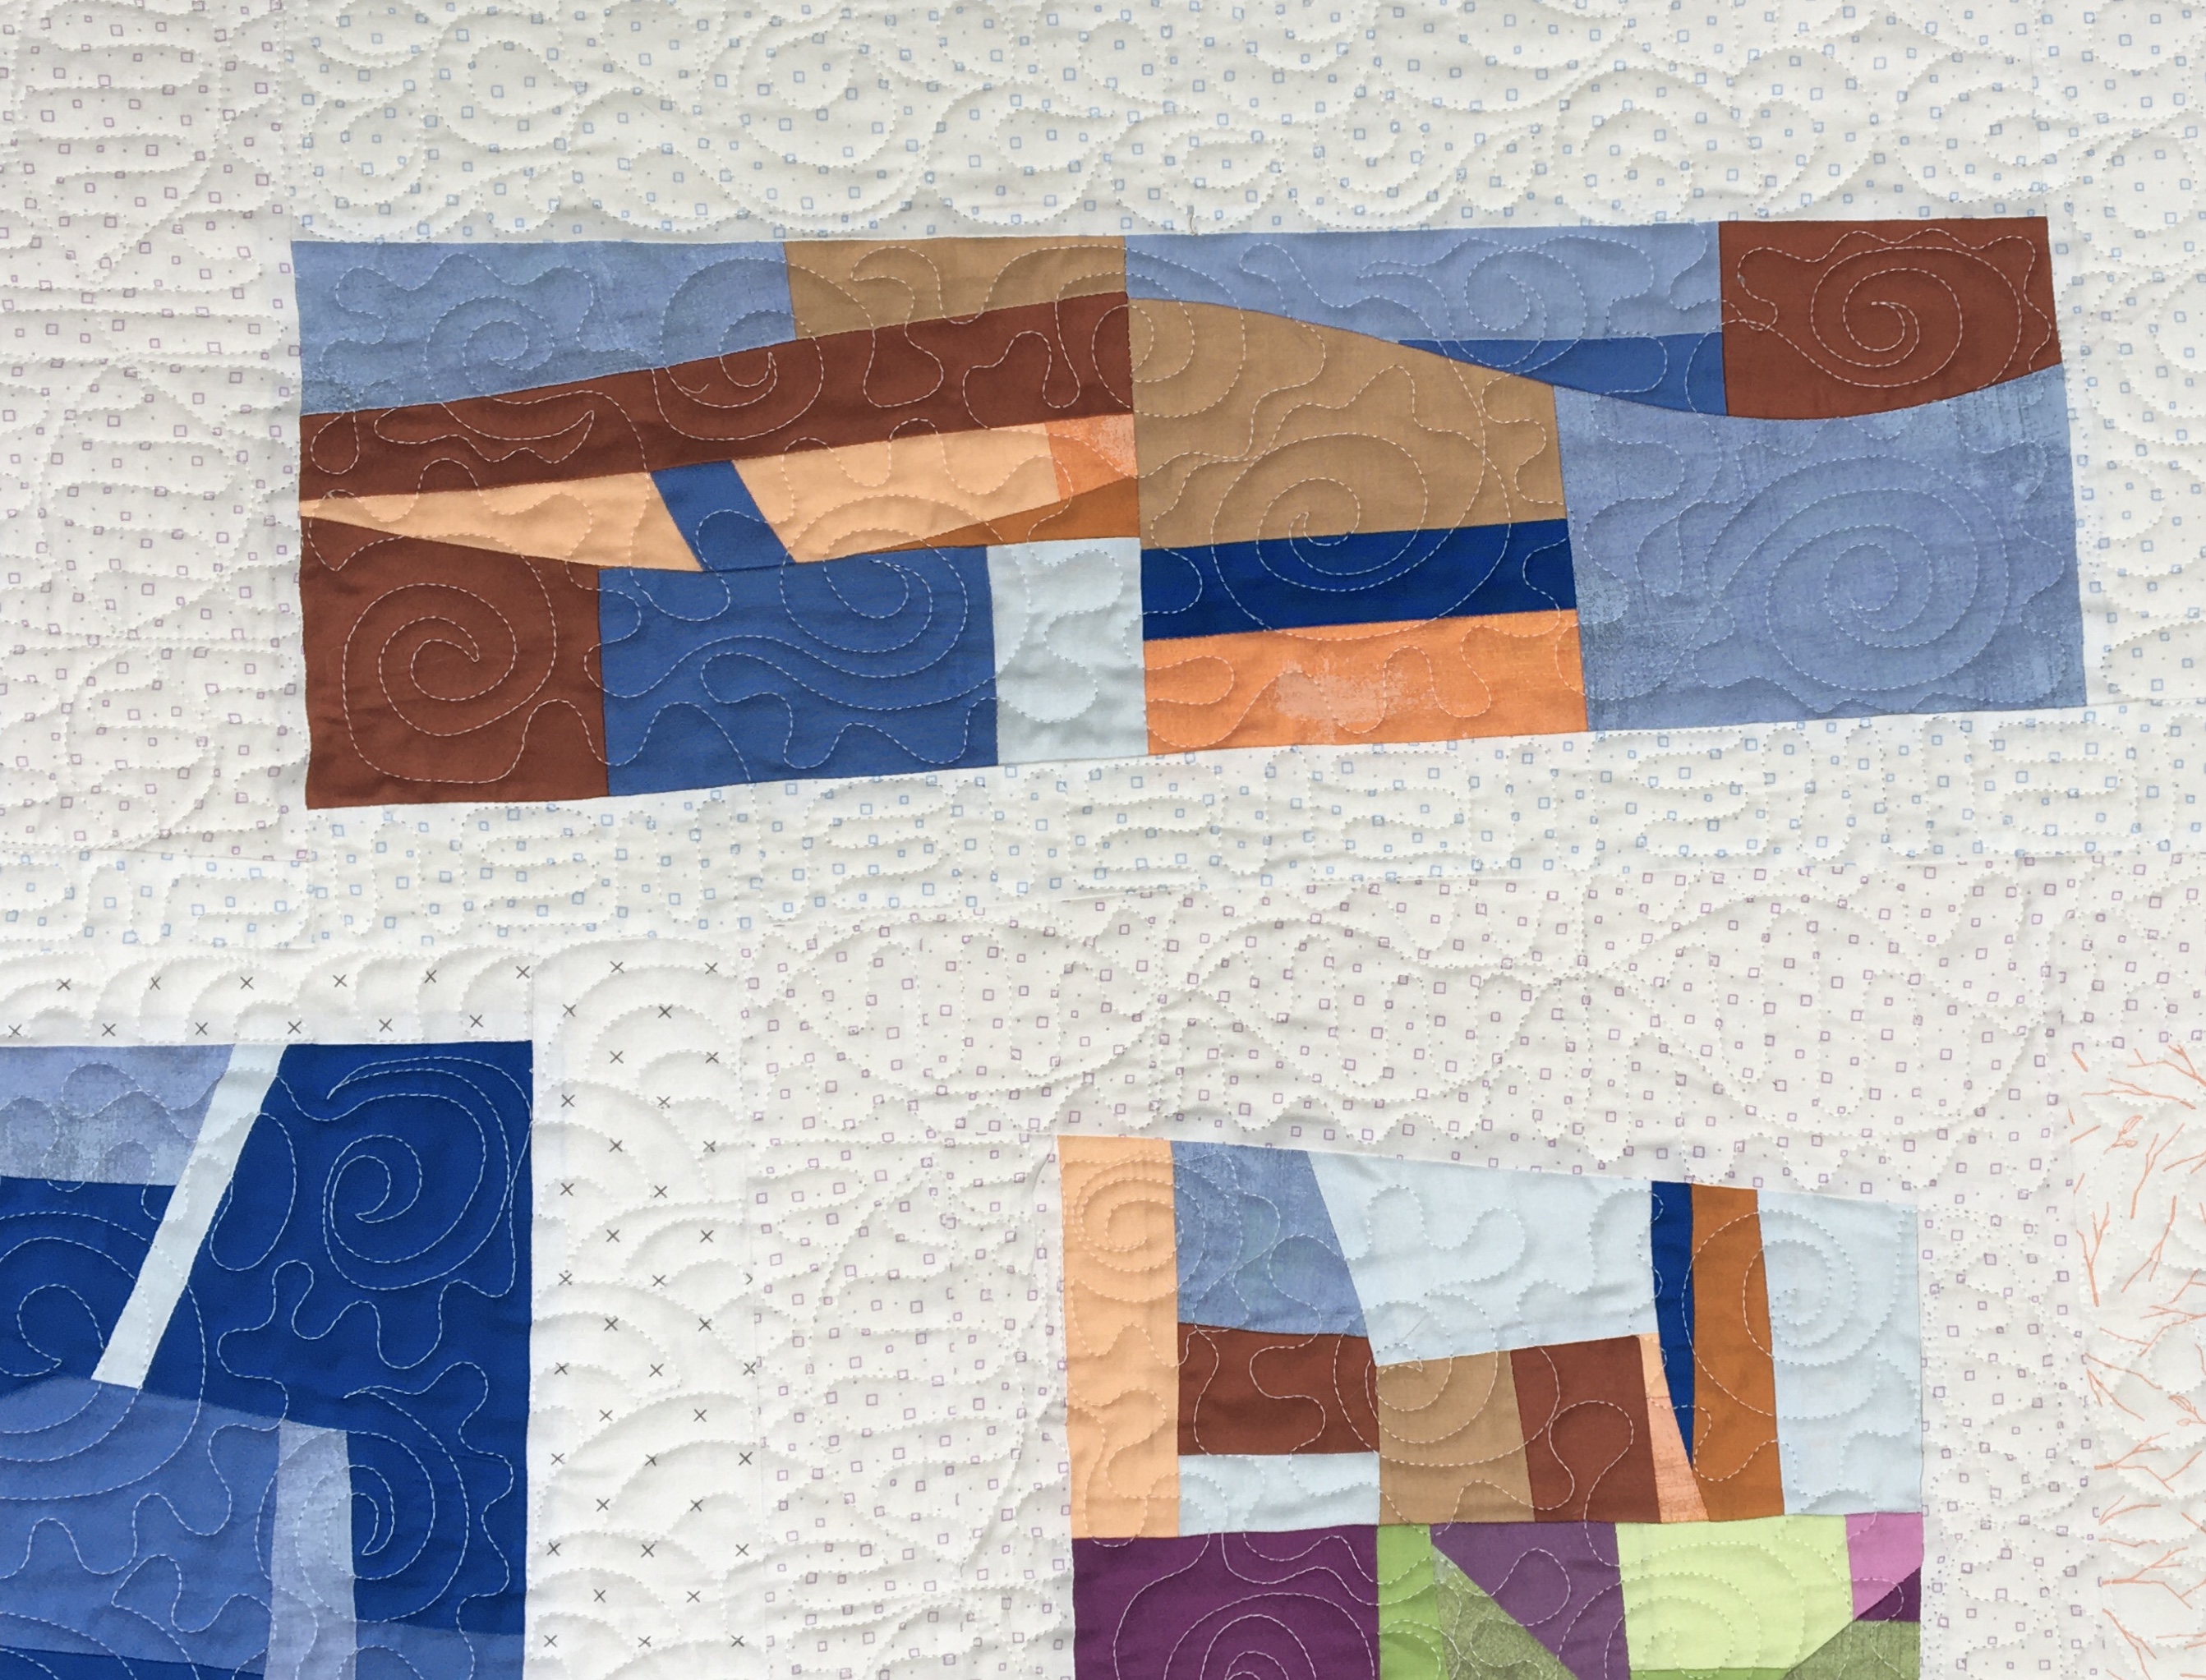
For example, I randomly chose Tetrad Blue. So, I made an improv quilt with two sets of complimentary colors: Blue/Orange and Red-Violet/Yellow-Green. The idea was to start with monochromatic blocks with different values of the colors and then mix them all together. The mixing proved too chaotic and I felt it was a non-harmonic clashing mess. So rather than merge it all together, I softened the look with negative space and came up with this:
And I ended up liking it. Sometimes I even love it. It definitely looks better in person.
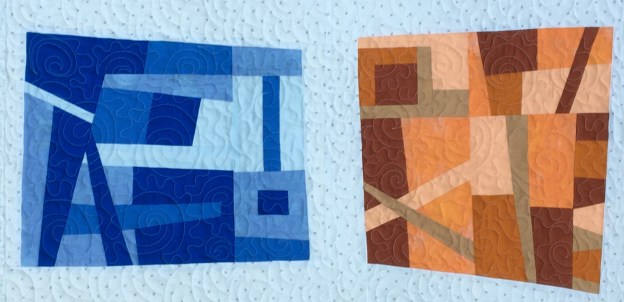
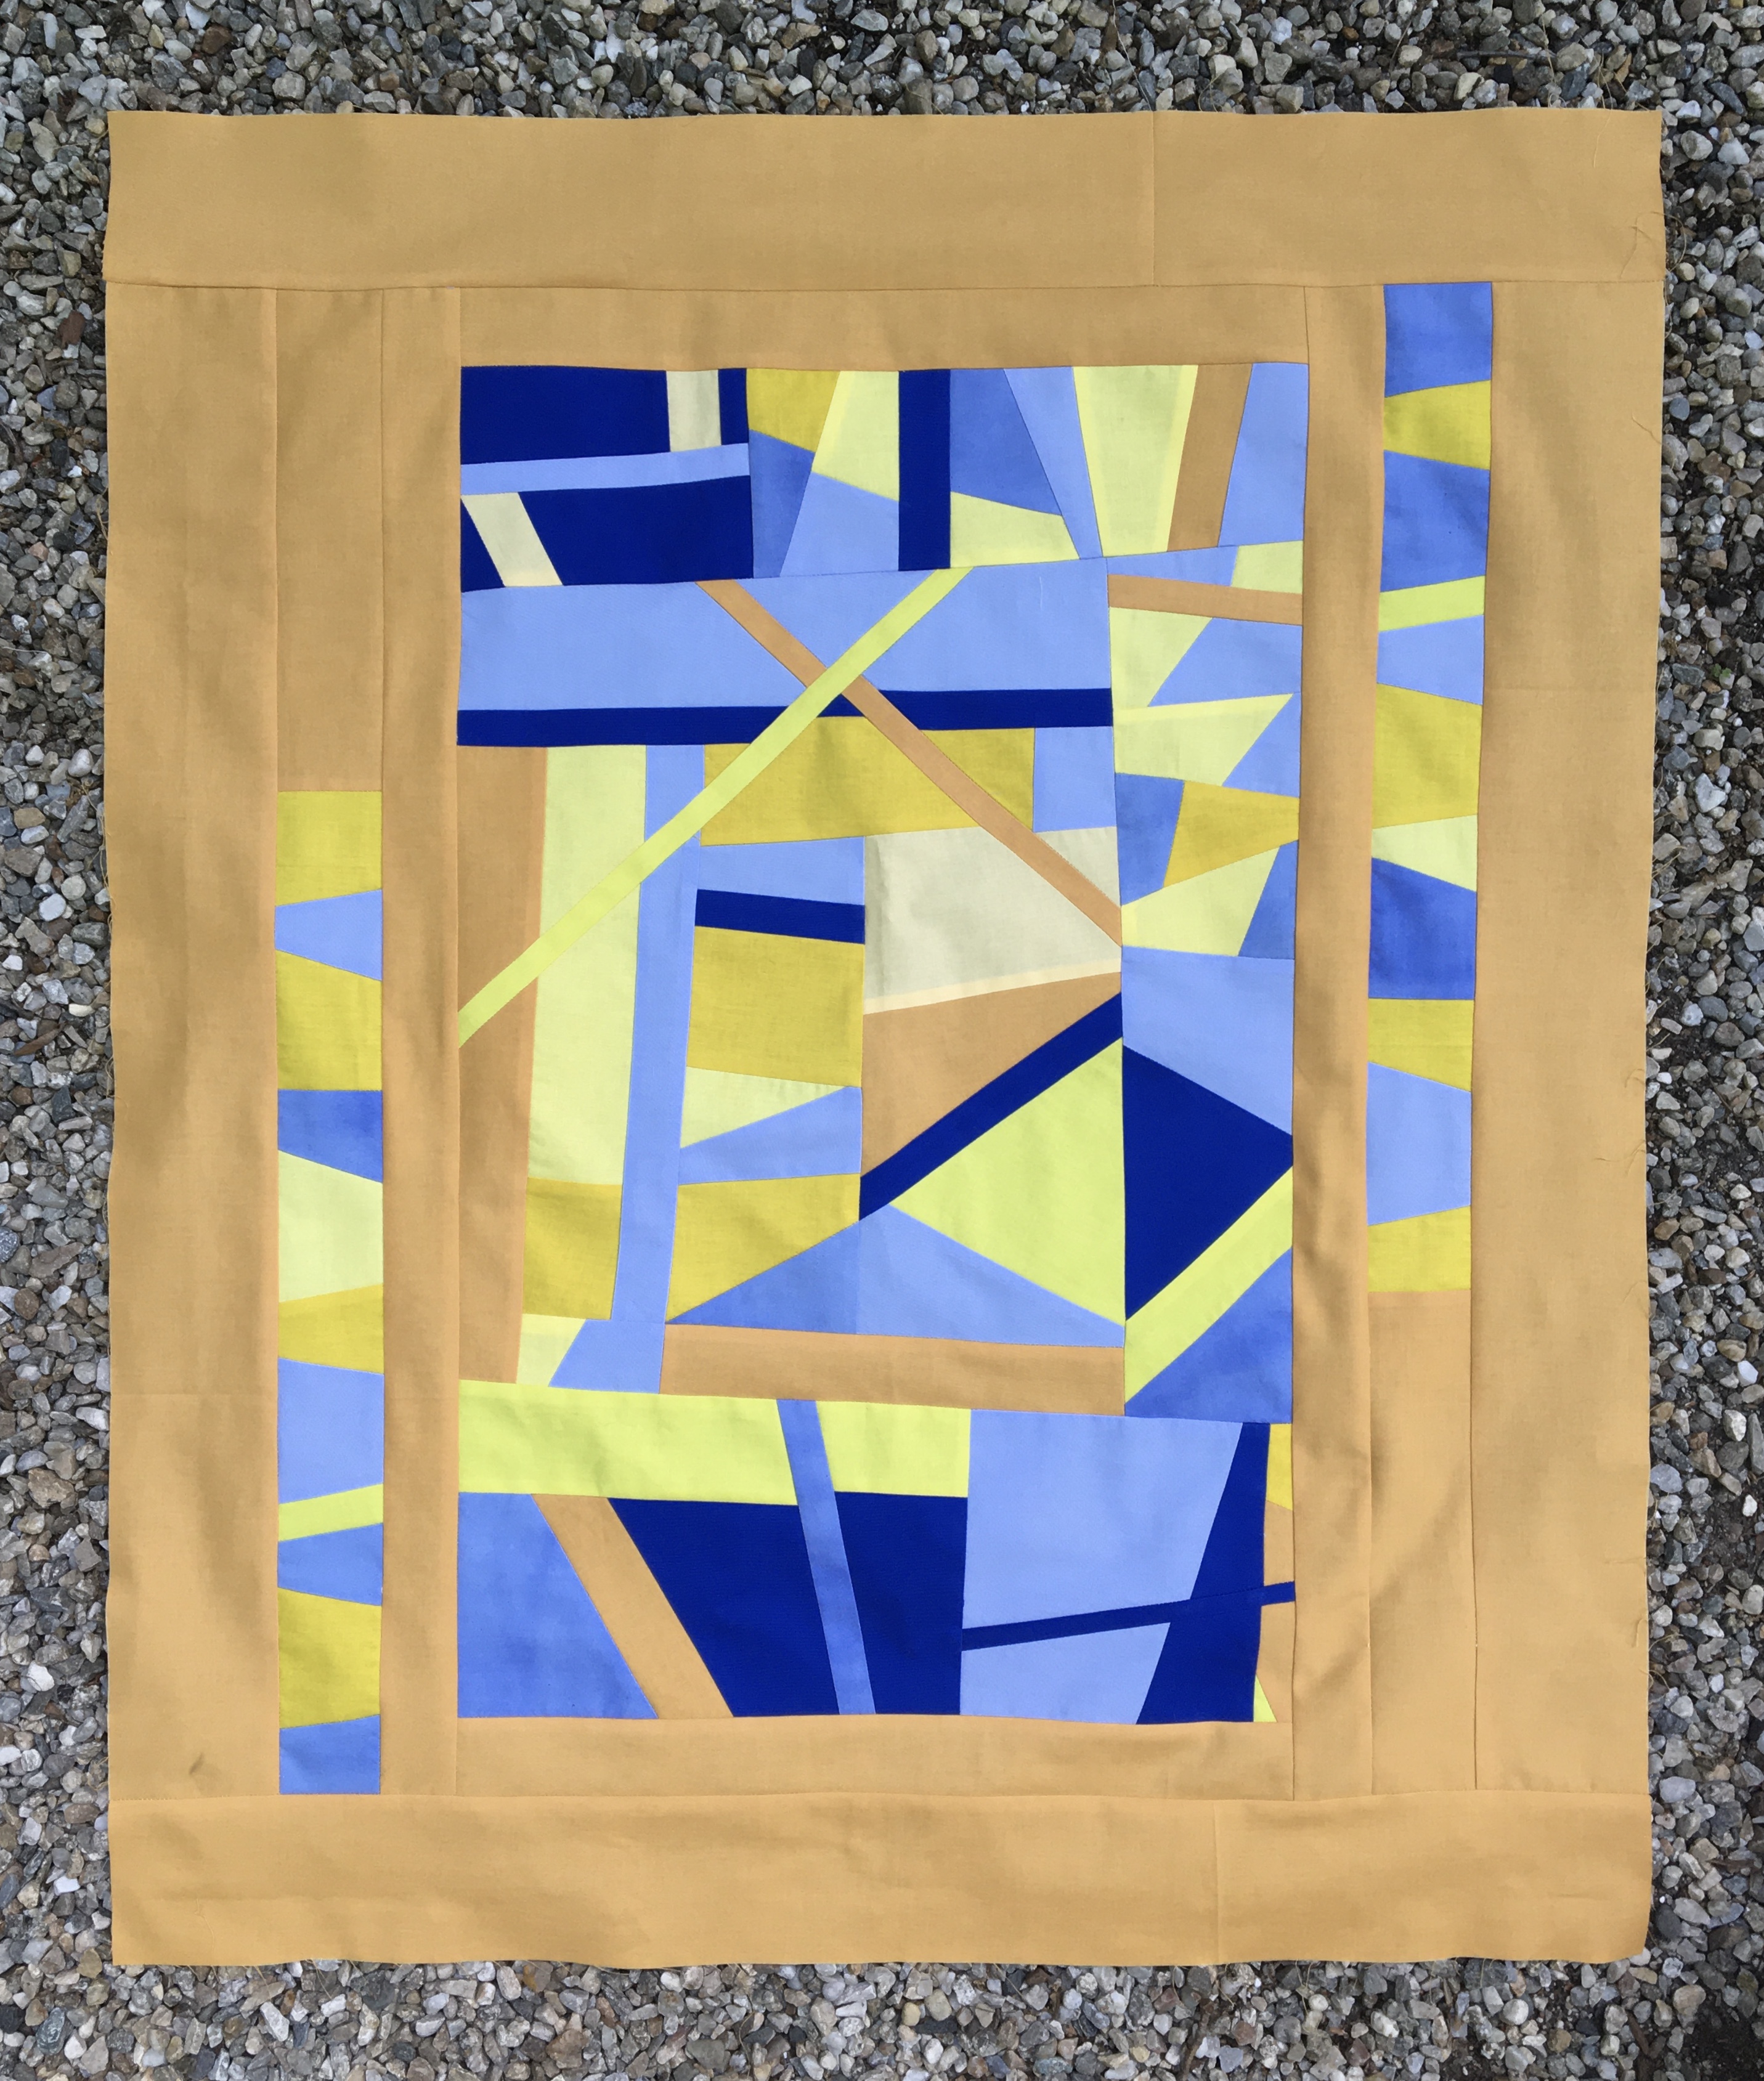
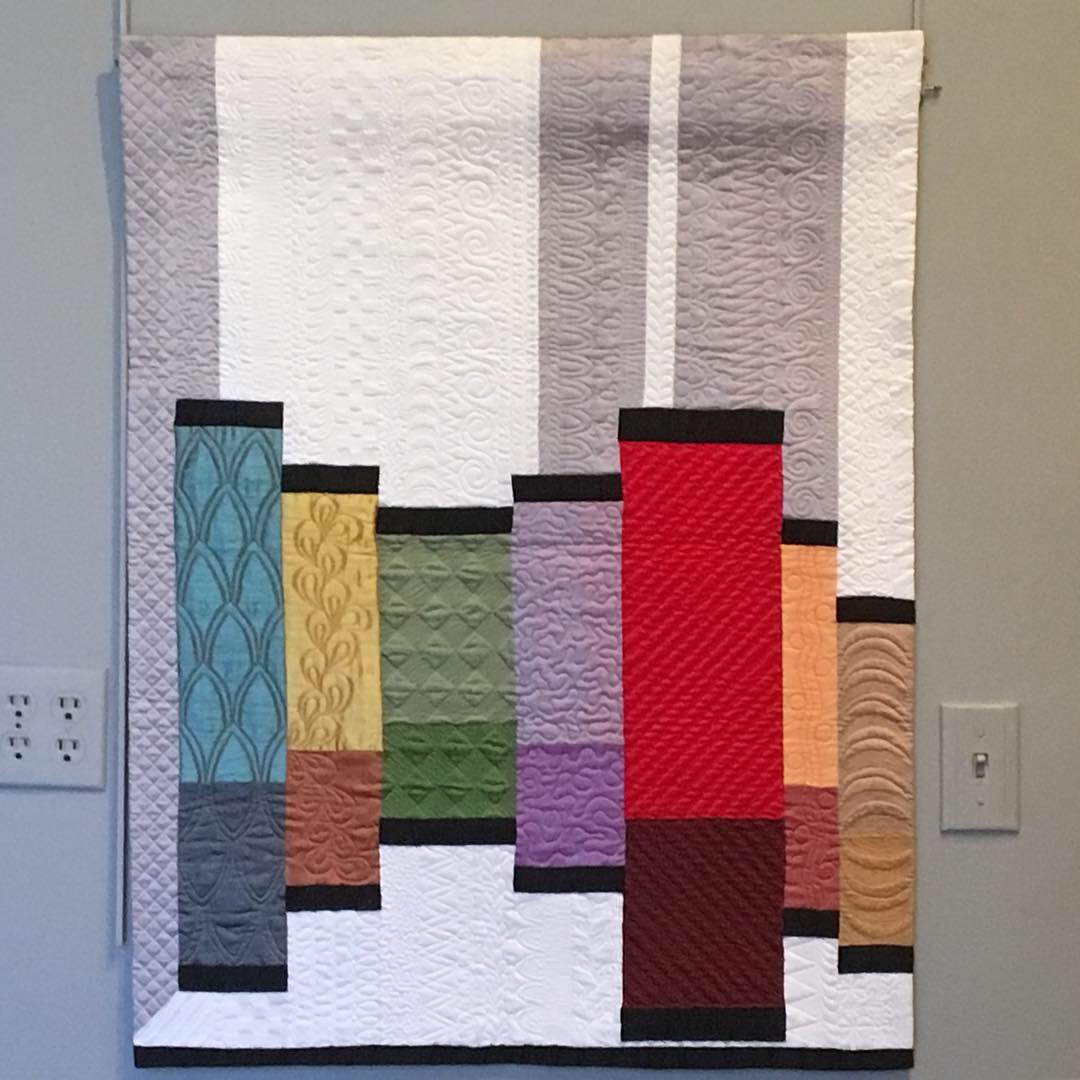
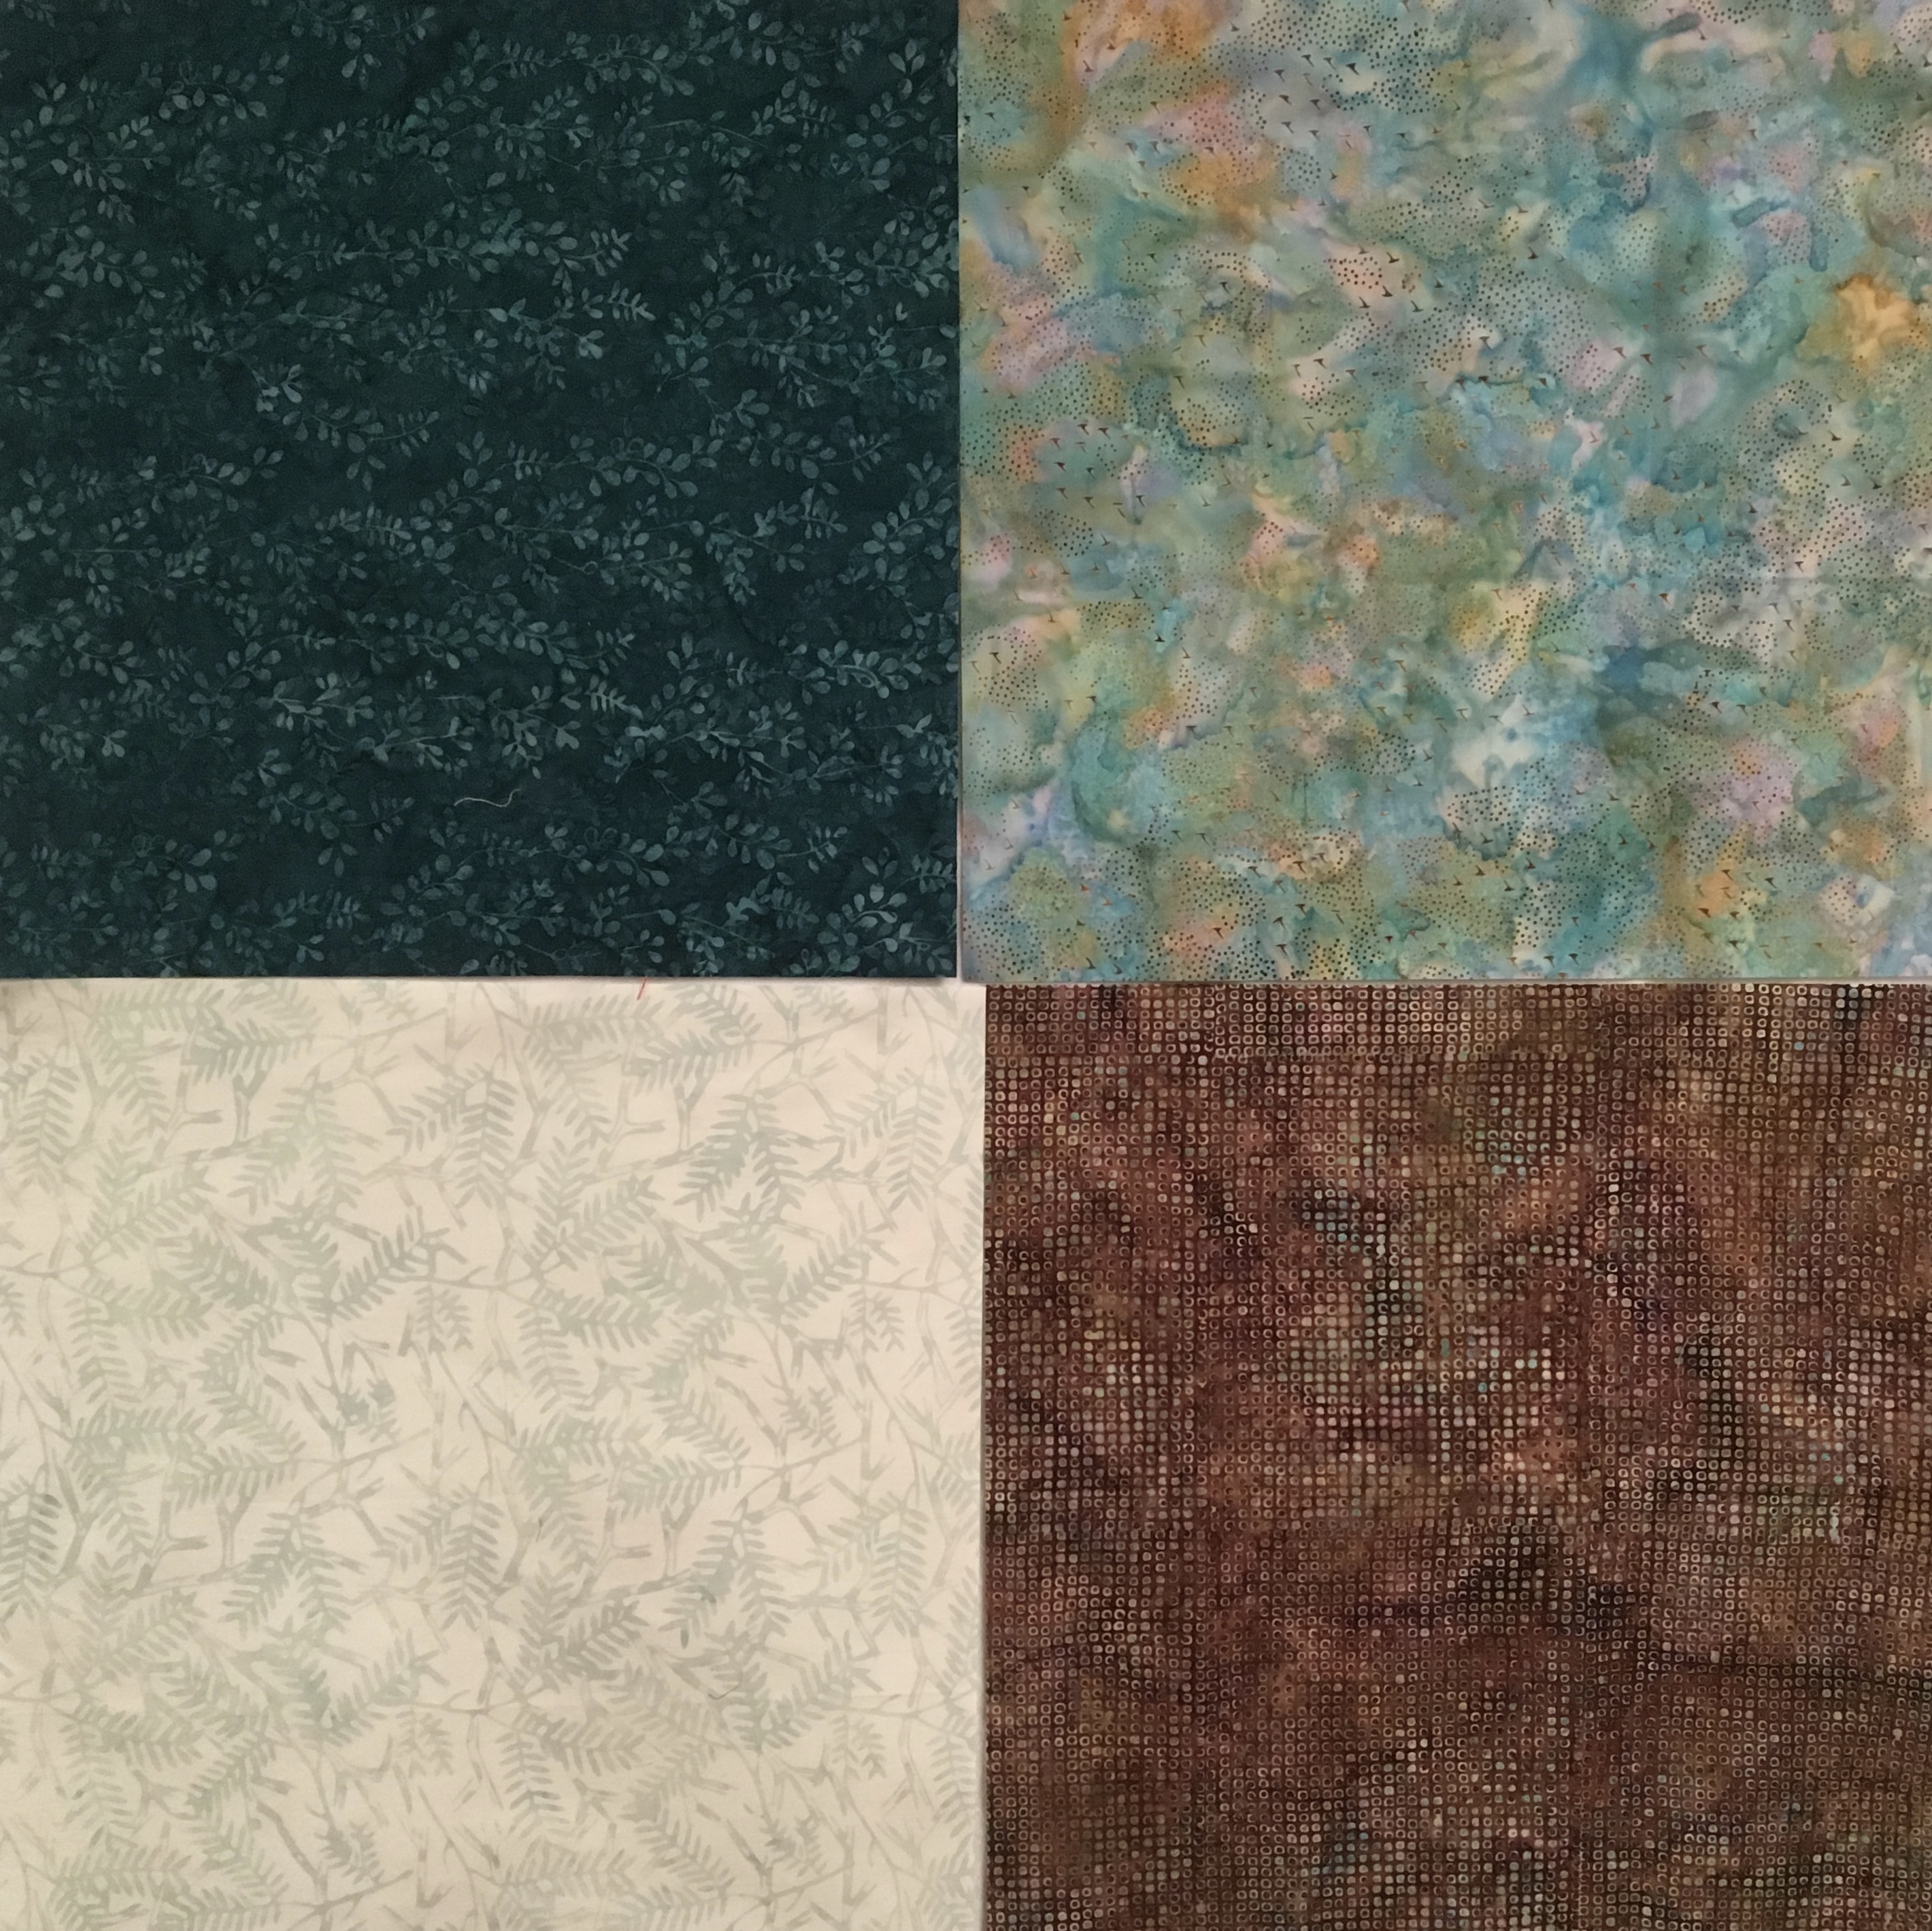
Next up was a small minimalistic quilt. I tried working with the color wheel but ultimately the blue fabric I picked seemed to look really interesting with the yellow and yellow green fabrics I pulled out of my stash. But, even though I thought it all looked okay together, I could not make it work on the color wheel. I pulled out my Ultimate 3-in-1 Color Tool by Joen Wolfrom and still could not justify the use of my colors. Regardless, I decided to use the colors:
Maybe improv is not your thing, but I do think the colors work, and it was a fun time putting it together. And, yes, it went beyond minimalistic, but never mind about that!
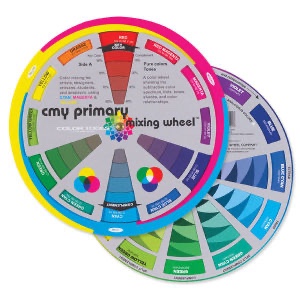
So I began wondering about the use of the color wheel for quilting. Should I be relying on it to pick “complimentary” colors? Do orange and blue go together? Here is an article I came across: https://blog.asmartbear.com/color-wheels.html
If you read through the article you will see alternative color wheels. Both the wheel based on light and the one based on the CMYK printing ink (process color) show yellow across from or complimenting blue, rather than orange. And, that is what I did in my second quilt.
If I had followed the traditional mixing color wheel I would have had a violet and yellow quilt.
There is a lot of discussion regarding the traditional color wheel and its shortcomings. Here is another article: https://www.handprint.com/HP/WCL/color13.html. I have not read through the entire discussion, but the point it this: the Wheel is controversial! My favorite quote from that article is this: “Experienced artists learn to use the color wheel as a compass to color improvisation“
I also have another tool that my friend Peggy Anne recommended years ago, The Color Scheme Bible by Anna Starmer. She used this to put quilt kits together for her shop for years with great success. I did not find any schemes that featured Orange and Blue in Anna’s book.
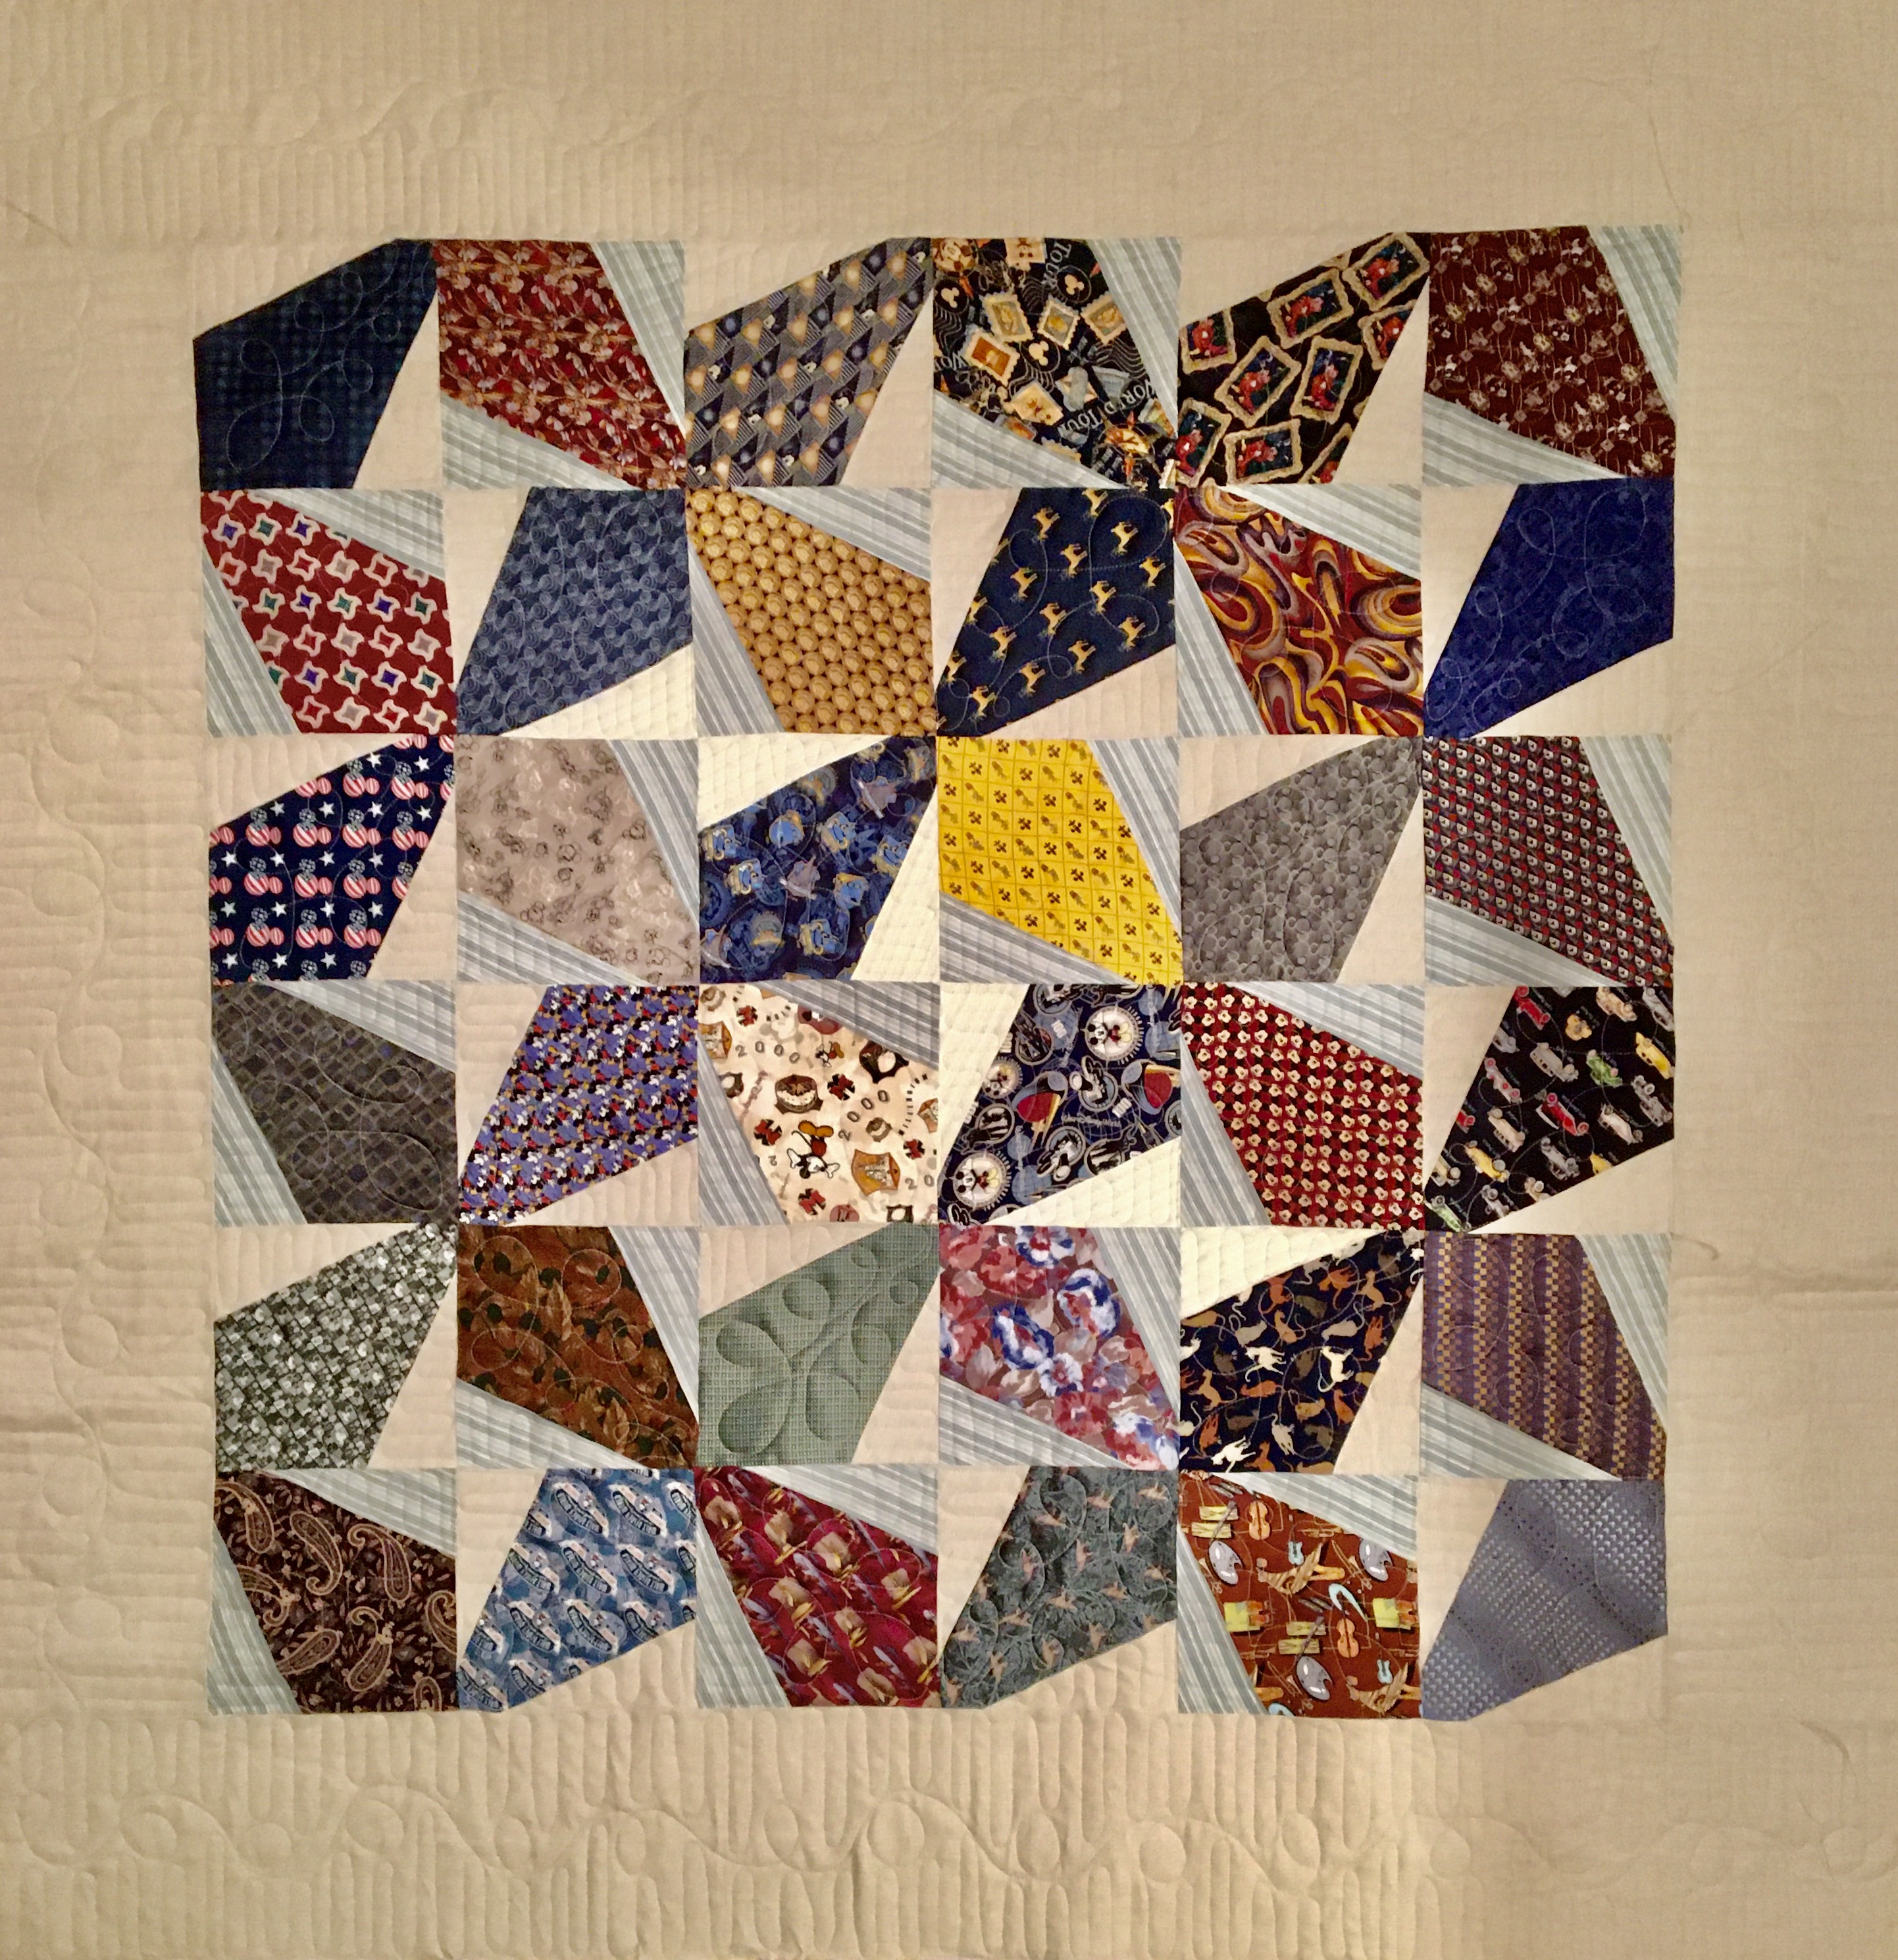
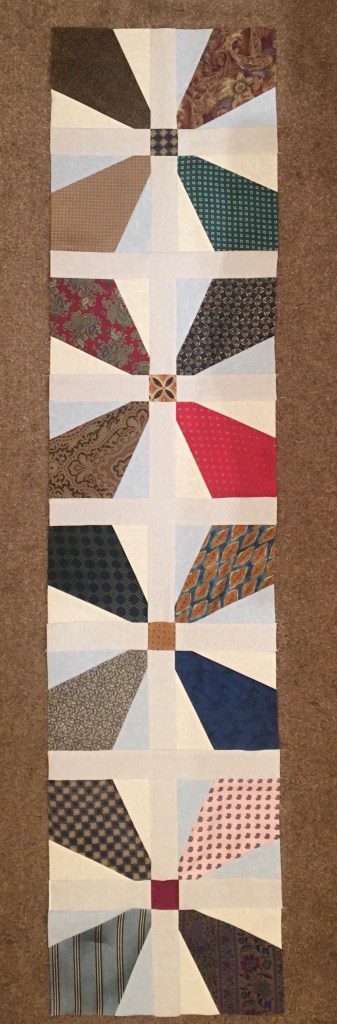
Tom asked if I knew anyone who would be interested in making a quilt with his collection of ties. Who me, did I know someone? So, of course, I am now making quilts out of silk ties. I had to practice with Bob’s before I would commit to taking on Tom’s Ties.
Here is what I came up with for Bob.
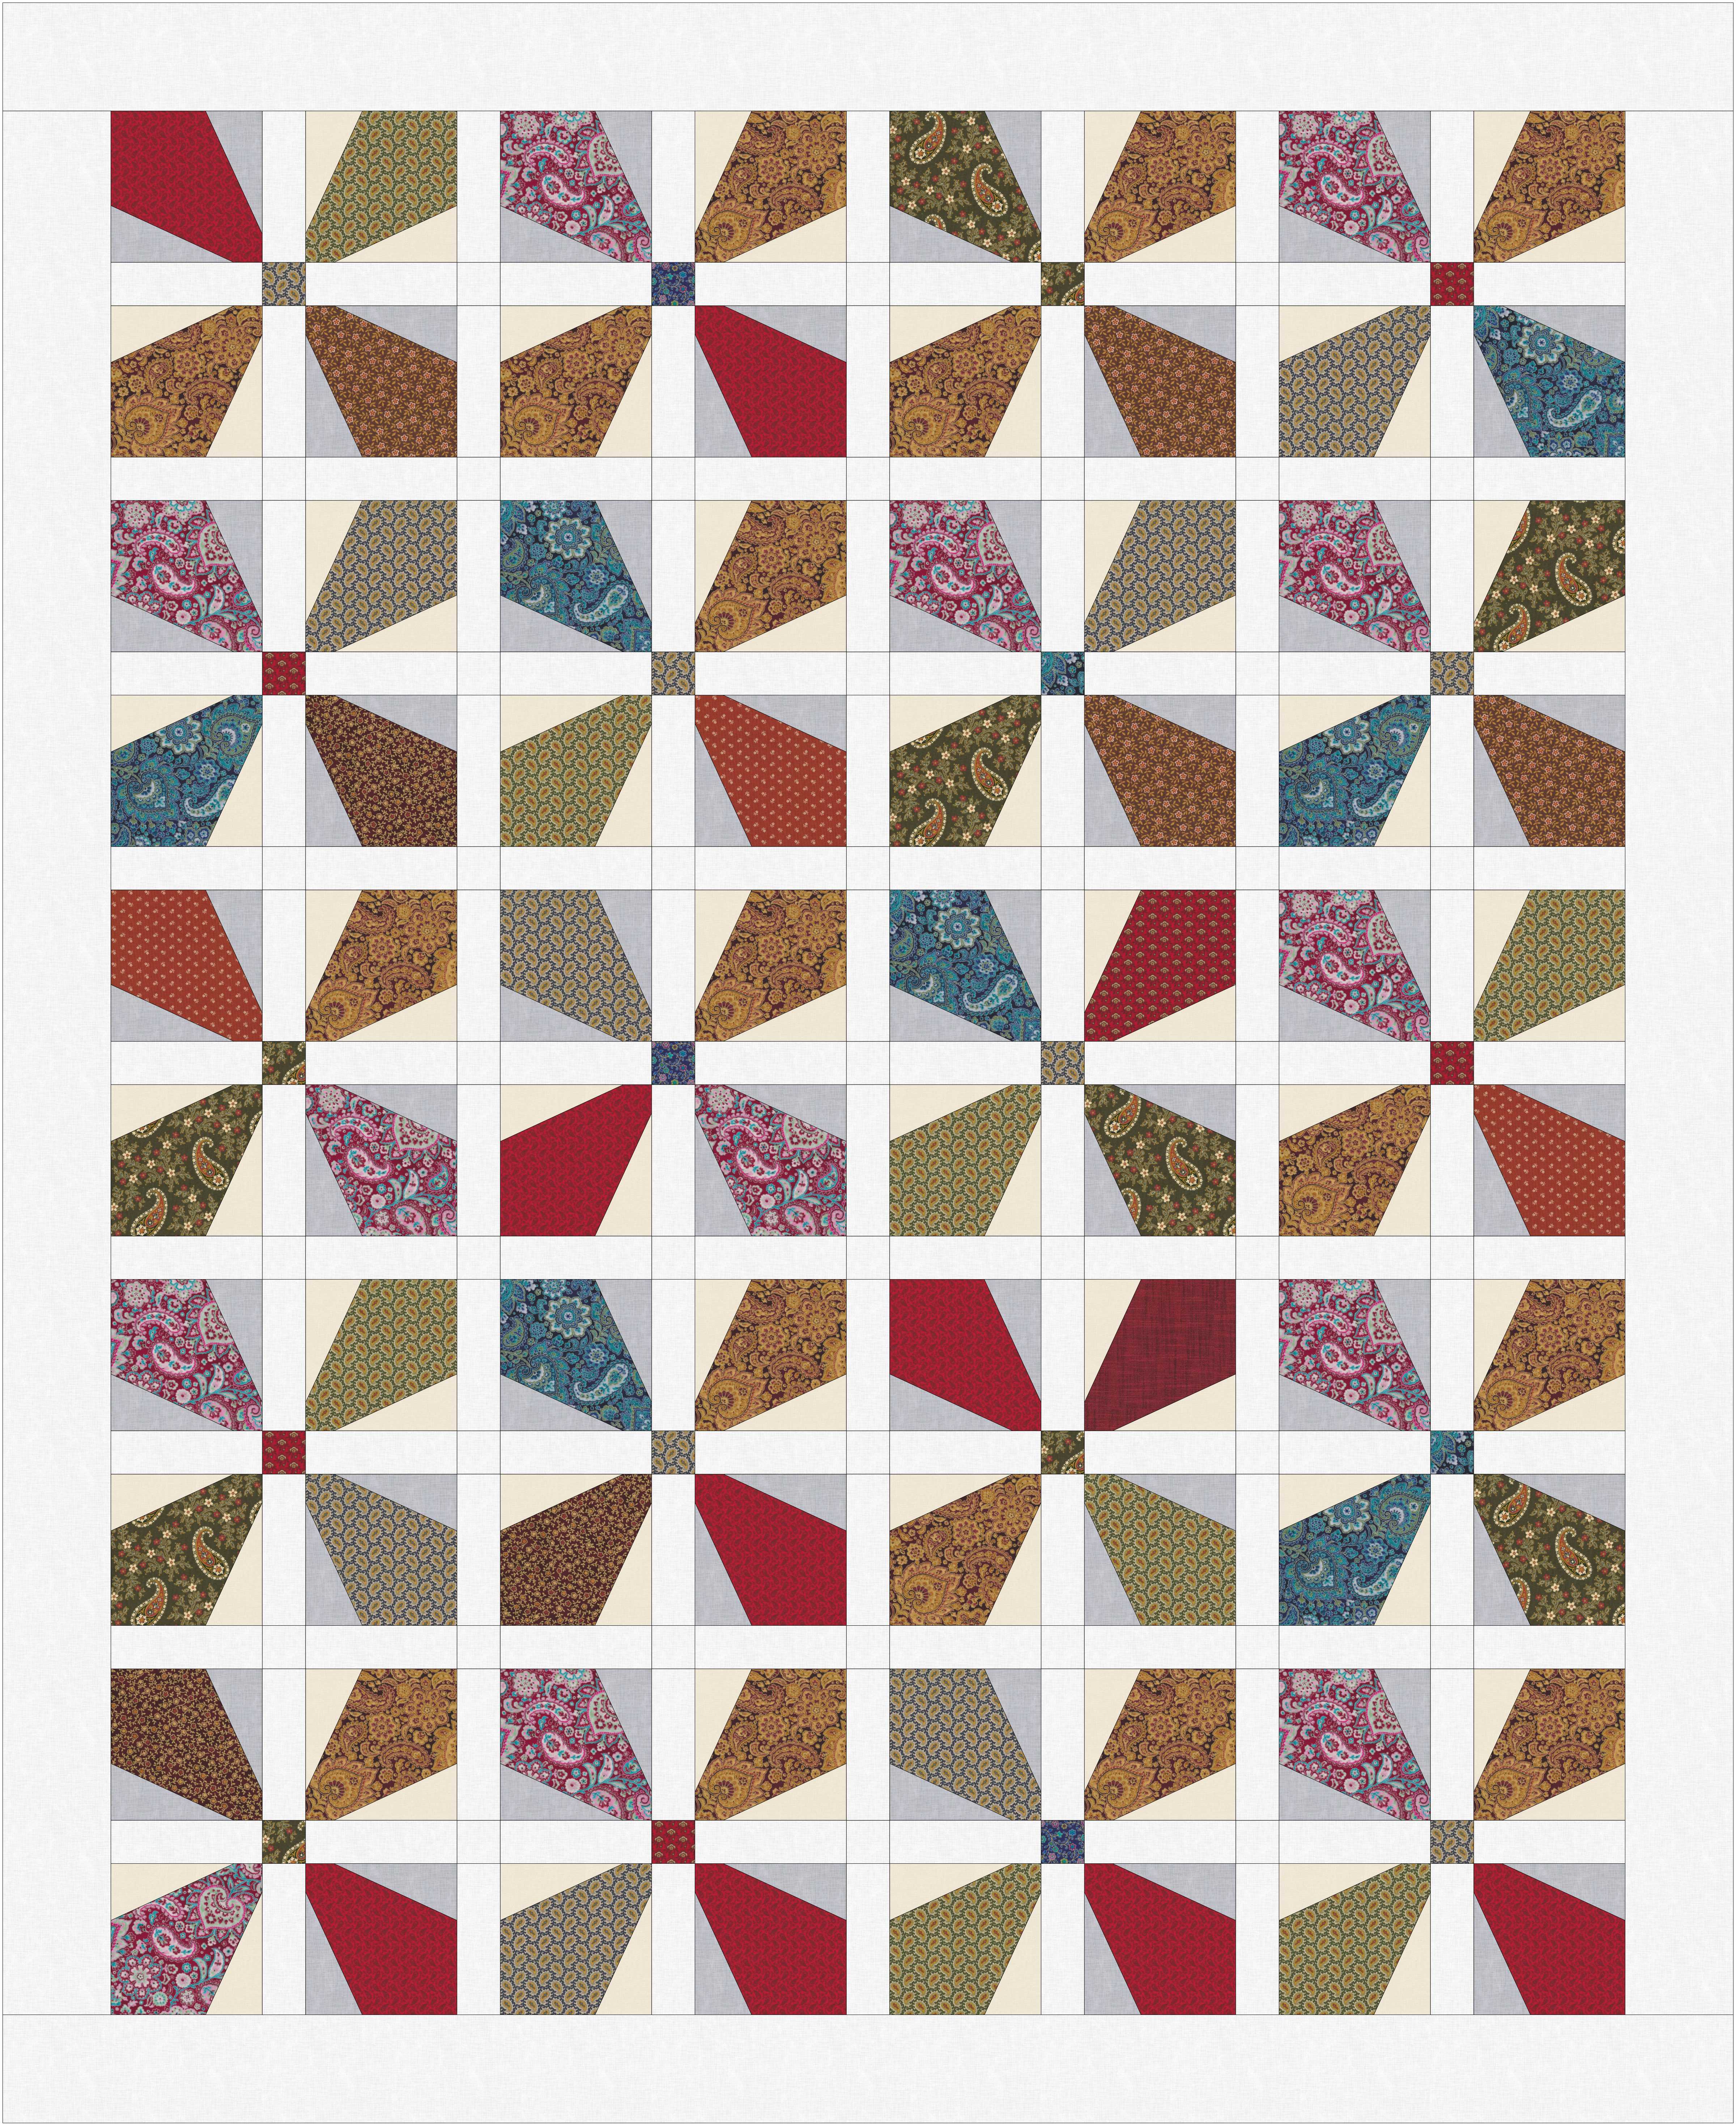
The plan for Tom’s Ties is a little different:
Here is what I have so far for Tom:
If you are working with silk in a quilt it is best to stabilize the fabric somehow. You can use a fusible interfacing for this. I have used a light weight fusible woven interfacing with silk in the past. For this quilt I decided to paper piece the blocks, as the paper provides stability. The other thing I decided to do was to spray the silk with Best Press, which worked great and did not harm the fabric.
Keep in mind that silk ties are not dye fast. They bleed like crazy, so be careful with the steam on your iron and when all is put together DO NOT WASH THIS QUILT IN WATER. The only safe way to clean a silk quilt is vacuuming it!
Jane Stickle finished her quilt in 1863. People are still enchanted and challenged by her unique quilt blocks. Even with all of my modern gadgets and fancy machines I still had a lot to learn from Jane. Could not have managed to get through all of the blocks without help from the Jane Stickle Group lead by Pat Kowalczyk at Quilters Common, which met for 4 years starting in 2013.
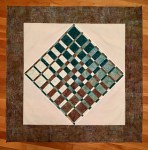
Checkerboard Skew Revisited, 2020
In 1973 Beth Gutcheon included this design in her book “The Perfect Patchwork Primer”. This book inspired quilters to take a fresh look at quilting and her designs are still making us ask what is a modern quilt and showing how timeless modern is.
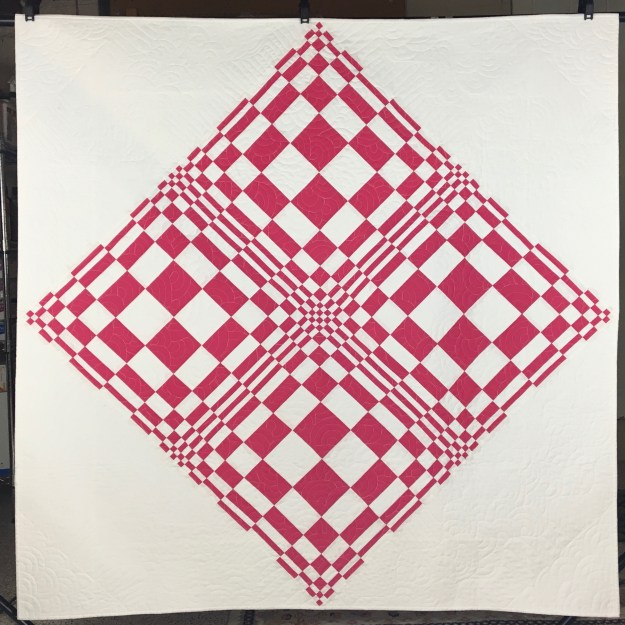
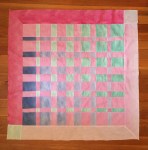
Seeing Red, 2020
Are you seeing a red and white quilt? This is actually a pink and white quilt, but color is often a matter of opinion. The design is based on a half scale Fibonacci sequence used to determine the width of strips used. I borrowed Ricky Tims Convergence technique and sewed the strips together, rotated and then cut strips again.
Seeing Red
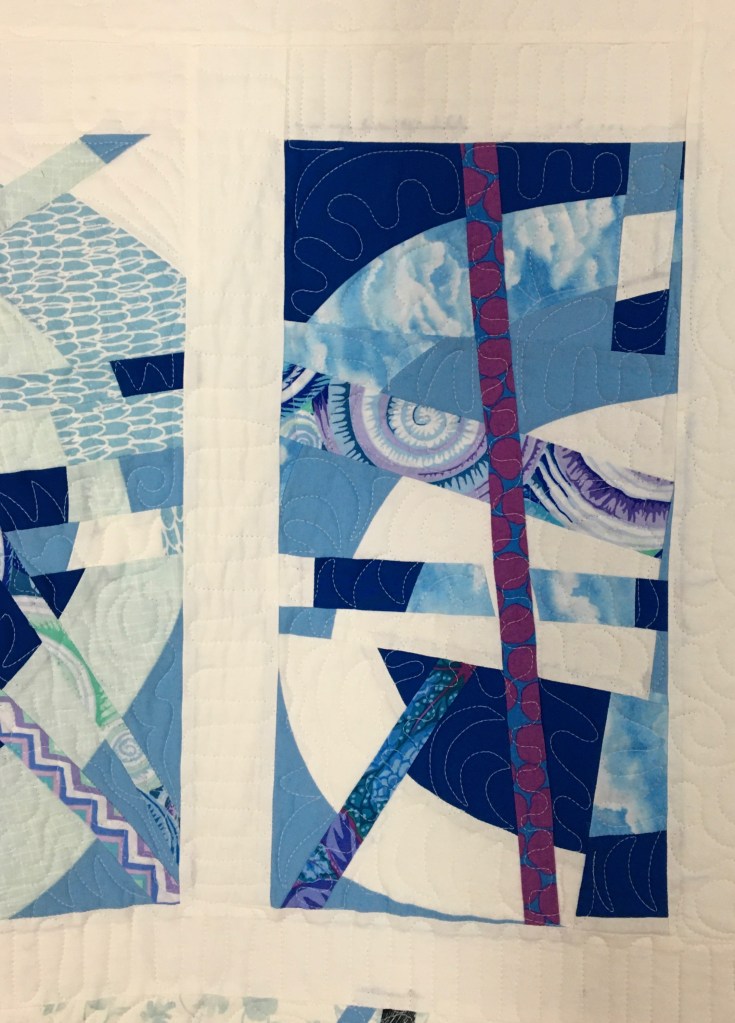
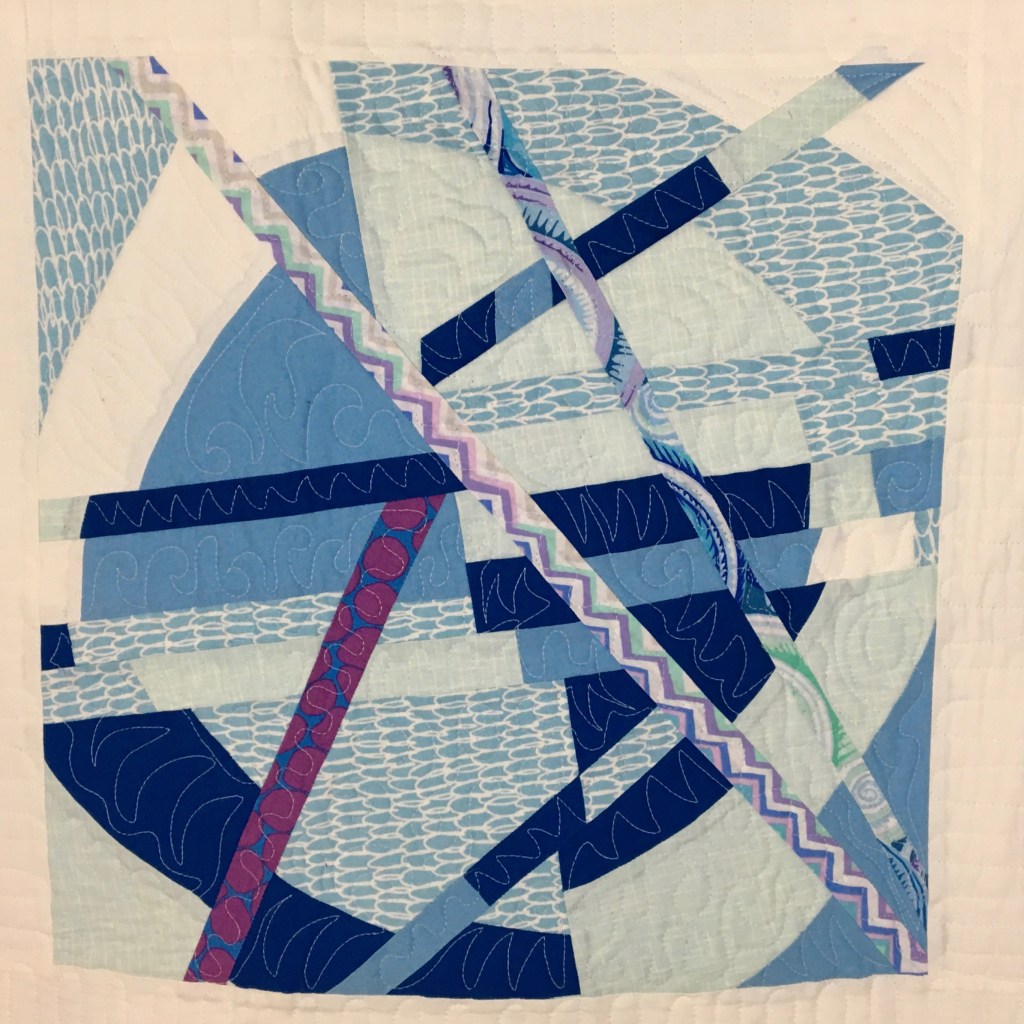
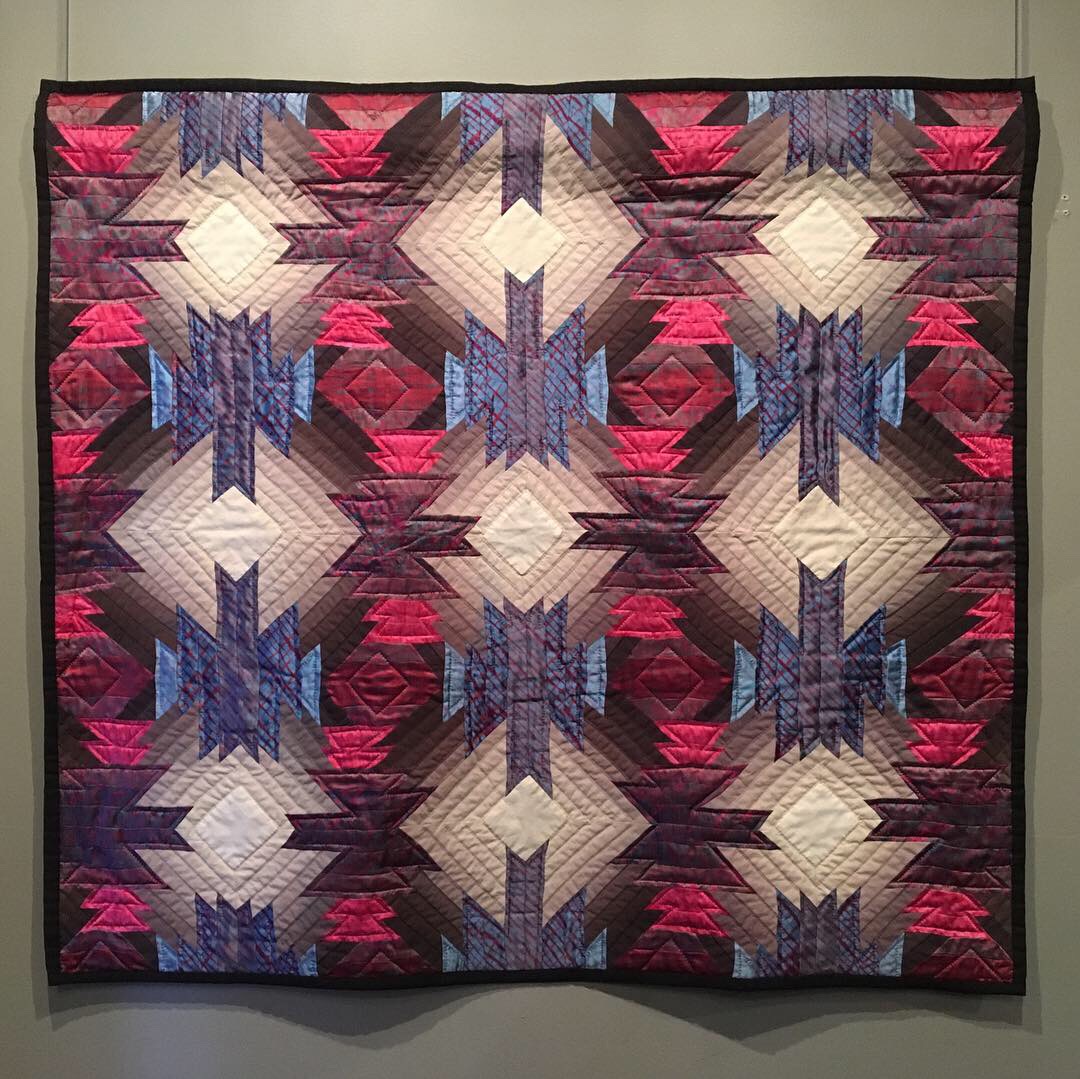
Storm, 2020
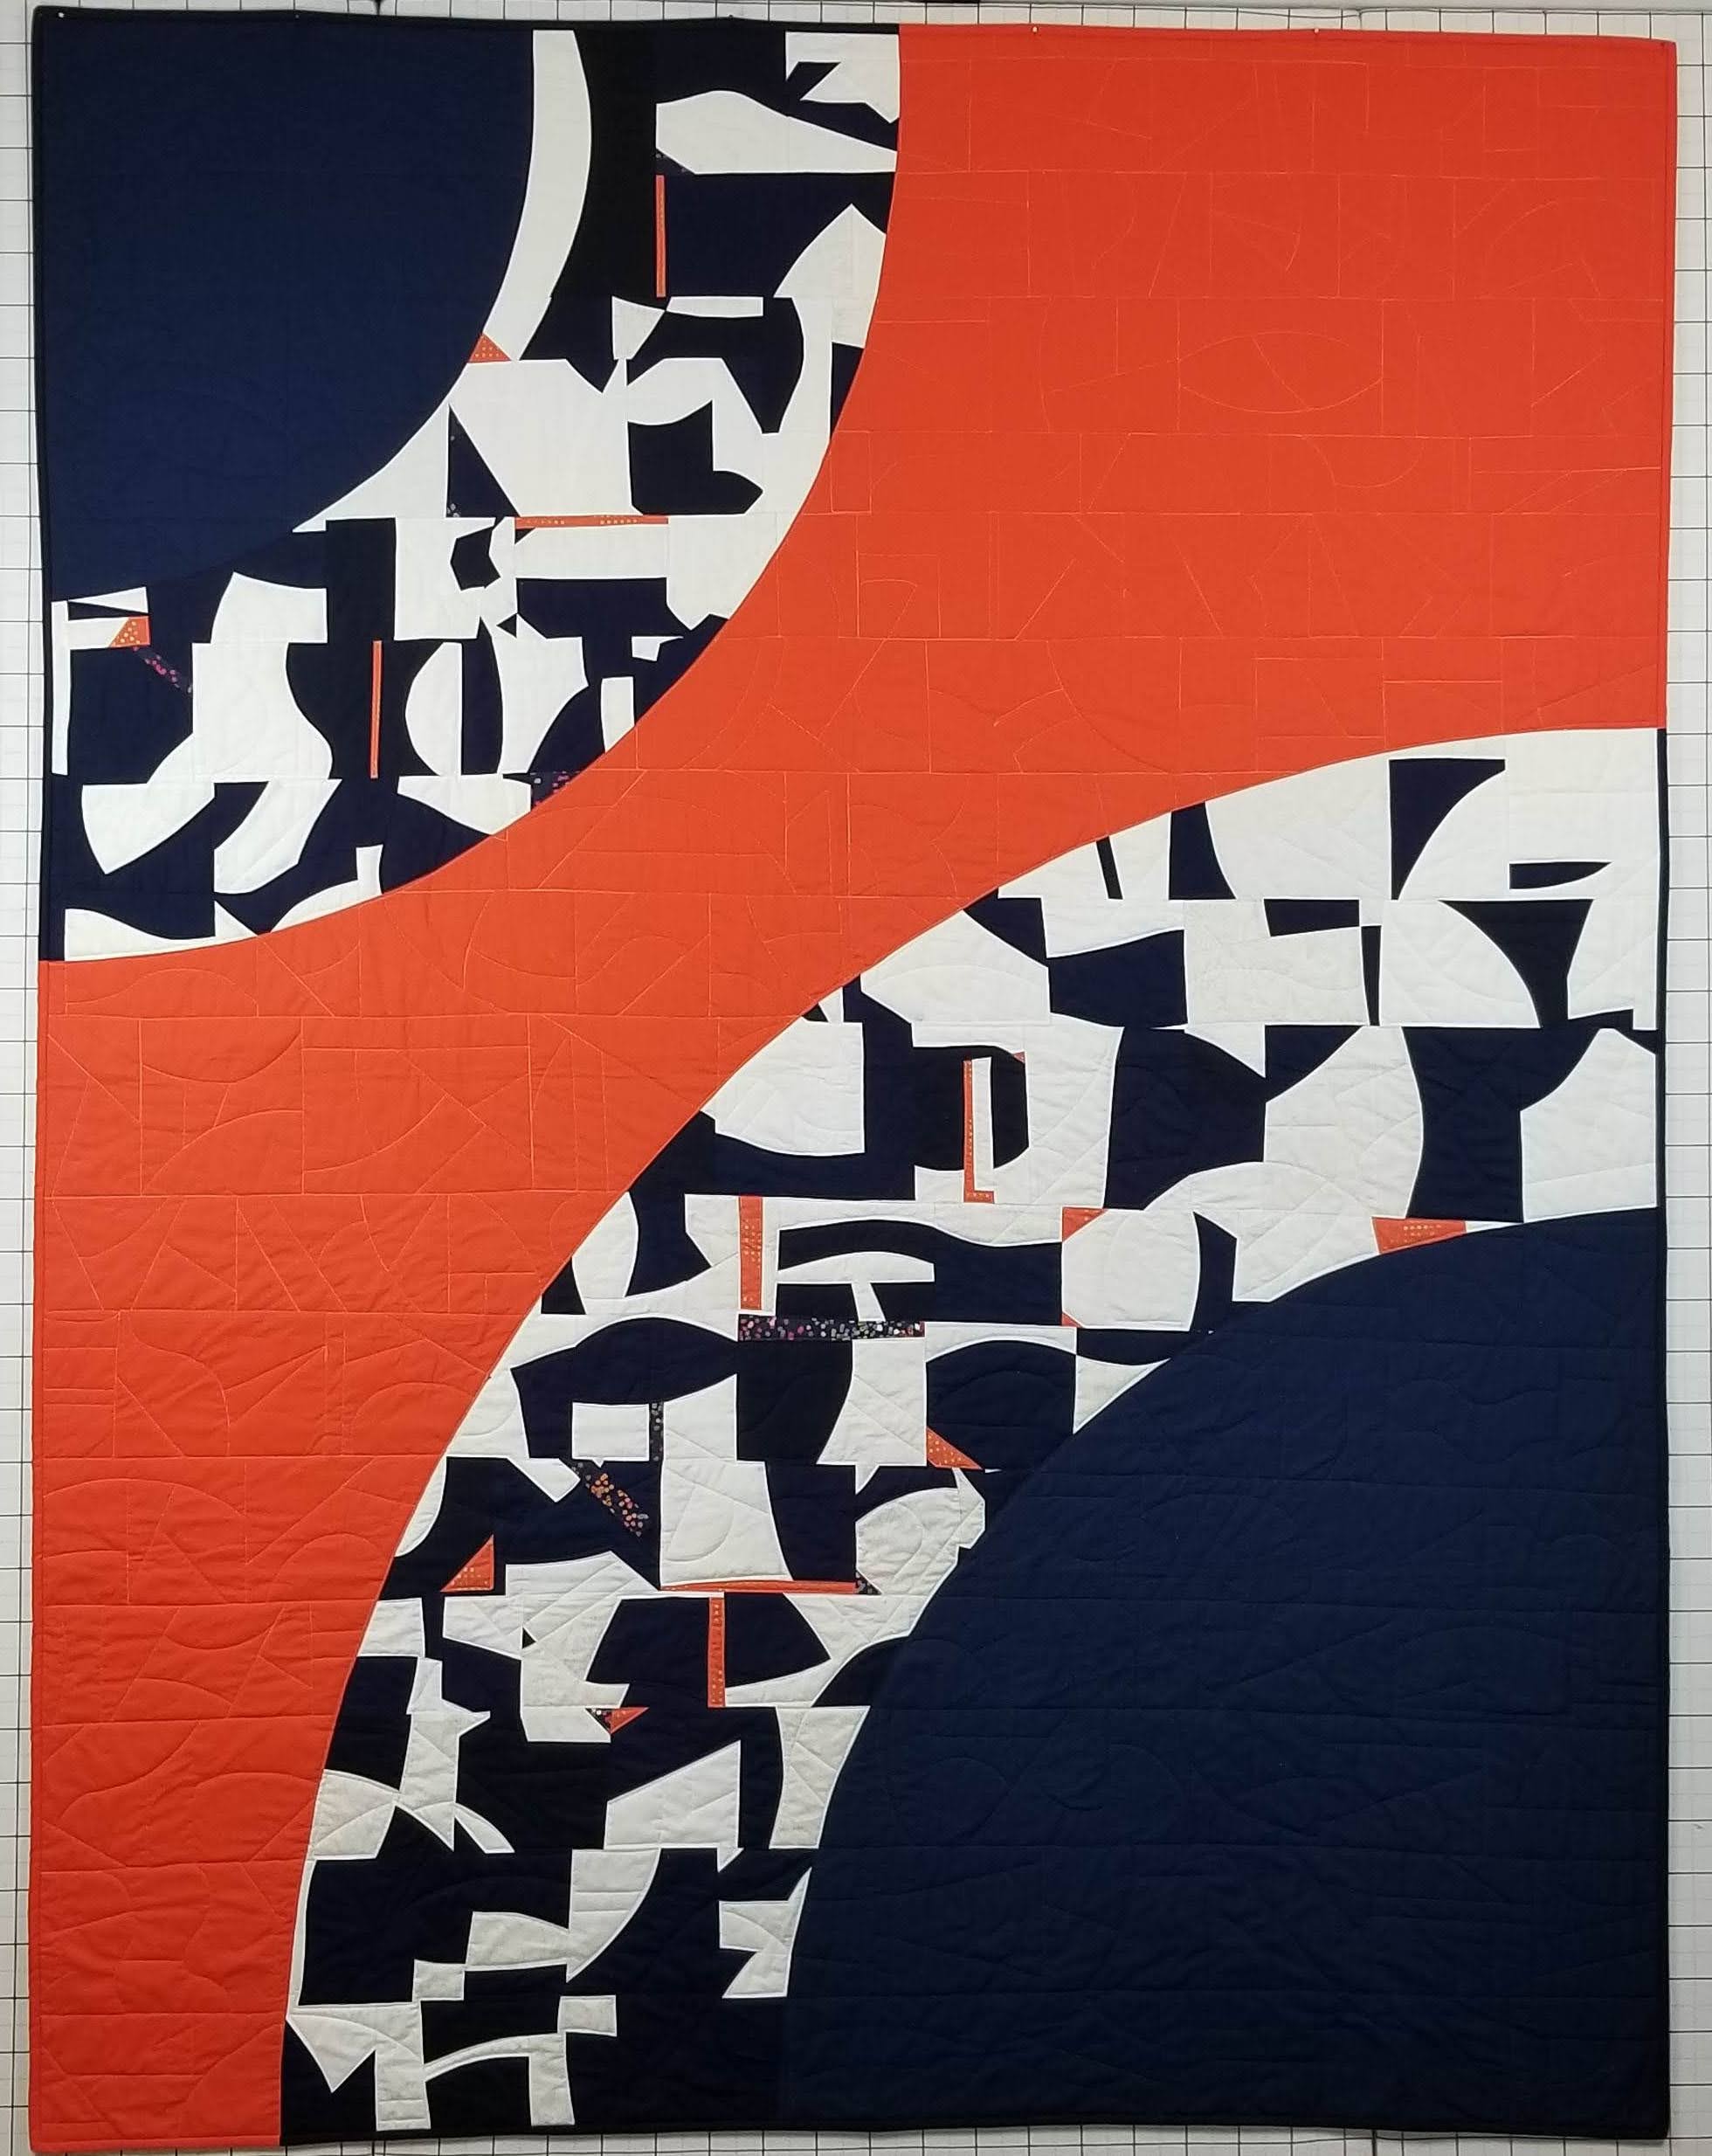
During the pandemic I found myself trying a virtual workshop. I took Mid Century Modern with Carole Lyles Shaw. This is improv to the max. You start out with a big pieced circle and then you just keep slicing, relocating and adding. I posted my progress online and Carole commented that I should keep slicing! At some point I was satisfied with my slicing and this is the stormy result.
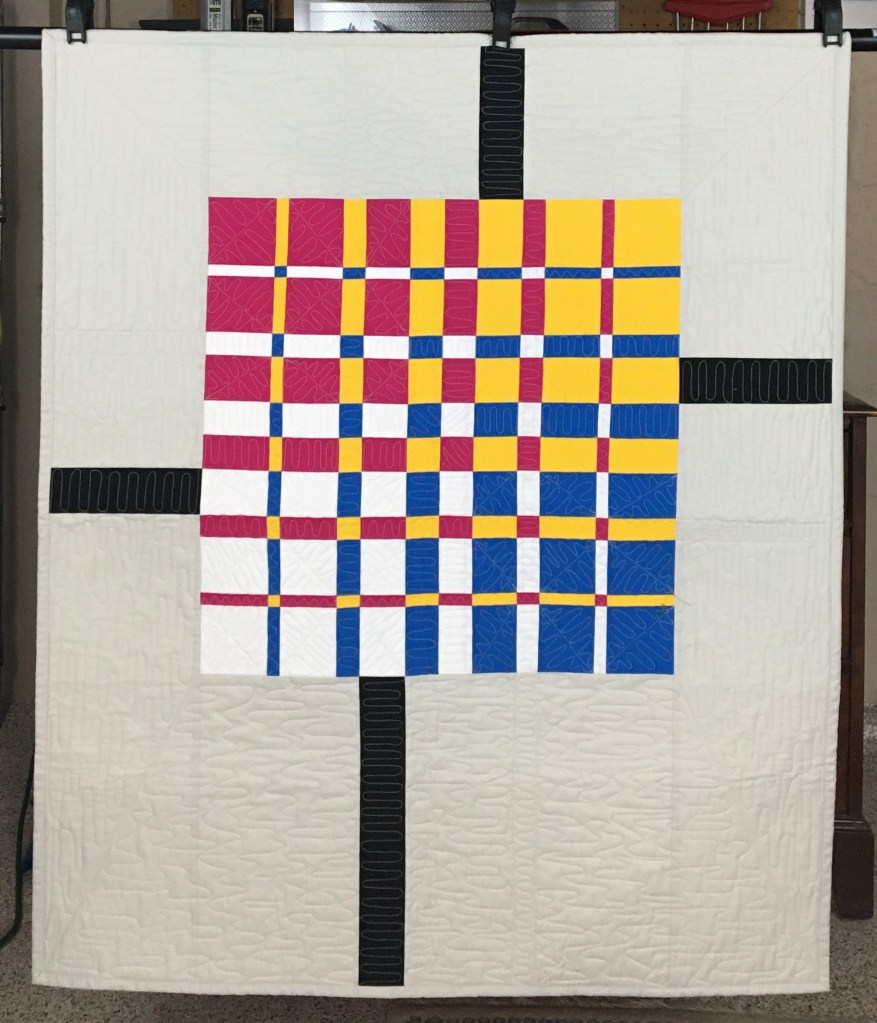
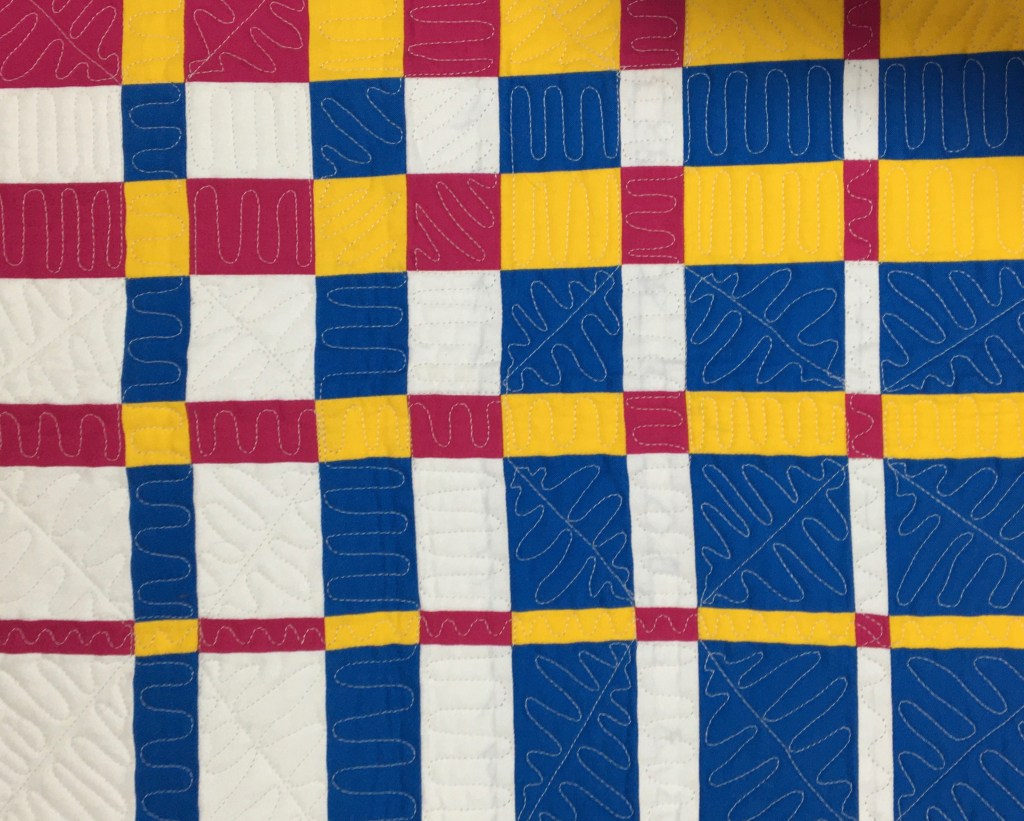
Process Color, 2019
I wanted to work with the four colors of ink that I am always feeding my printer to see how bold they might look together. I had been playing with the Ricky Tims Convergence Quilts style so I went from there and here is the result.
Hope, 2020
I am working with a group of ladies in the do.Good Stitches Hope circle of quilters. We are an online community working through Instagram and Flickr to design and share quilt blocks. I designed this quilt, collected the blocks and put this quilt together. It is always amazing how the quilts come together with just a little bit of prompting for fabric selection. The rainbow of colors gives us all hope for less cloudy days ahead.
The following contributed blocks to this quilt: Sherryl Barnum, Jeanine Conner, Angie Fitzreiter, Heather Flegel, Cath Hall, Christie Kline, Suzy Lampman, Susan McKinney, Jennifer Mendola, Sarah Terry
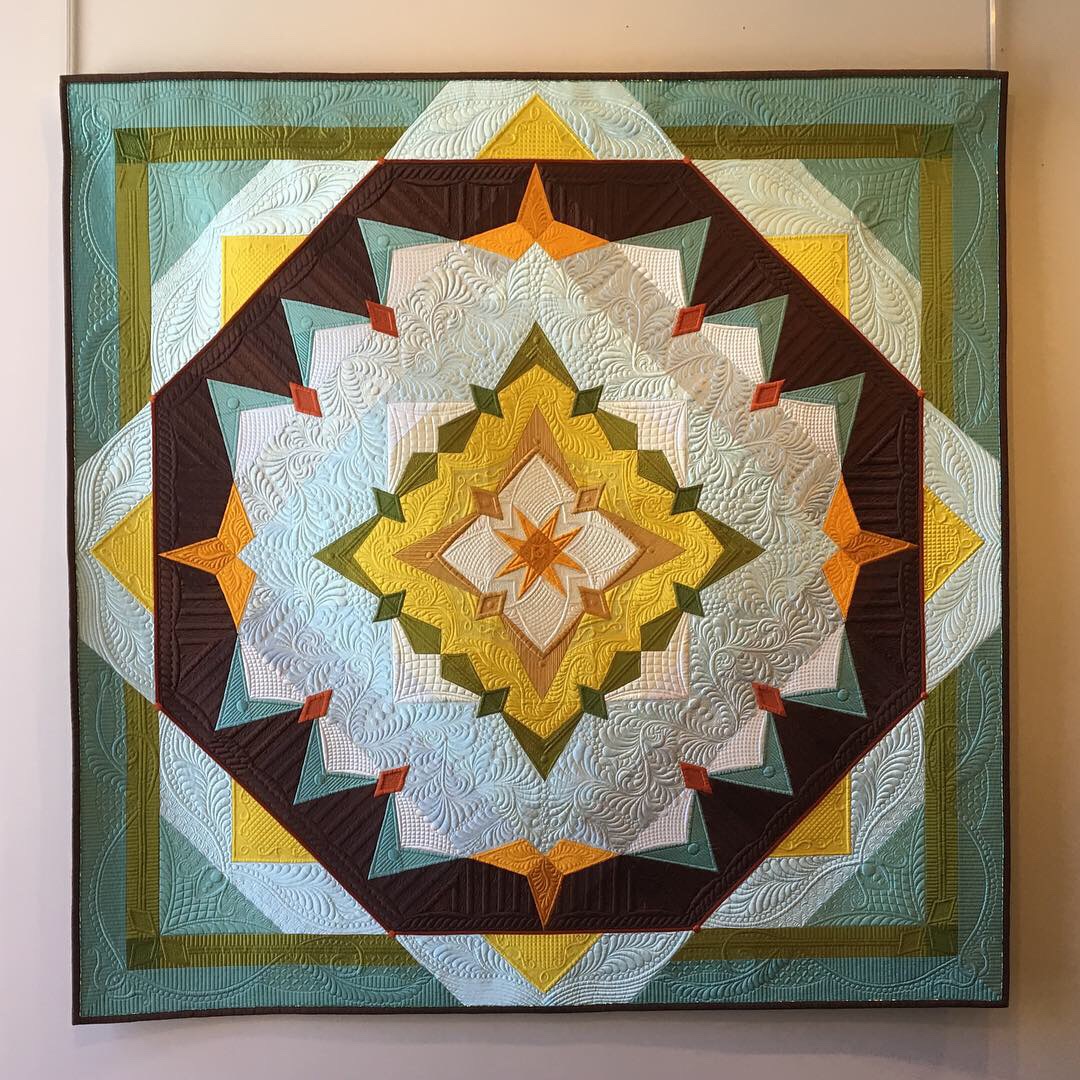
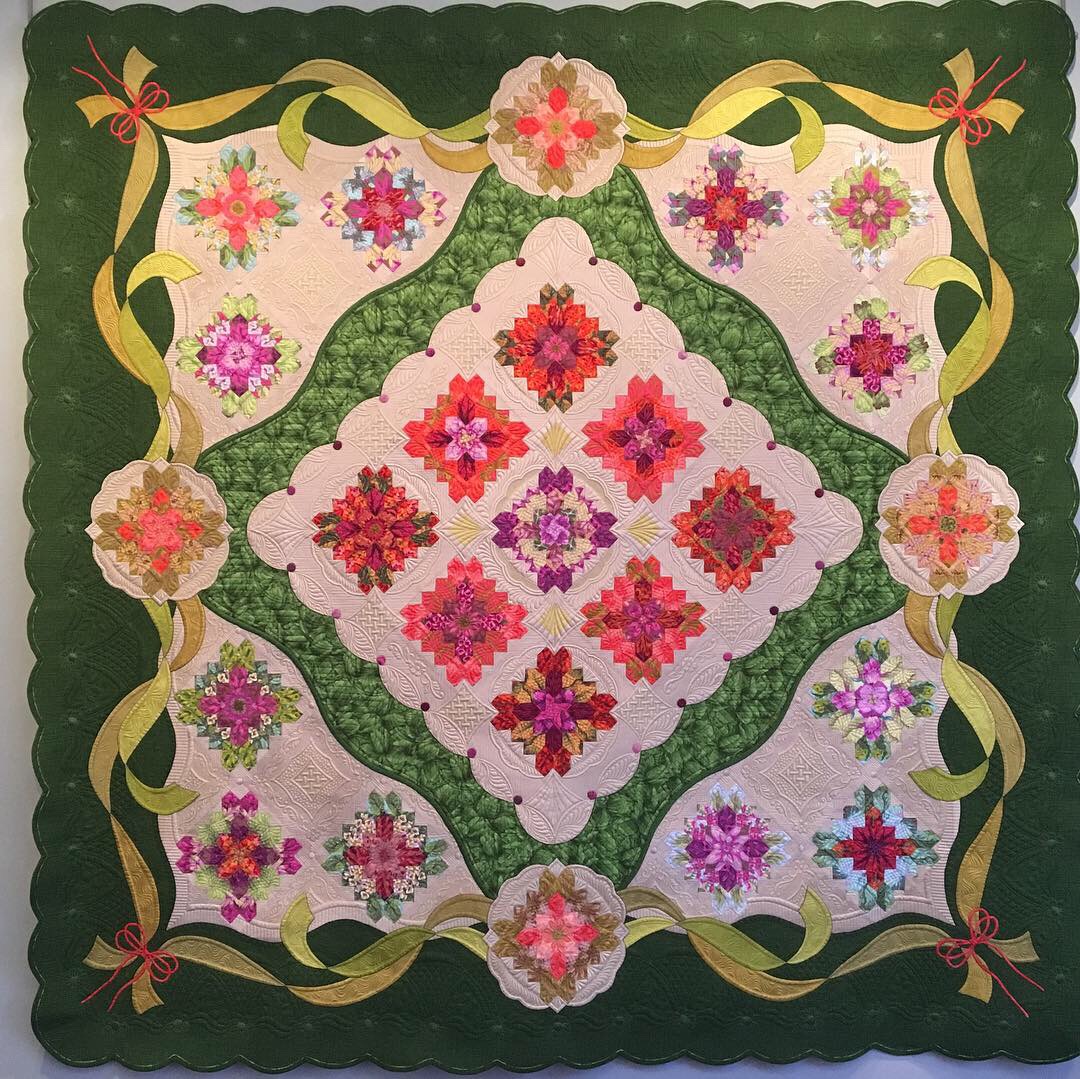
Garden Trellis, 2020
This is another one of my Stack and Wack quilts with a new more complicated block that makes the quilt look like a Garden Trellis. I have a pattern for this quilt and was scheduled to teach it at Quilters Common, but then suddenly everything changed. Hopefully I can get back to teaching classes later this year!
And here are two Group Quilts that the BMQG have put together:
“Orange You Glad We Made This Quilt?” and “Shattered” are group quilts created through distanced and virtual togetherness. The design process began with a group brainstorming in a park. Participants then made curvy starter-blocks using materials provided by the guild, followed by a virtual workshop where the starter-blocks were altered by random prompts. The improvised blocks were brought together at a backyard design session where two quilt designs emerged. Although the two quilts were made from improvisational blocks that were essentially the same, the resulting quilts were very different. The process was truly collaborative and fun.
Orange You Glad We Made This Quilt?, 2020, Long Arm Quilting by Rebecca Loren
Shattered, 2020, Long Arm Quilting by Patrice Denault
I had a comment on my Jane Quilt, which I am now calling “Thank You Jane”, because I learned so much about quilting during my Jane Journey.
The comment was regarding the sashing on the quilt. The sashing was inspired by Tula Pink’s City Sampler Book, as explained in a previous post.
I have come up with some drawings which should help to explain the dimensions I used for the Trellis Sashing. The first thing I did was add a 1/2″ border around each Jane Block to increase the size from 4.5″ to 5.5″ finished. From there I prepared the sashing as shown in the drawings. The dimensions shown are the unfinished sizes. Cut pieces the sizes shown.
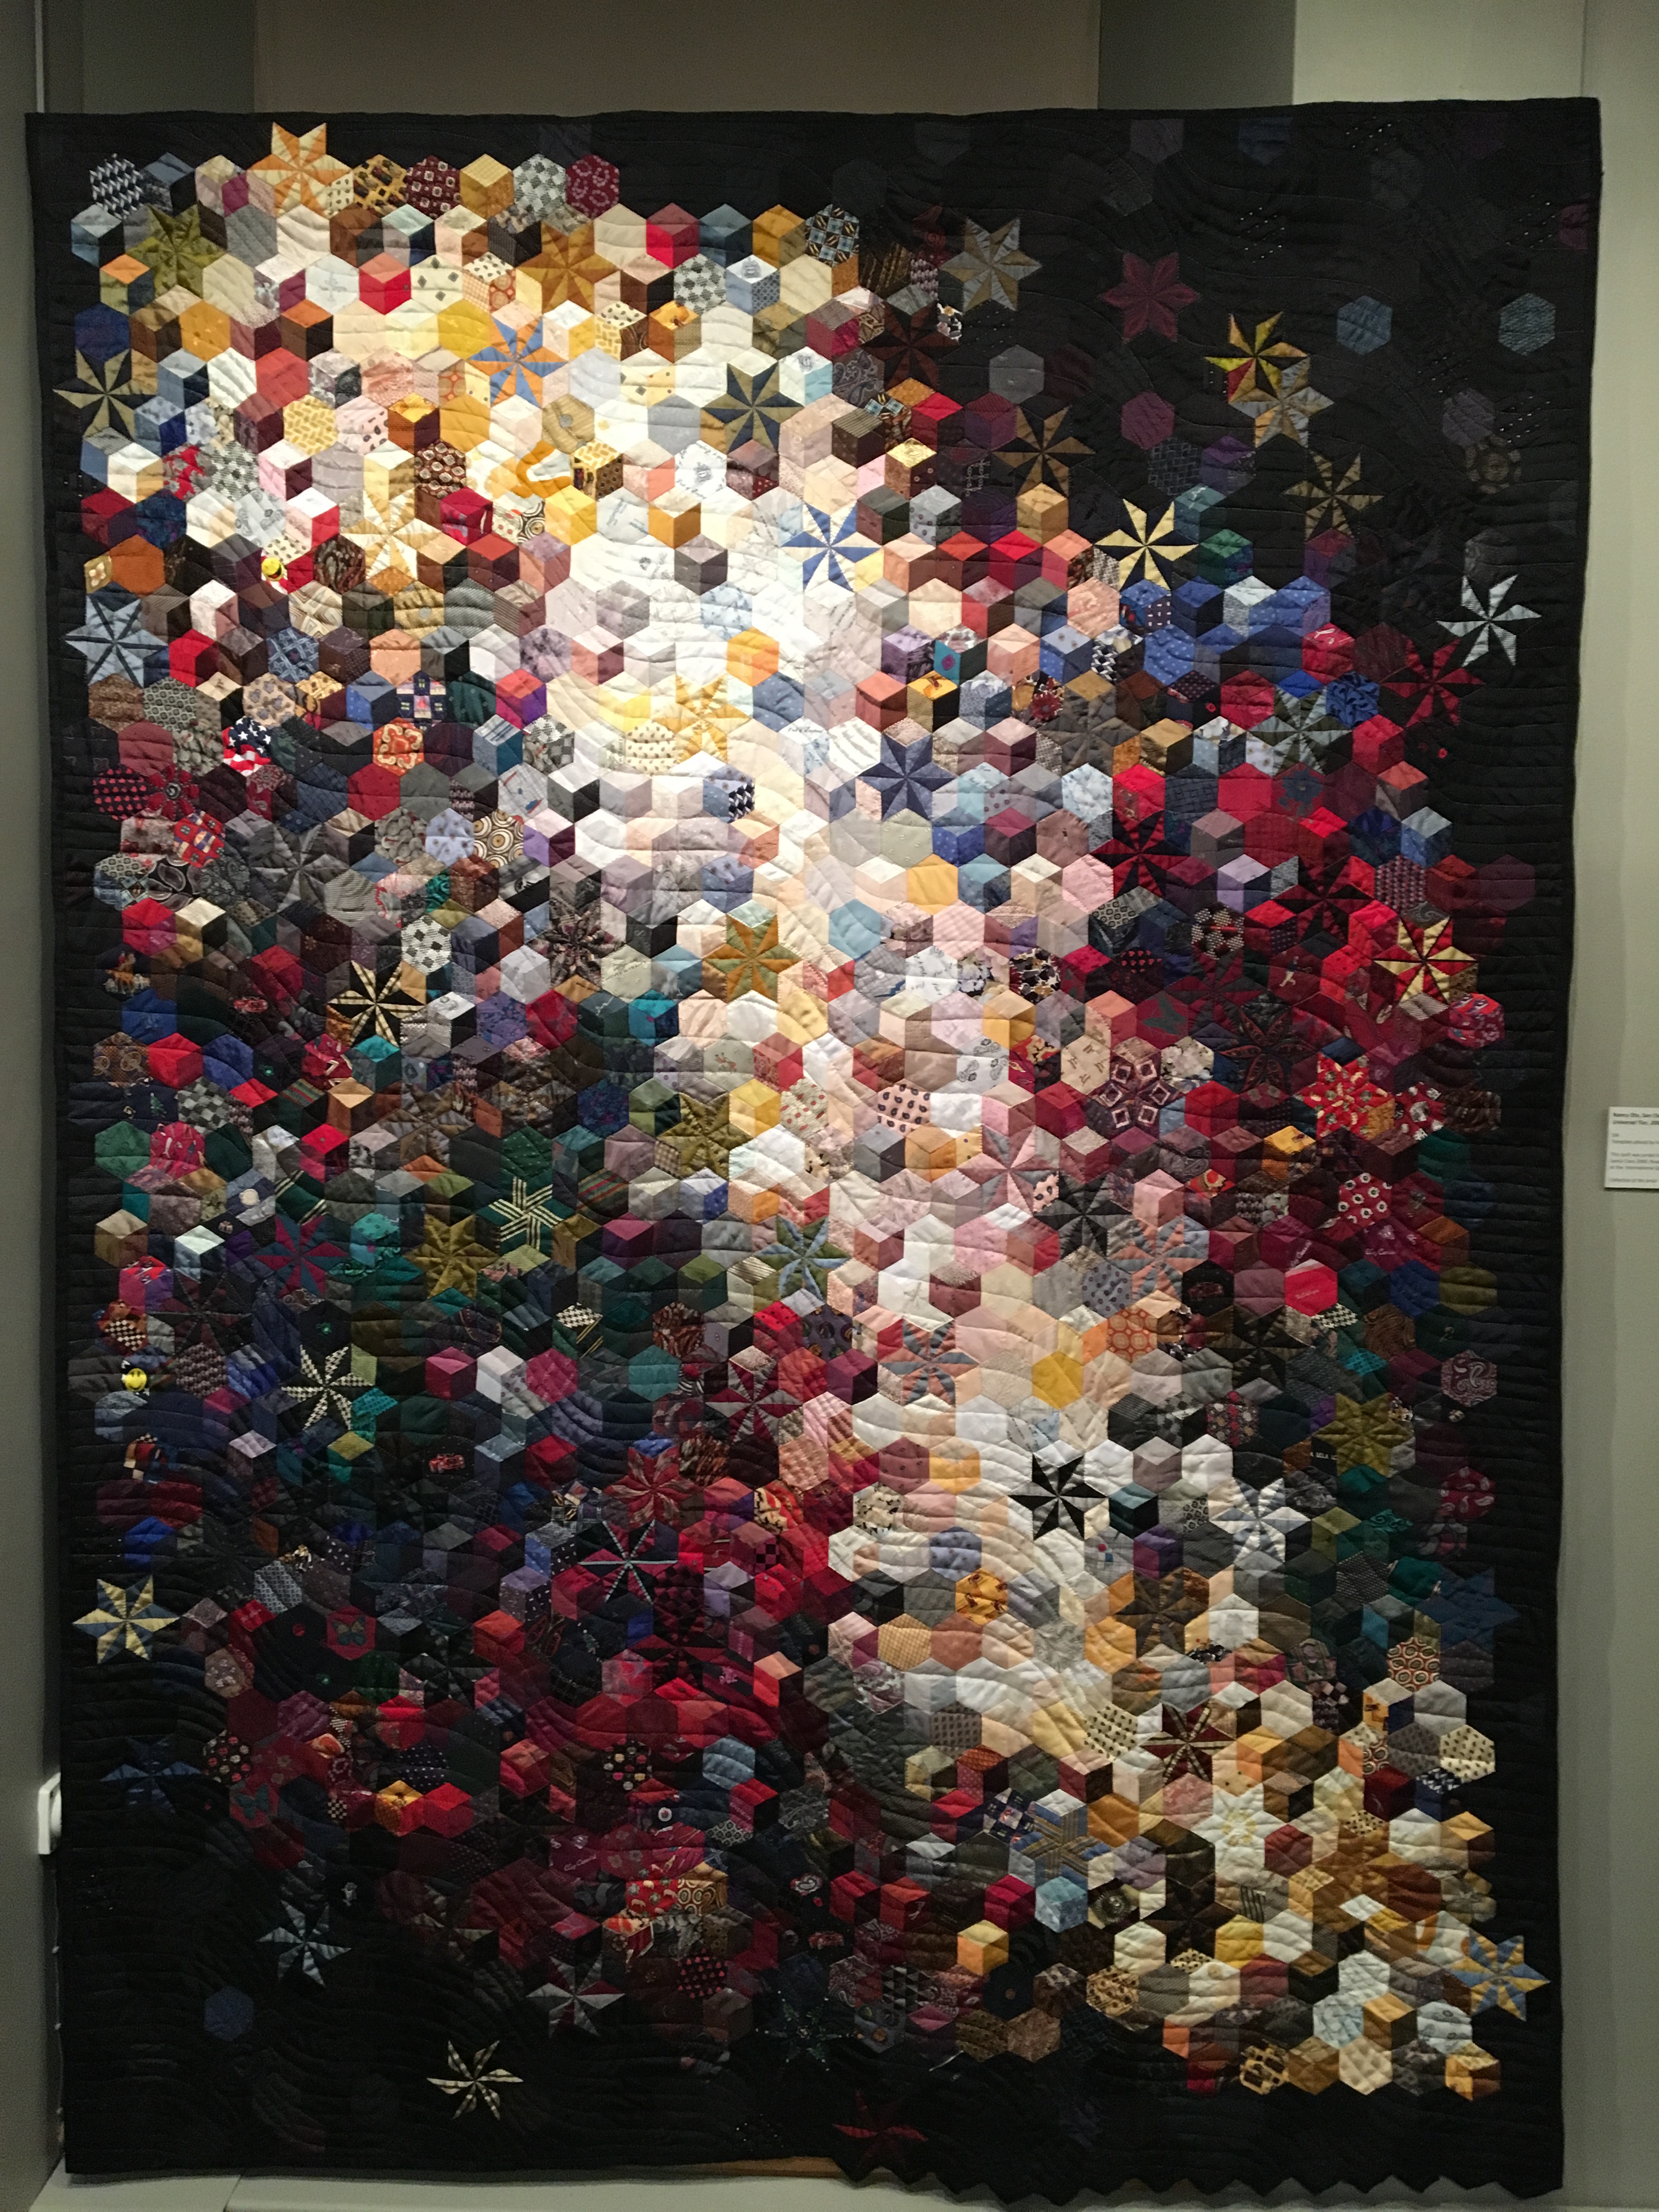
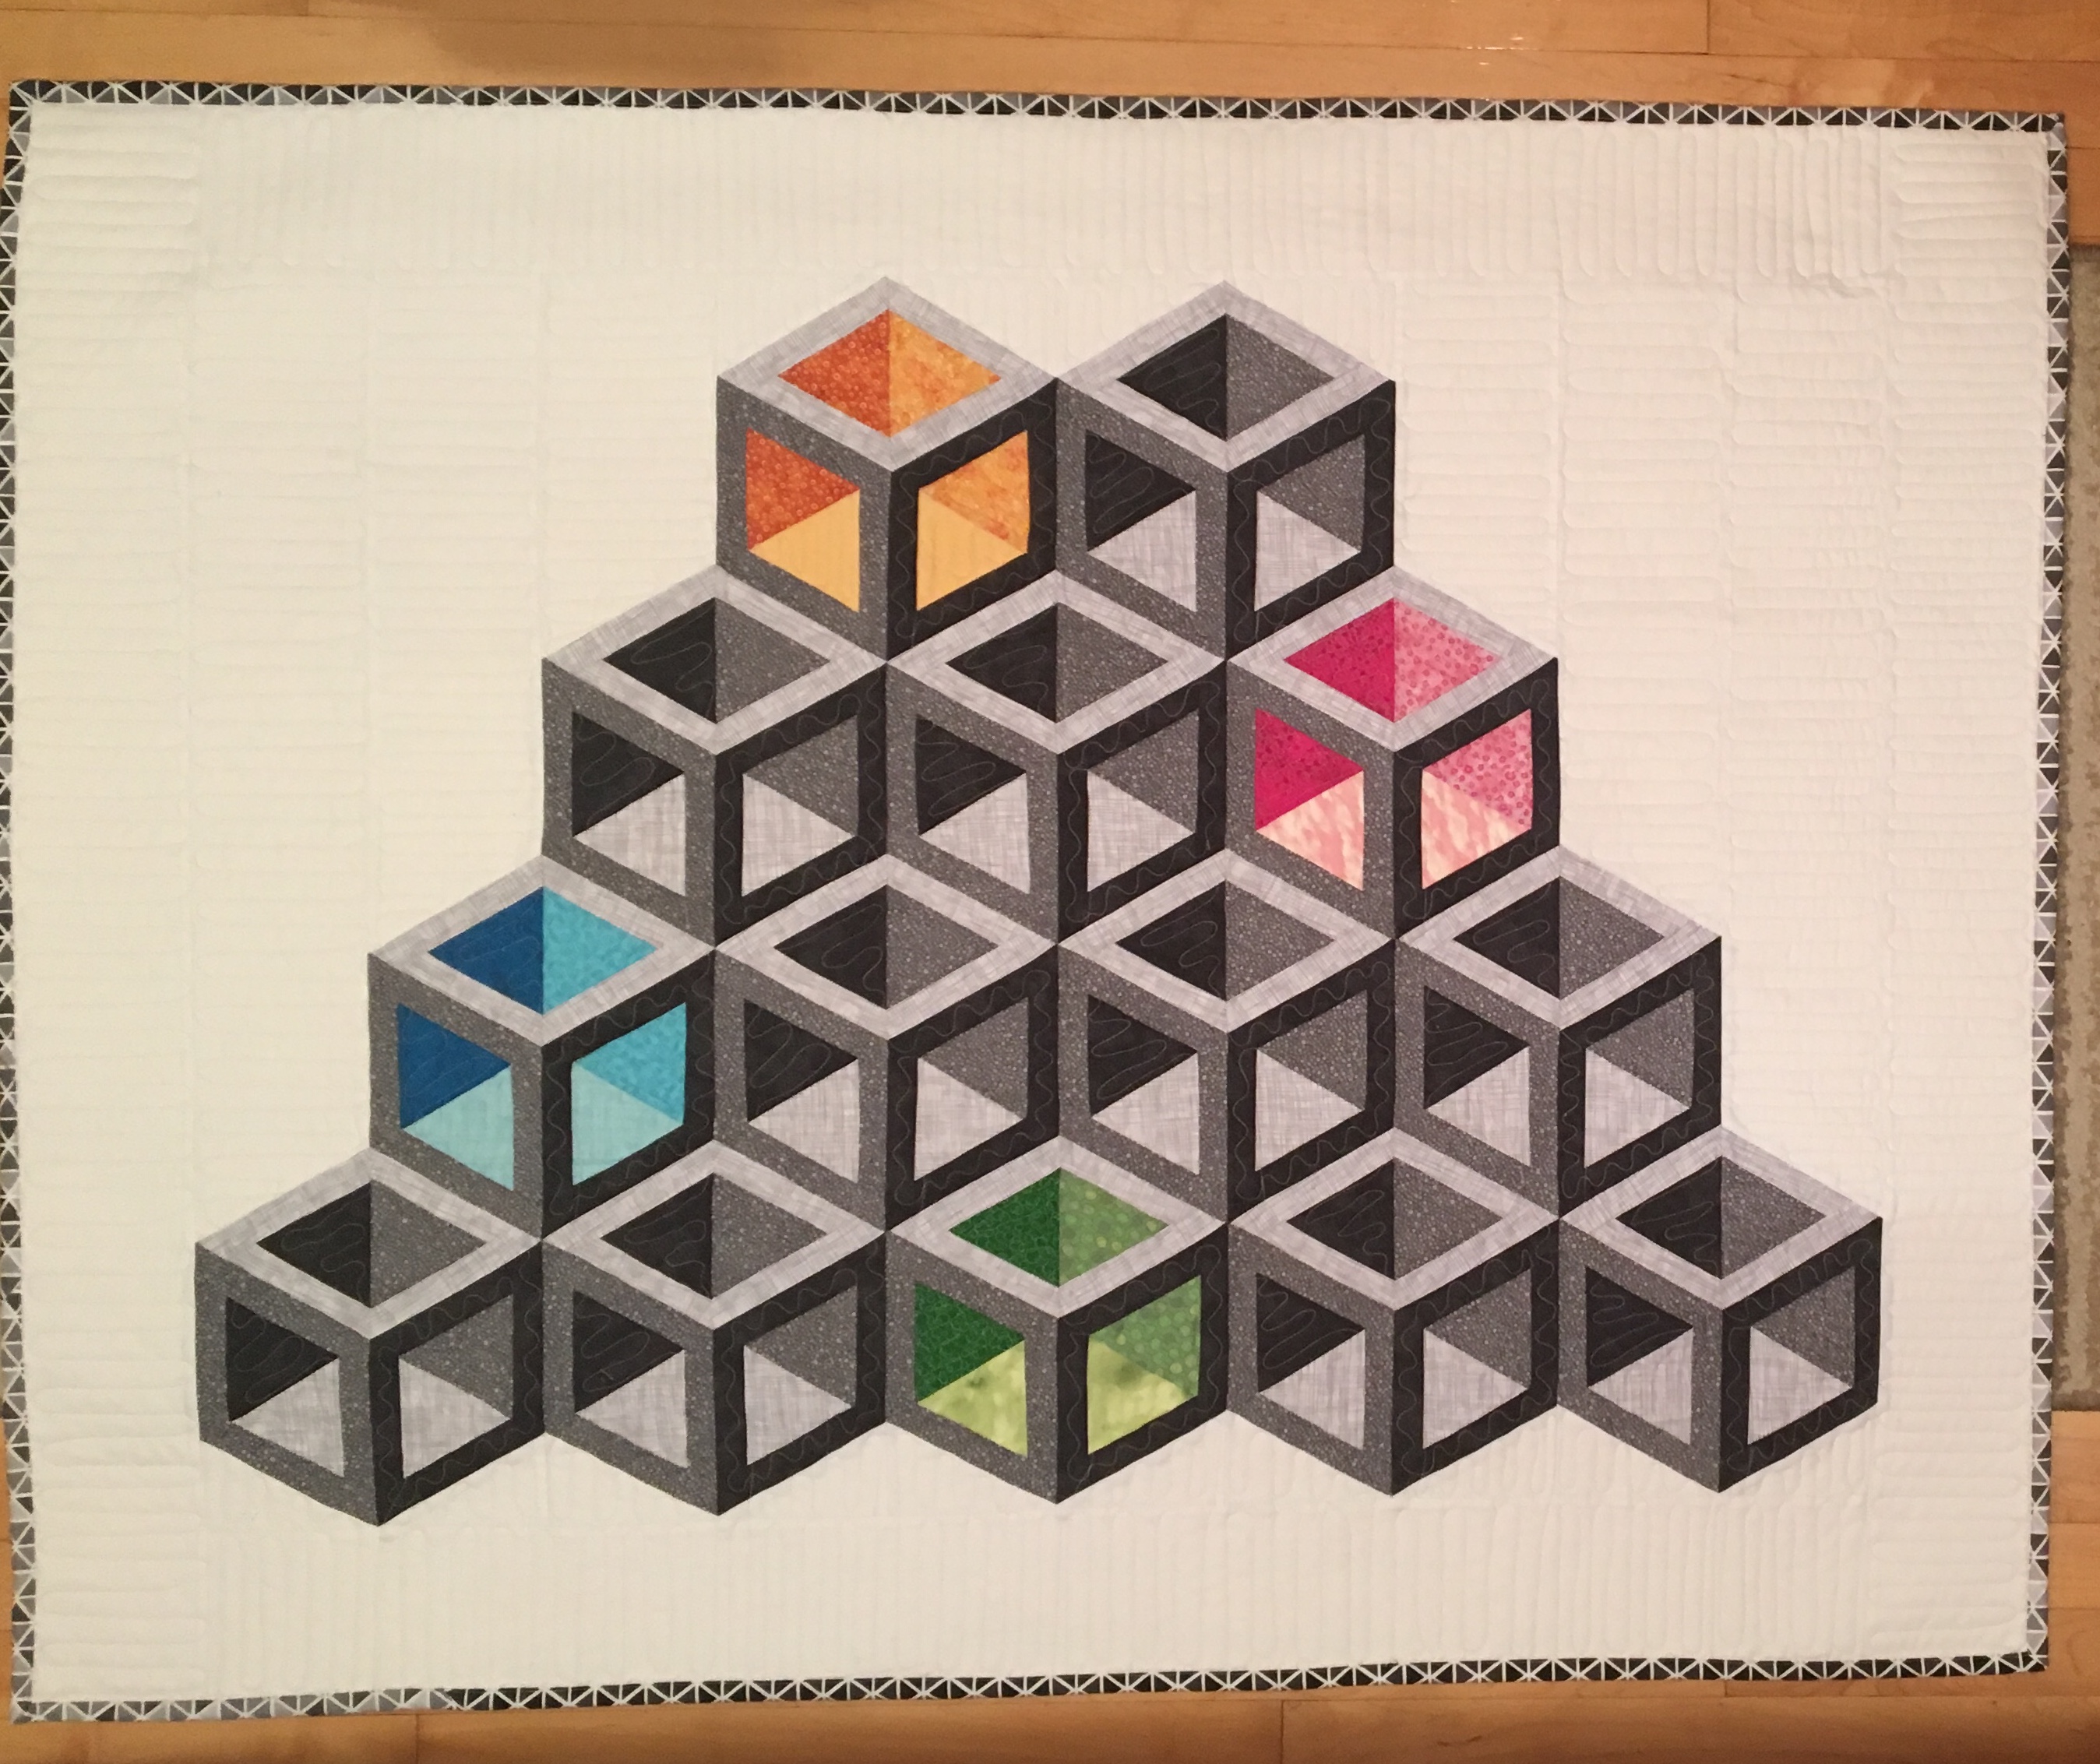
Don’t miss the Silk Exhibit at the New England Quilt Museum in Lowell. My Cube Life Quilt is on display with some really extraordinary quilts by award winning quilters.
I am honored to have been given the opportunity to exhibit my Cube Life Quilt along with these fantastic quilts.
This is the second time I have made this quilt. Here is the first one made with cotton quilting fabrics.
Pam Weeks saw my cotton version and loved it. She said if I made the quilt in silk then she could include it in the exhibit. This was last year some time. I went about collecting silk for the quilt and finished it in time for the show.
This quilt went together more easily than you might think. It is pieced in rows, or in this case columns, of paper pieced triangles and diamonds. The colored cubes are shimmering silk; the gray cubes are a more subdued linen. The background fabric is silk noil.
I became intrigued with three dimensional blocks after seeing quilts featured in Jeffrey Gutcheon’s Diamond Patchwork book. The tumbling blocks become more of a cubic space when you add sashing to each diamond and when you consider the color value and placement of the fabrics that you use.
We all spend a lot of time in cubic spaces. Many of us have spent our careers working in an office cube. Why not add a splash of color to your cube? And, silk makes it so much more luxurious!
Ricky Tims published his Convergence Quilts book in 2003. I was brainstorming with Jolene at Quilters Common trying to come up with a good idea for a workshop. She mentioned that she had seen some Harmonic Convergence quilts on the internet, perhaps Pinterest? So of course I did some researching as soon as I got home and discovered his book. I checked a copy of the book out from the incredible New England Quilt Museum research and lending library. (I volunteer there on Thursdays). The book has a lot of interesting projects to try, but the trick is finding the right fabric combinations. I found his original Harmonic Convergence project the easiest to work with. In fact I found it so easy that I could hardly stop picking out fabrics and making them. It is fun and easy to put these stunning little quilts together. Here are the ones I have put together (so far!)
Here is a pictorial overview of the process:
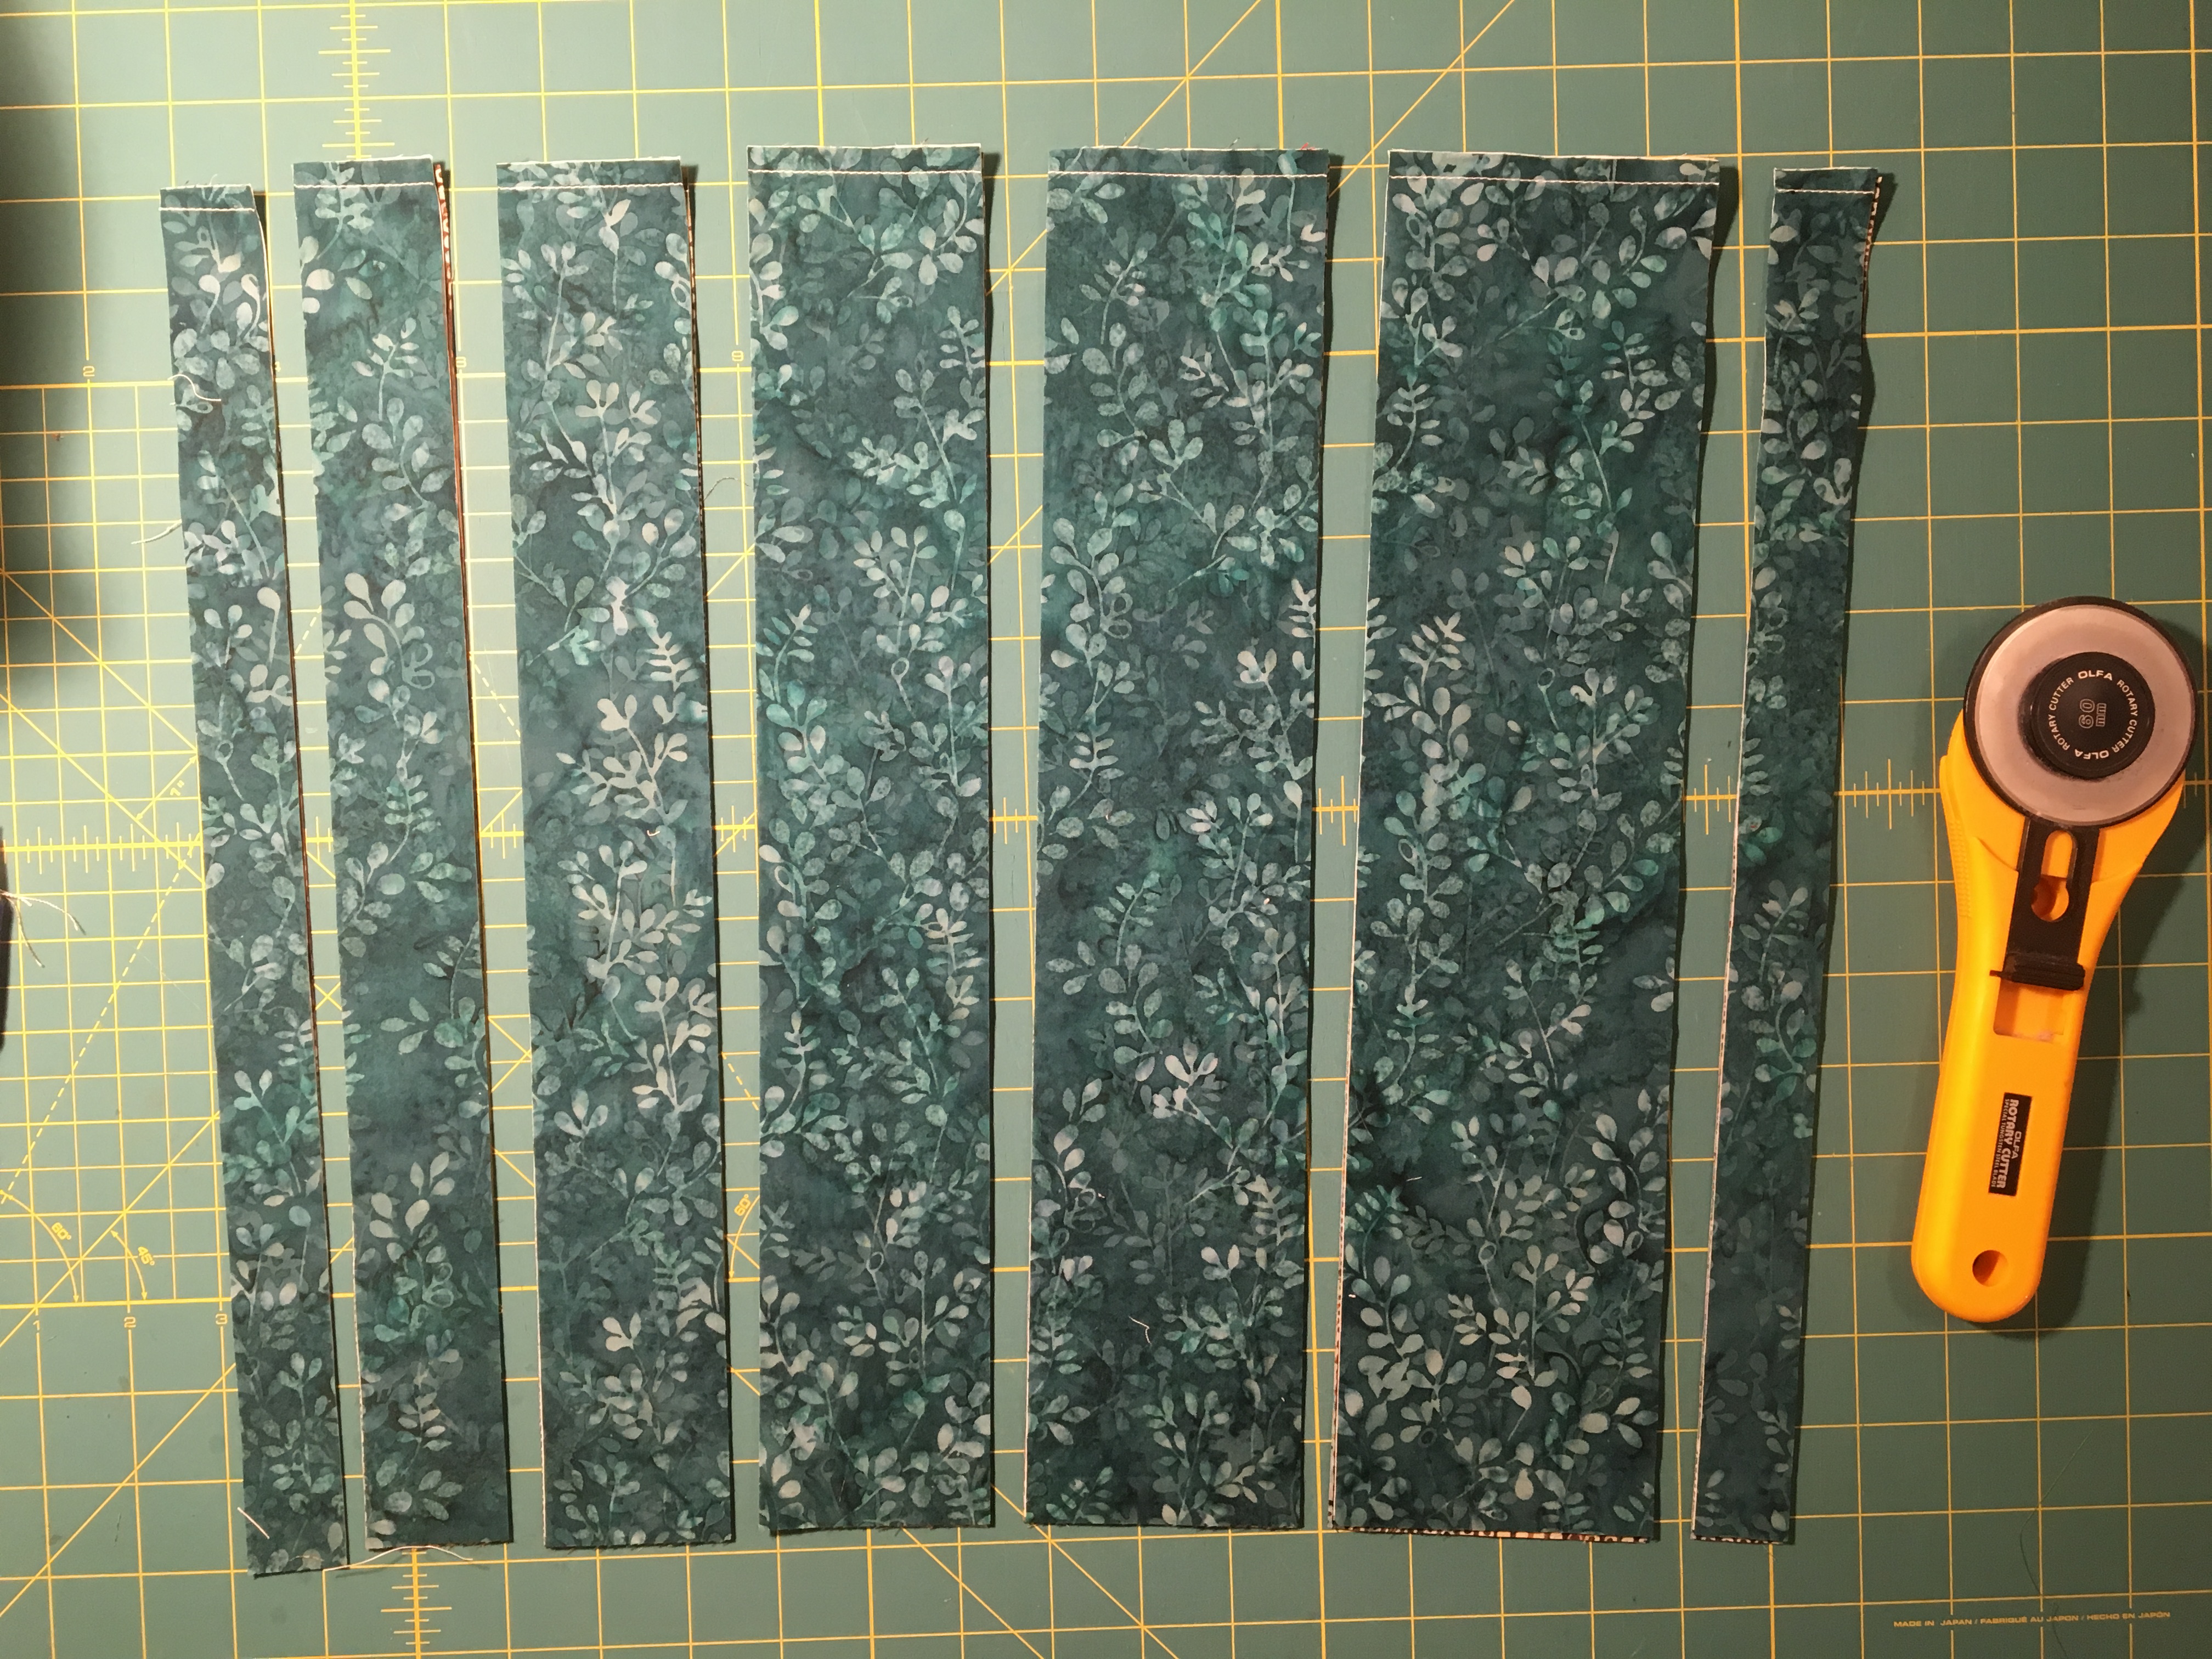
Start with four 16″ squares. Sew them together is pairs, layer the four squares and then cut strips increasing in size by half an inch from 1″ to 3 1/2″. For the quilt in the photos there was enough fabric left over, so I cut an extra 1″ strip and used it as a border.
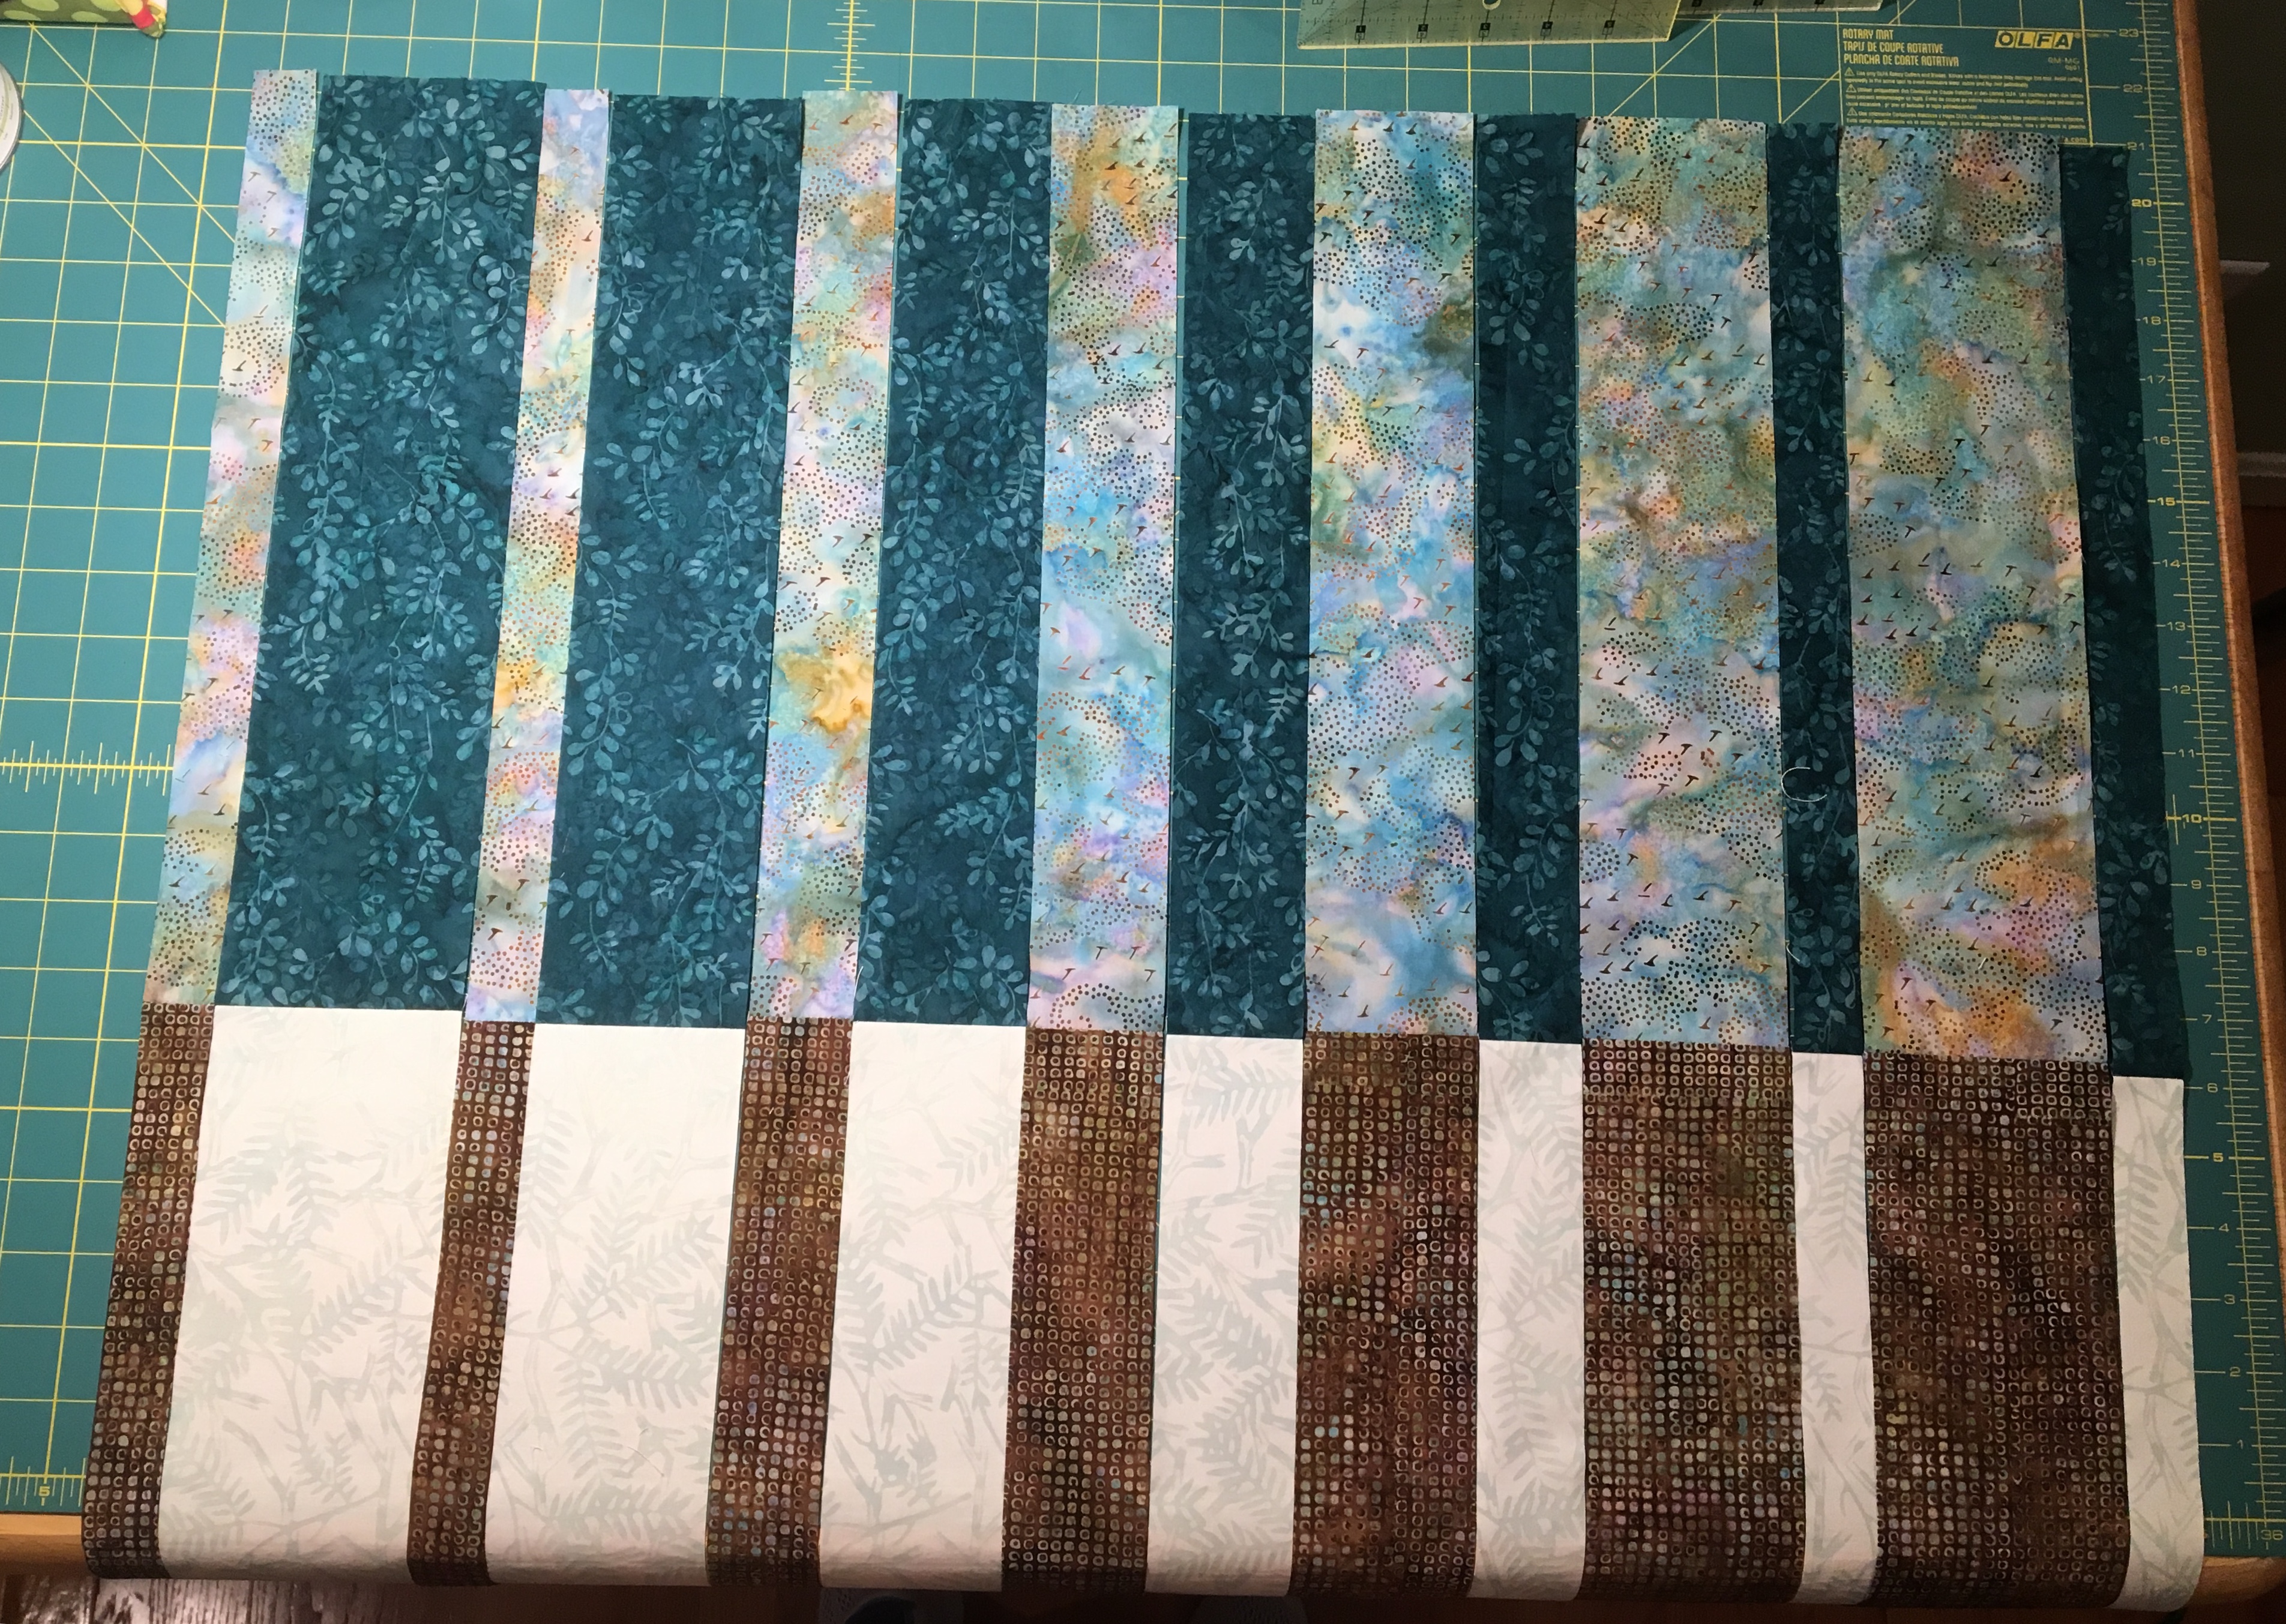
Open up the strips and then rearrange them as shown here (click to zoom in on any of these photos).
Looking at the photos of my finished quilt tops above, I am going to point out that on my turquoise and red quilt the strips are not arranged correctly! Can you see what I did wrong? Does it matter???
Once the strips are arranged CORRECTLY, sew them all together. When I was pressing the seams, I spun the seams so that half of the seam was pressed to one side and the other to the opposite side. Trust me, do this and it will be much easier to sew the second go round of strips together, because everything will nest together nicely and increase your accuracy. If you want these to end up pressed to the dark side then remember to press to the light side when you are first sewing your squares together in pairs …. I did not do this in the example … live and learn!
Once the strips are pressed, rotate the fabric panel, and cut strips again increasing in size from 1″ to 3 1/2″, plus the extra 1″ strip if you are including the border,
Rearrange them and sew them together again to complete your Harmonic Convergence square.
I finished one of mine on point, two of the others with borders, and the bright solid colored one is finished with some modern asymmetrical negative space.
I am I the process of quilting these, and finding they are a great way to practice my free motion quilting.
I designed my modern convergence in Electric Quilt 8 and printed an outline of the quilt to draw out my quilt plan.
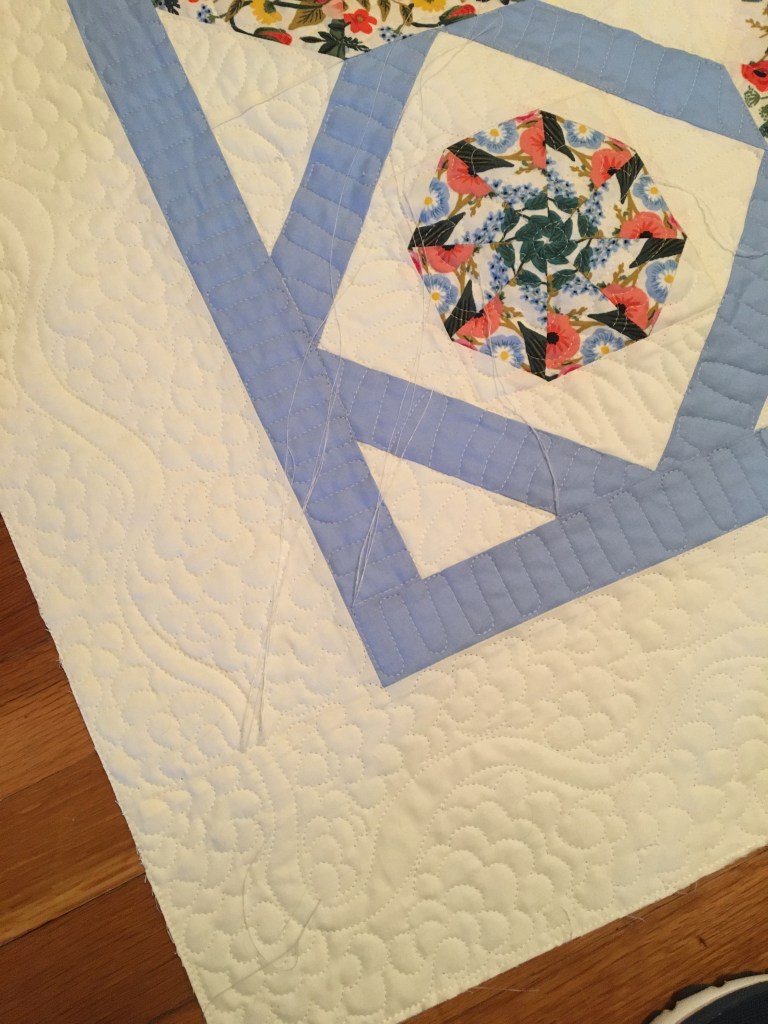
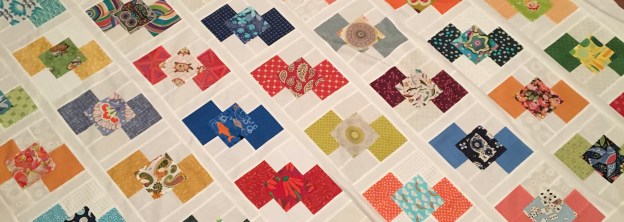
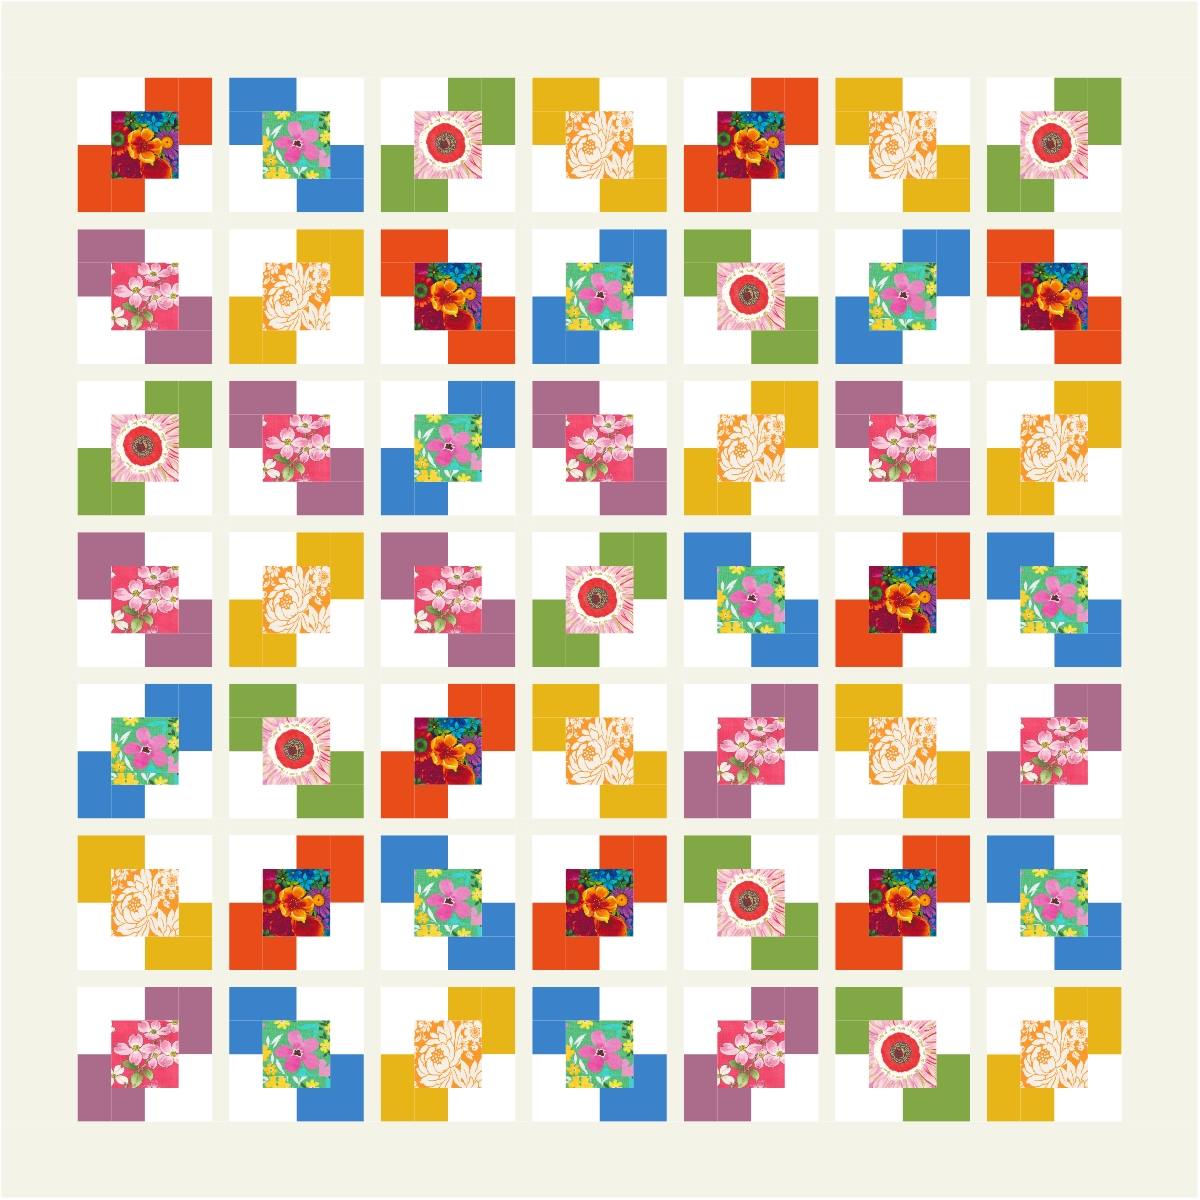
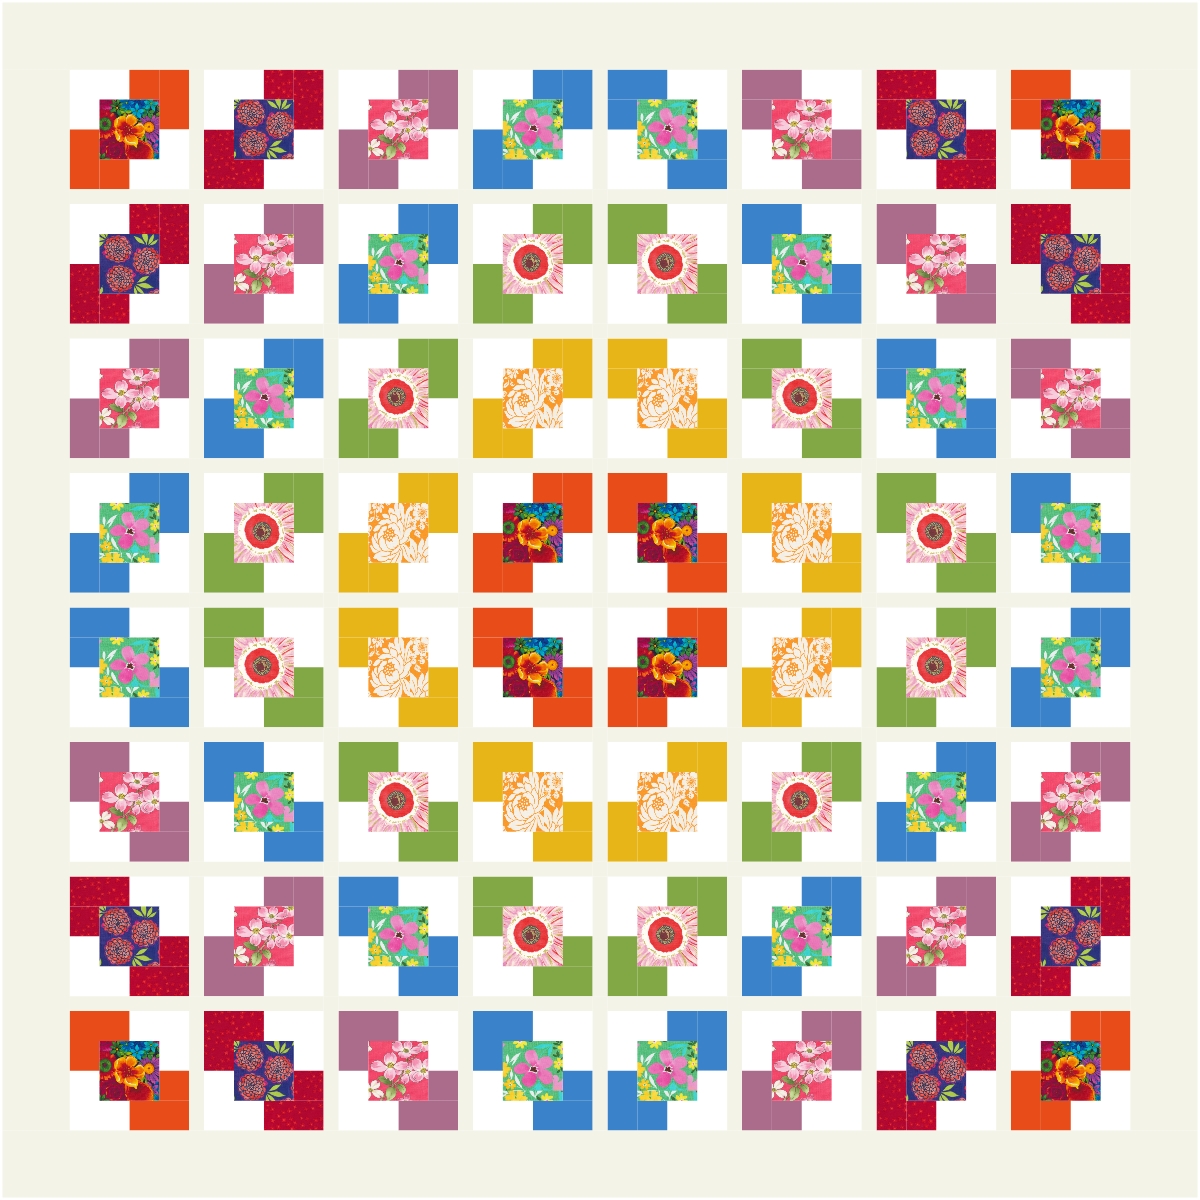
I recently joined the Hope Circle of Do Good Stitches which is a group of 10 people working together to make quilts to be given for charity and comfort. I joined just in time to be asked to design a quilt for the month of October. I came up with the idea to have everyone make Squares within Squares blocks. These blocks all have a center square which is perfect for fussy cutting novelty and floral fabrics. Here are instructions for making the block.
These blocks are 8″ finished squares. I used white background fabric(s), a different dark colored fabric for each block and a different coordinating novelty and/or
floral fabric for the center of each block.
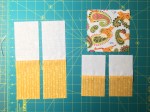
For each block cut an exactly 4 1/2” by at least 5” piece of
white fabric and one from one of the colored fabrics. Sew
together on the long edge. Press towards the colored fabric.
Cut 2 pieces from this that are 8 1/2” x 2 1/2”.
Then cut an exactly 2 1/2” by at least 5” piece of the same
white fabric and one from the same colored fabric as above.
Sew together on the long edge. Press towards the colored
fabric. Cut 2 pieces from this that are 4 1/2” x 2 1/2”
Fussy cut 1 square that is 4 1/2” x 4 1/2” from your novelty/floral
fabric.
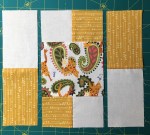
Sew together as indicated in the photos. Don’t worry about the direction
of your fussy cut square if directional! Press seams towards the
center block.
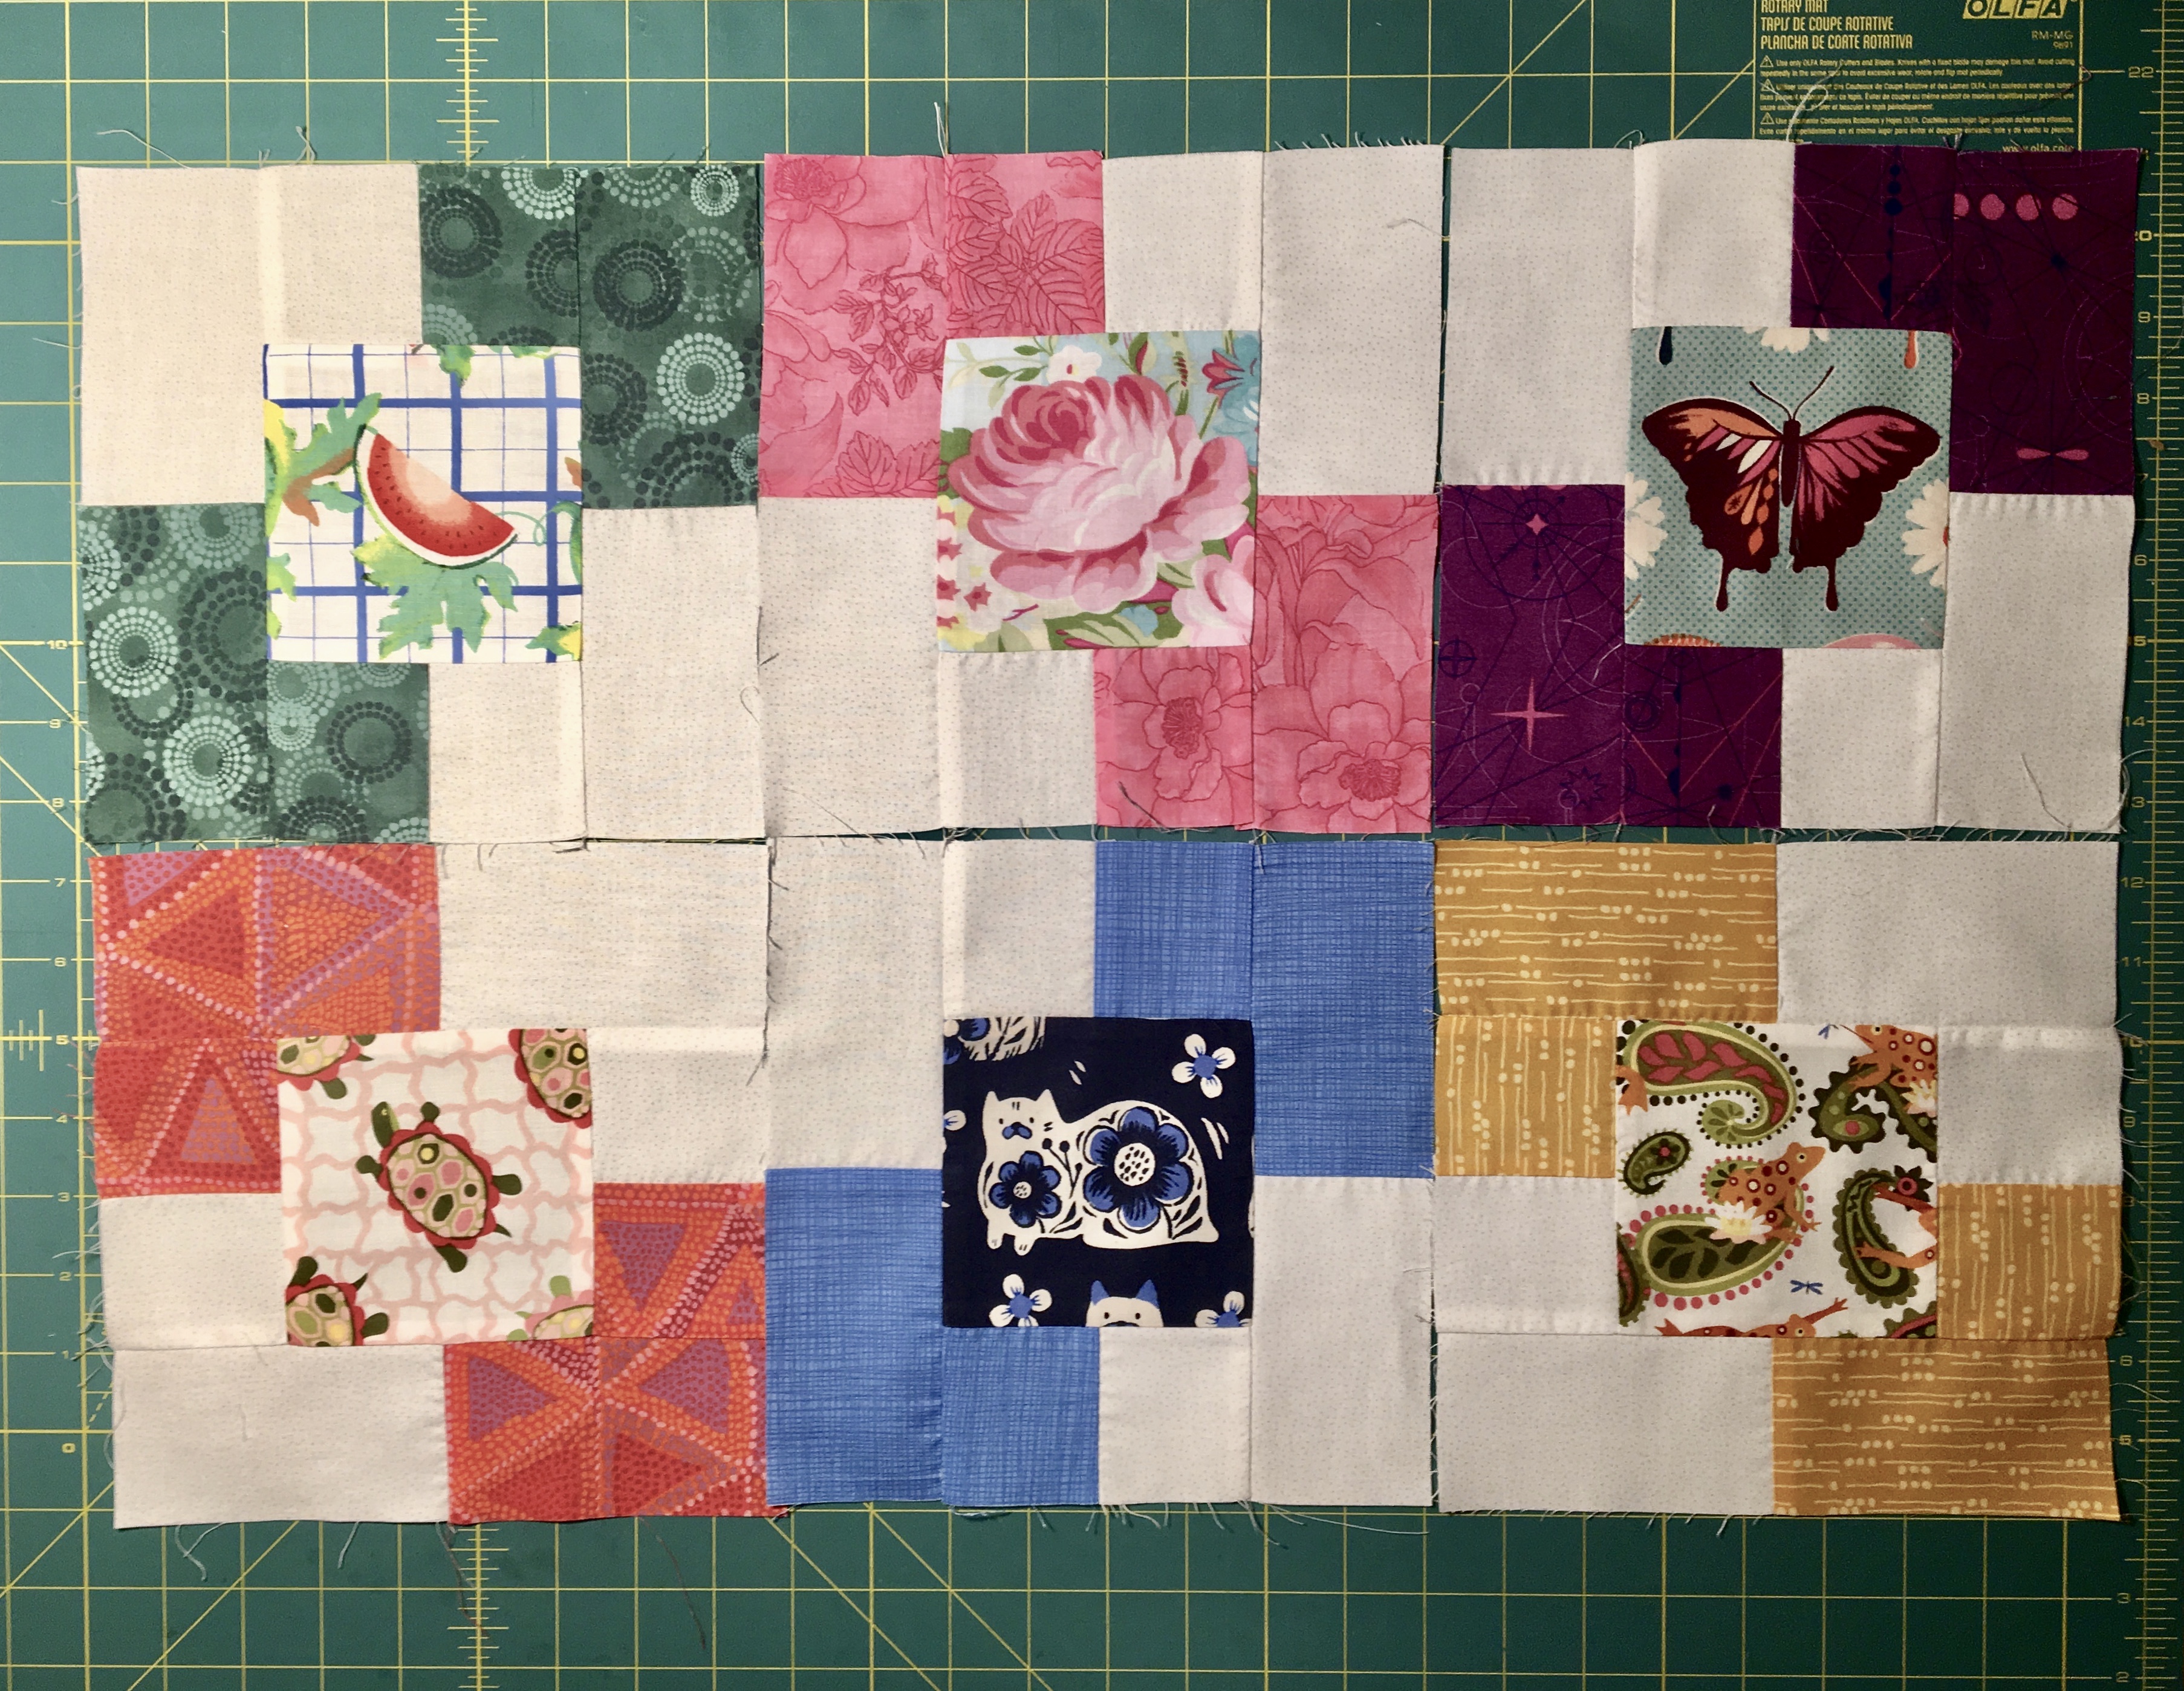
Here are six of the finished blocks:
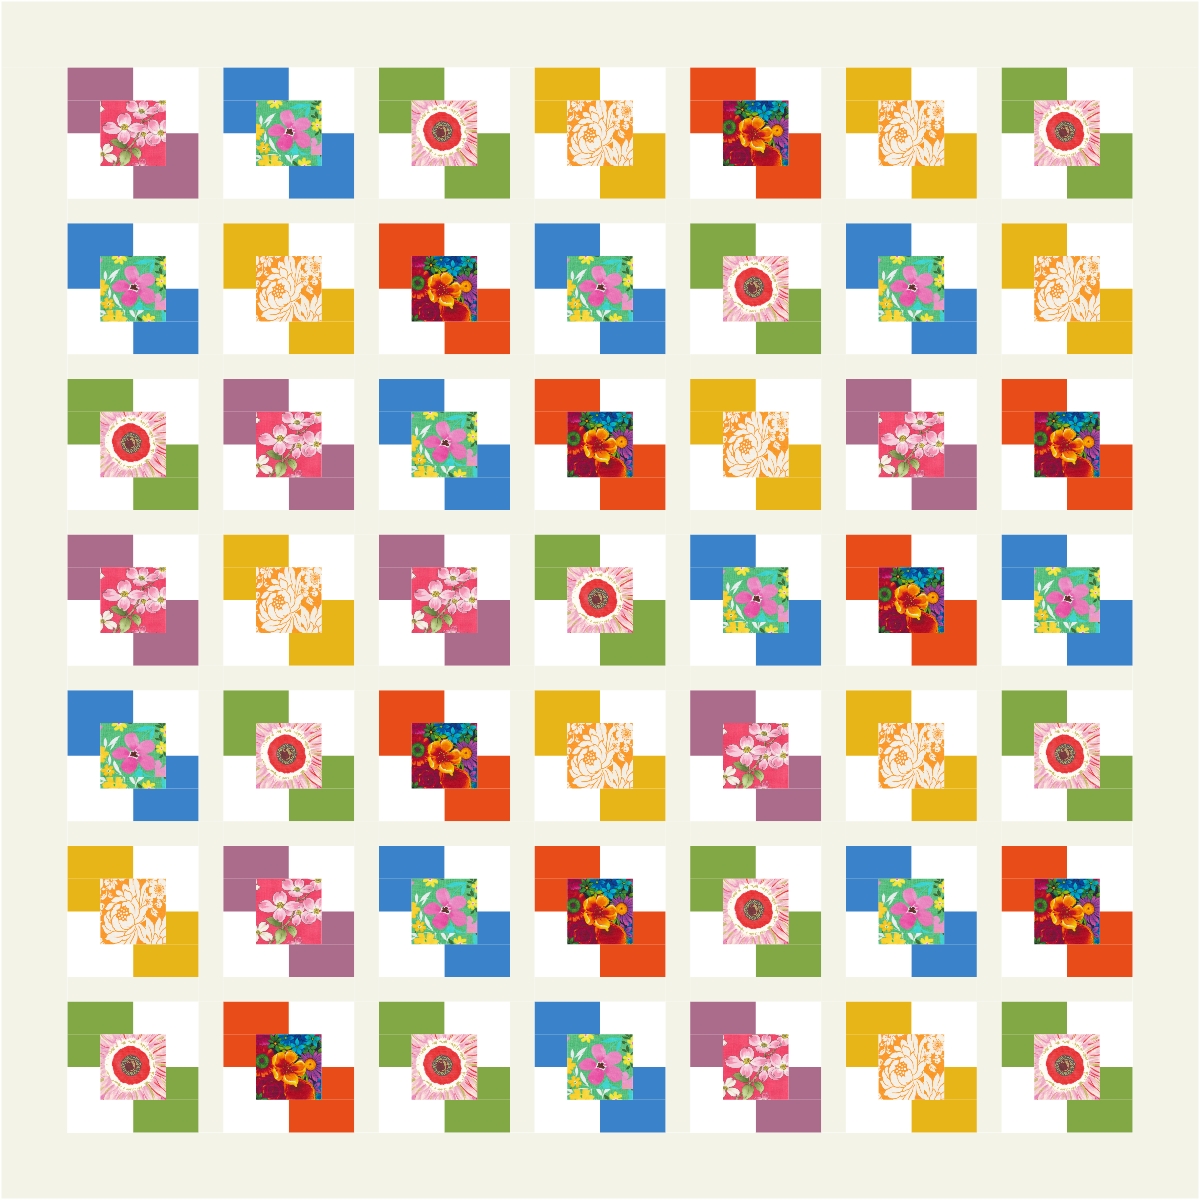
I had a few of design ideas in mind. These two are 7 x 7 blocks:
This design would require 8 x 8 blocks:
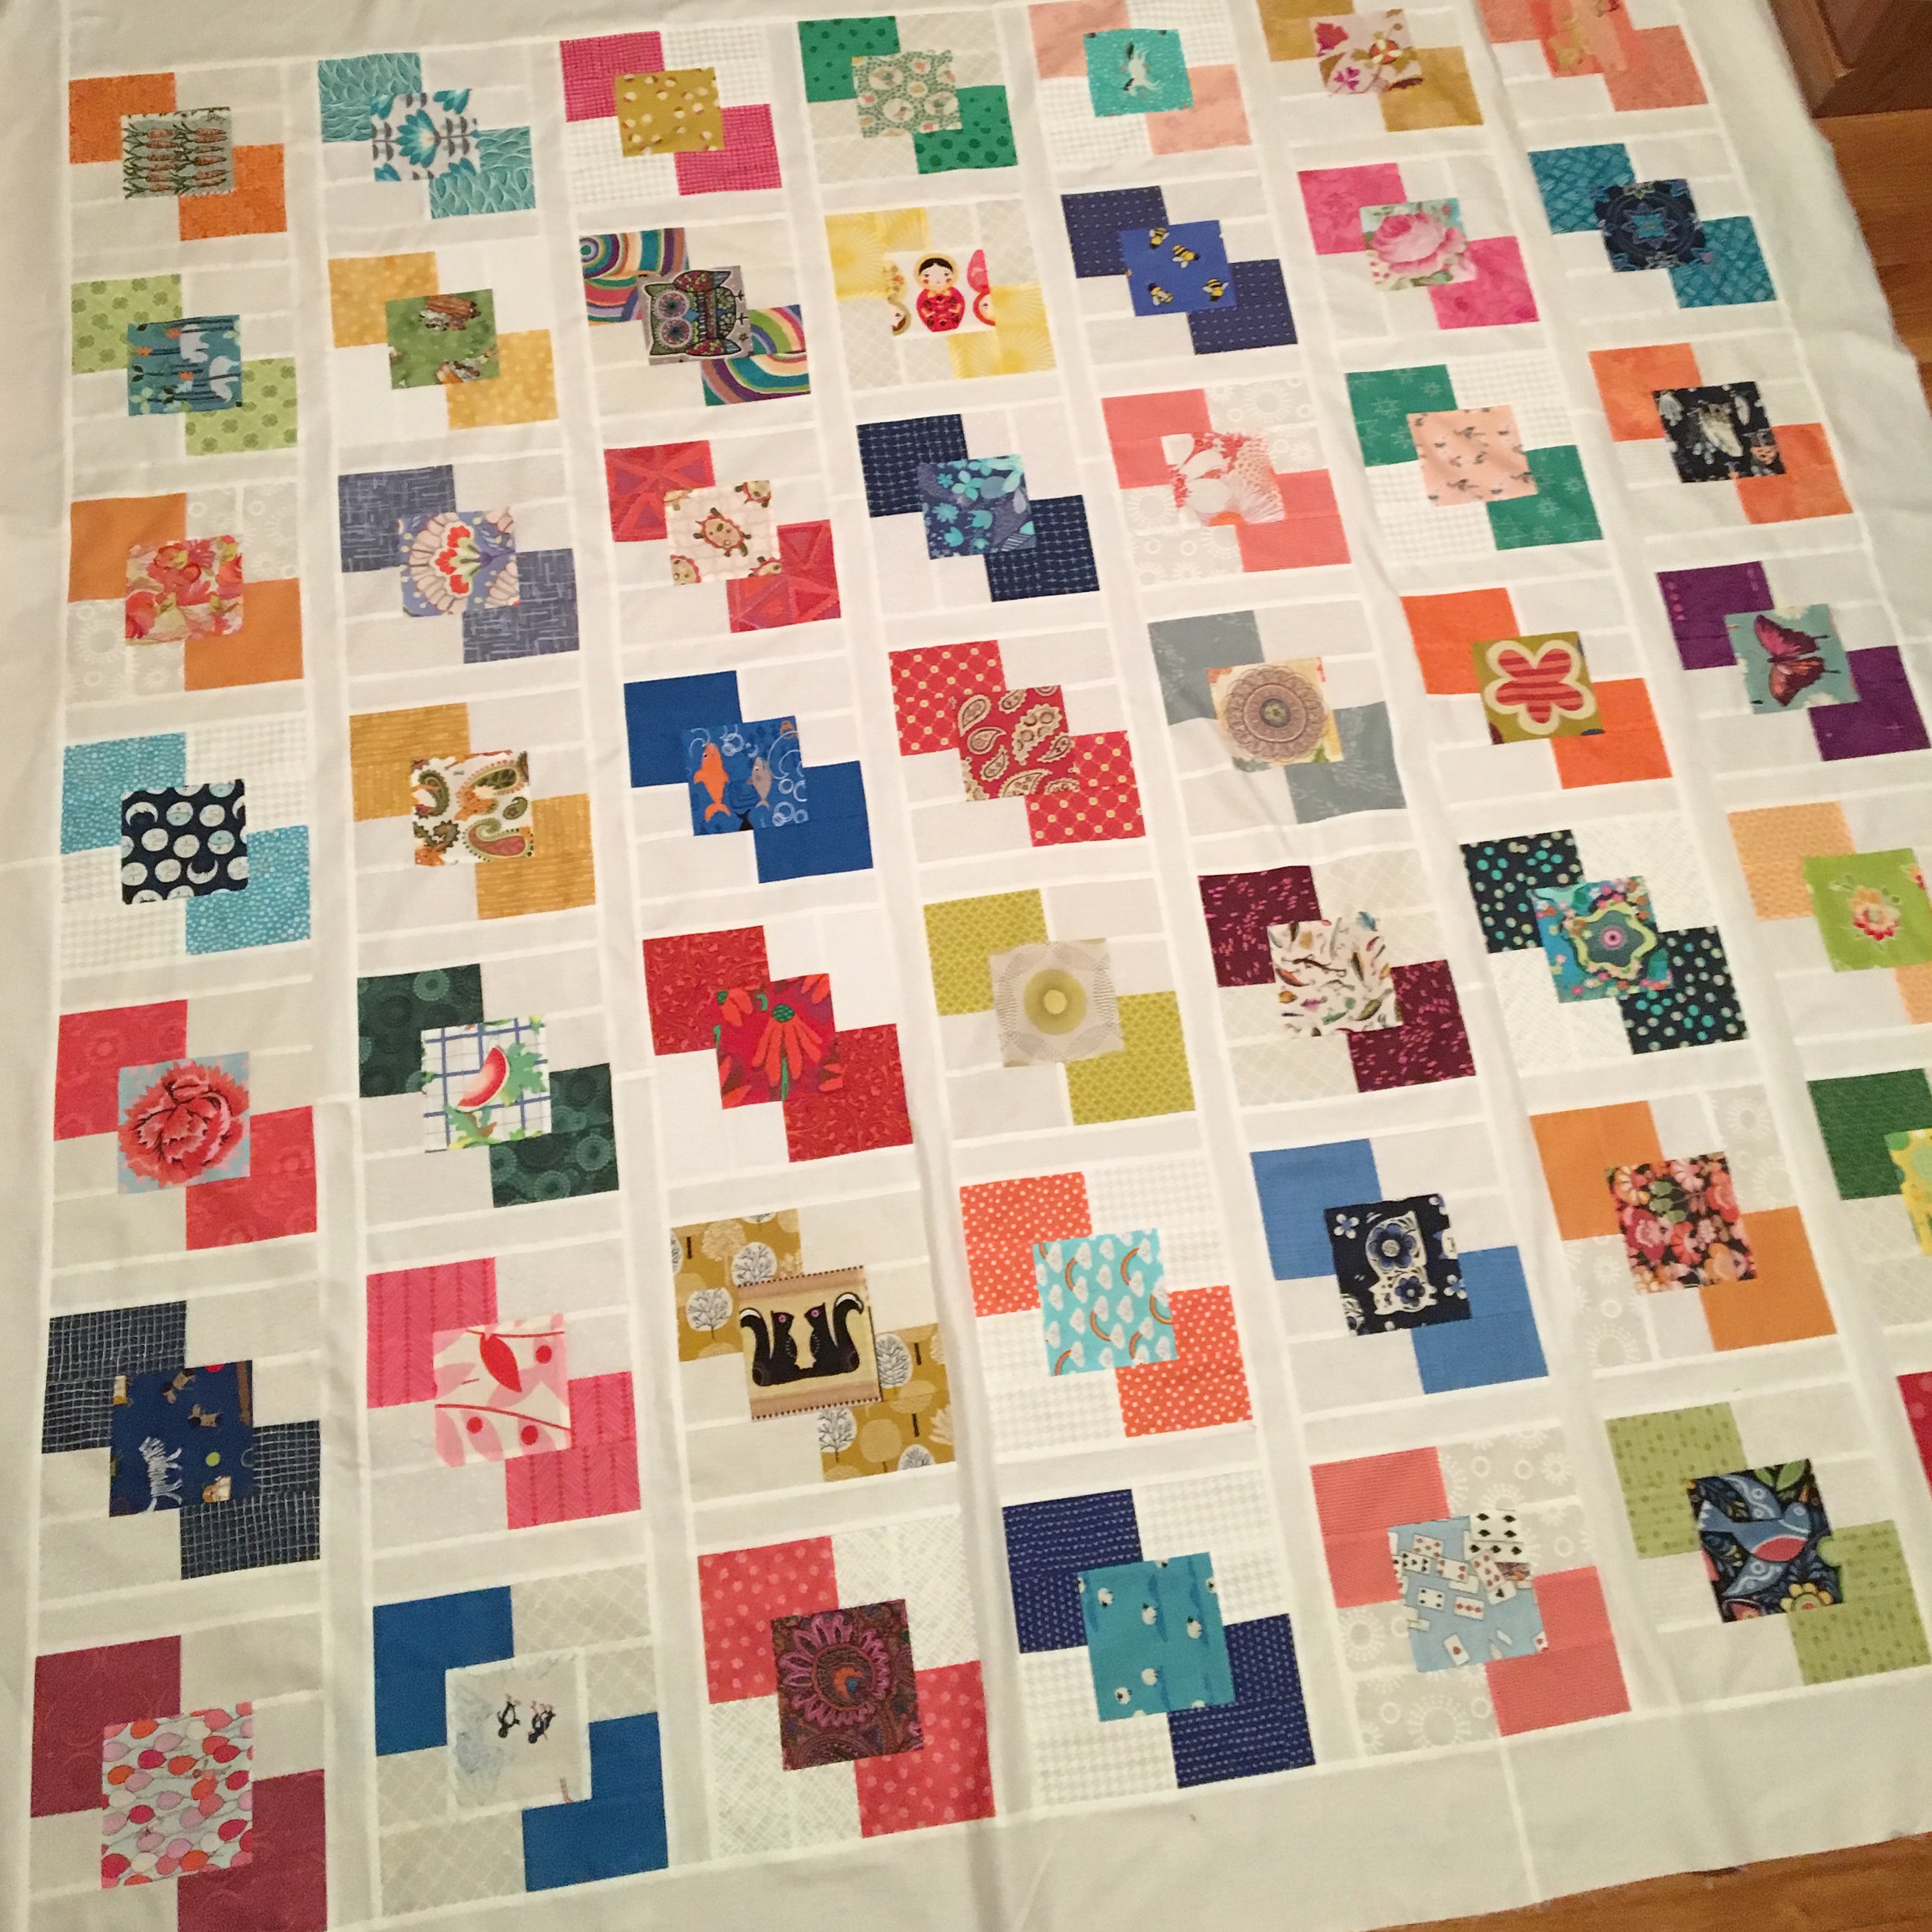
This is what I went with. The sashing is 1 1/2″ and the borders are 4″. The quilt finishes to 73″ x 73″. I will update this post to include a photo of the finished quilt.
AND … here is the update. This quilt was donated to the MassGeneral Hospital for Children.