Tag Archives: applique

Modern Jane

Despite all of the projects I am working on, I could not resist signing up for the Jane Stickle quilt group at Quilter’s Common.  I started a Jane quilt a few years ago using reproduction fabrics but I only got four blocks done before I gave up on the idea.

img_3169

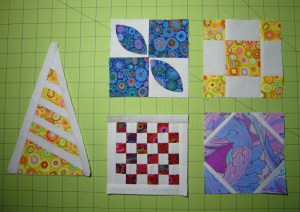
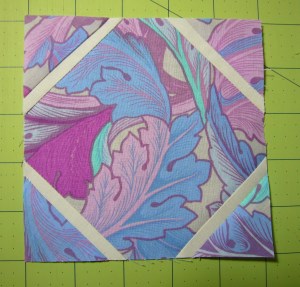
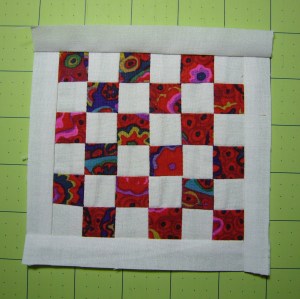
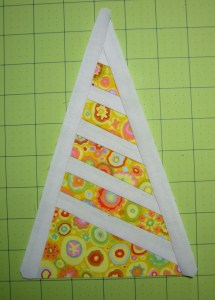
This time around I am feeling more confidant with a few more years of piecing experience and a sewing machine (Bernina 830) that makes it a lot easier to be precise … which is absolutely necessary with these small 4 1/2″ blocks .  I have decided to go with modern fabrics this time and I am using a pale gray fabric for the background.

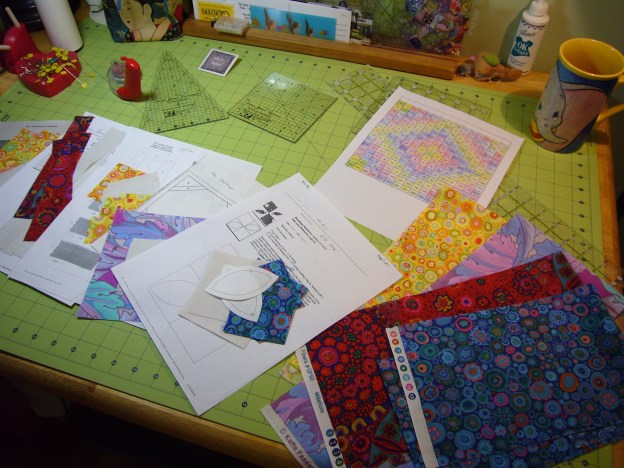
I have a collection of Kaffe Fassett fabrics and also just purchased three sets of 6 1/2″ squares of Kaffe and Philip Jacobs fabrics.  I think the 6 1/2″ squares will be perfect for the Dear Jane blocks … 5″ squares would be too small for the blocks that require 2 or more 2 3/4″ square pieces from the same fabric.

I am already ahead of my first attempt attempt at Dear Jane.  I have finished four squares and a triangle.  I make no promises about keeping up with the pace and I don’t plan to make this a Dear Jane Blog … but, I will post updates as I go along!

Through the Needle Article

Yes, I have been published!!

I sent the editor, Jo Leichte, a copy of the tutorial featured in my Bird Applique Quilt article …  and now it is published in the latest issue of Bernina’s on line magazine  Through the Needle!

The article provides all the instructions for programming your embroidery machine to sew around each little applique piece when using raw edge applique for a project.  The article features my Gold Finch applique pattern which is in my Bird Applique Quilt, along with my Blue Jay.

I also made a pillow with my Mr. and Mrs. Cardinal pattern.

cardinal pillow

Please visit my Craftsy Shop if you would like to buy these patterns … and finish the applique any way you want! My method, your method … but do try applique … it is like paint by numbers combined with a jig saw puzzle and does anyone else remember colorforms???

But wait, please read on! … I must give this fabulous applique designer credit …. the majority of the patterns in the Bird Applique Quilt were designed by Peggy Anne Klinker.  These were made available for her 2011 Block of the Month quilt. You can still get some kits for a few of the birds in that quilt, as well as some from her 2012 BOM quilt.   And now Peggy Anne has a new BOM featuring Hens and Chicks … very cute, so do check it out.  Sign up!

 For a closer look at the applique embroidering click on these thumbnails of the Gold Finch and Blue Jay:

.finchfinished     finishedjay

Here is a PDF of my tutorial:  embroidering-raw-edge-applique


House Quilt Finished

I finished my little house quilt last Friday, the 19th of April.  I spent the day listening to the news and waiting for Suspect 2 in the Boston Marathon Bombings to be found and arrested.  While listening I worked on this quilt.  This terrible event hit close to home, as I work in Boston 3 days a week.

But on that Friday I was safe at home working on this fabric picture of my house and hoping that the law enforcement officers would all be safe while doing their jobs.  Thankfully no one else was injured or killed and now we can move on …. while remaining vigilant!

This little quilt is 18″ x 18″.  The story behind it is here … and to see a full size version of the finished quilt click on the thumbnail photo.

finished

Landscape Applique Class

I have been wanting to do a little art quilt of my house for awhile now.  I was thinking in terms of pieces cut and sewn together, but when Quilters Common was offering a class by Sue Colozzi featuring landscaping with raw edge applique I decided to give that a try.  The class project was a house … a standard center entrance colonial.  My house is a rather unique L shaped cape with a garage underneath.  Very 50’s!

Not to be deterred I decided to go ahead, with encouragement from Sue, and used a picture of my house for the project.  But, I needed to enlarge the picture and rearrange things a bit.  I did not want the tree in front of the house!  I started with an acrylic painting that I had done, enlarged that and then referred to a photo taken in the summer.  I had to add the squirrel, but Bob wanted me to put a car in the driveway …. of course he did!  Maybe next time.

I am happy with the result, which I think is nicer than the painting.  I work better with fabric!

Of course, I still need to take the time to finish this quilt.  The edges of each piece need to be sewn down, borders added and the whole thing needs to be quilted.  My plan is to use my embroidering method, which will mean taking the time to scan the quilt and “program” the stitches and then let my embroidery machine finish it for me!

If you decide to try this here is the method I used for fusing the shapes to the background.  I first drew the house, then I scanned the drawing and printed a  mirror image of it.  I then took a sheet of Steam a Seam 2, which is a doubled sided fusible web, and traced the shapes from the mirror image, grouping shapes by color.  Then I cut out each group of pieces and fused it to the back of the appropriate fabric.  Then I cut out the individual pieces and used the original drawing for a guide to place the pieces on the background fabric.

drawings