Category Archives: Patterns

Zipper Pouch Inspiration

The Boston Modern Quilt Guild will occasionally have a swap.  In November we were asked to bring a zippered pouch to the monthly meeting. I started checking out Pinterest and Google images for ideas.

I found this lovely Lavender Pouch at Pretty by Hand, but alas no pattern!  But then I found this neet Tutorial at Sew Like my Mom.  I combined the two and came up with my own version that includes a pocket on the back.

Too bad I didn’t get a picture of the bag after I added the turquoise ribbon!

Scrappy Monochromatic Blocks

The Boston Modern Quilt Guild is making charity quilts this year and members have been asked to donate blocks made with fabrics that are from the same color family.  The quilts will then be made with a rainbow of the different color grouped blocks.

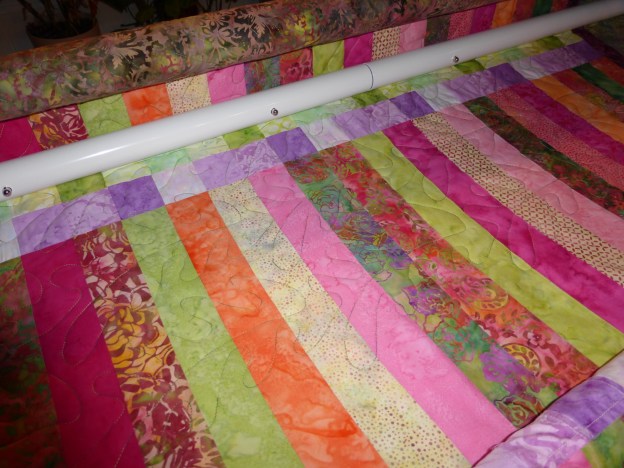
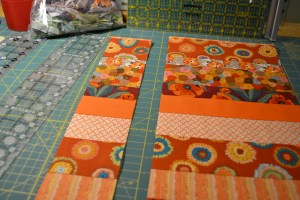
I came up with a strategy for my blocks which involved sorting all of my fabric scraps by color and then selecting strips from each pile and sewing them together.

DSC_0104

After sorting the strips I trimmed them so they were all about the same length and so that each strip was a uniform width, but the strips are various widths!

DSC_0103 DSC_0102

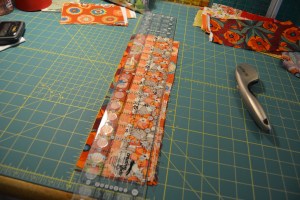
Then I sewed them together.

DSC_0107

For the blocks that I decided to make I made sure that the pieced strips panel was 38″ long and about 15″ wide. This is enough to make several blocks. You do need a 38″ long strip for the log cabin block featured in this article.

DSC_0109

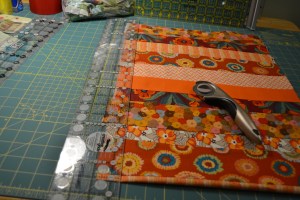
Trim the uneven edge and don’t forget to save your scraps that are too small to sew with.  These will be the stuffing for a pillow!

DSC_0110 DSC_0111

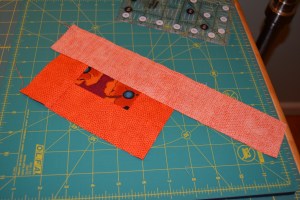
I cut my pieced strips 3 1/2″ wide and some are 2″ wide.

DSC_0112 DSC_0113 DSC_0114

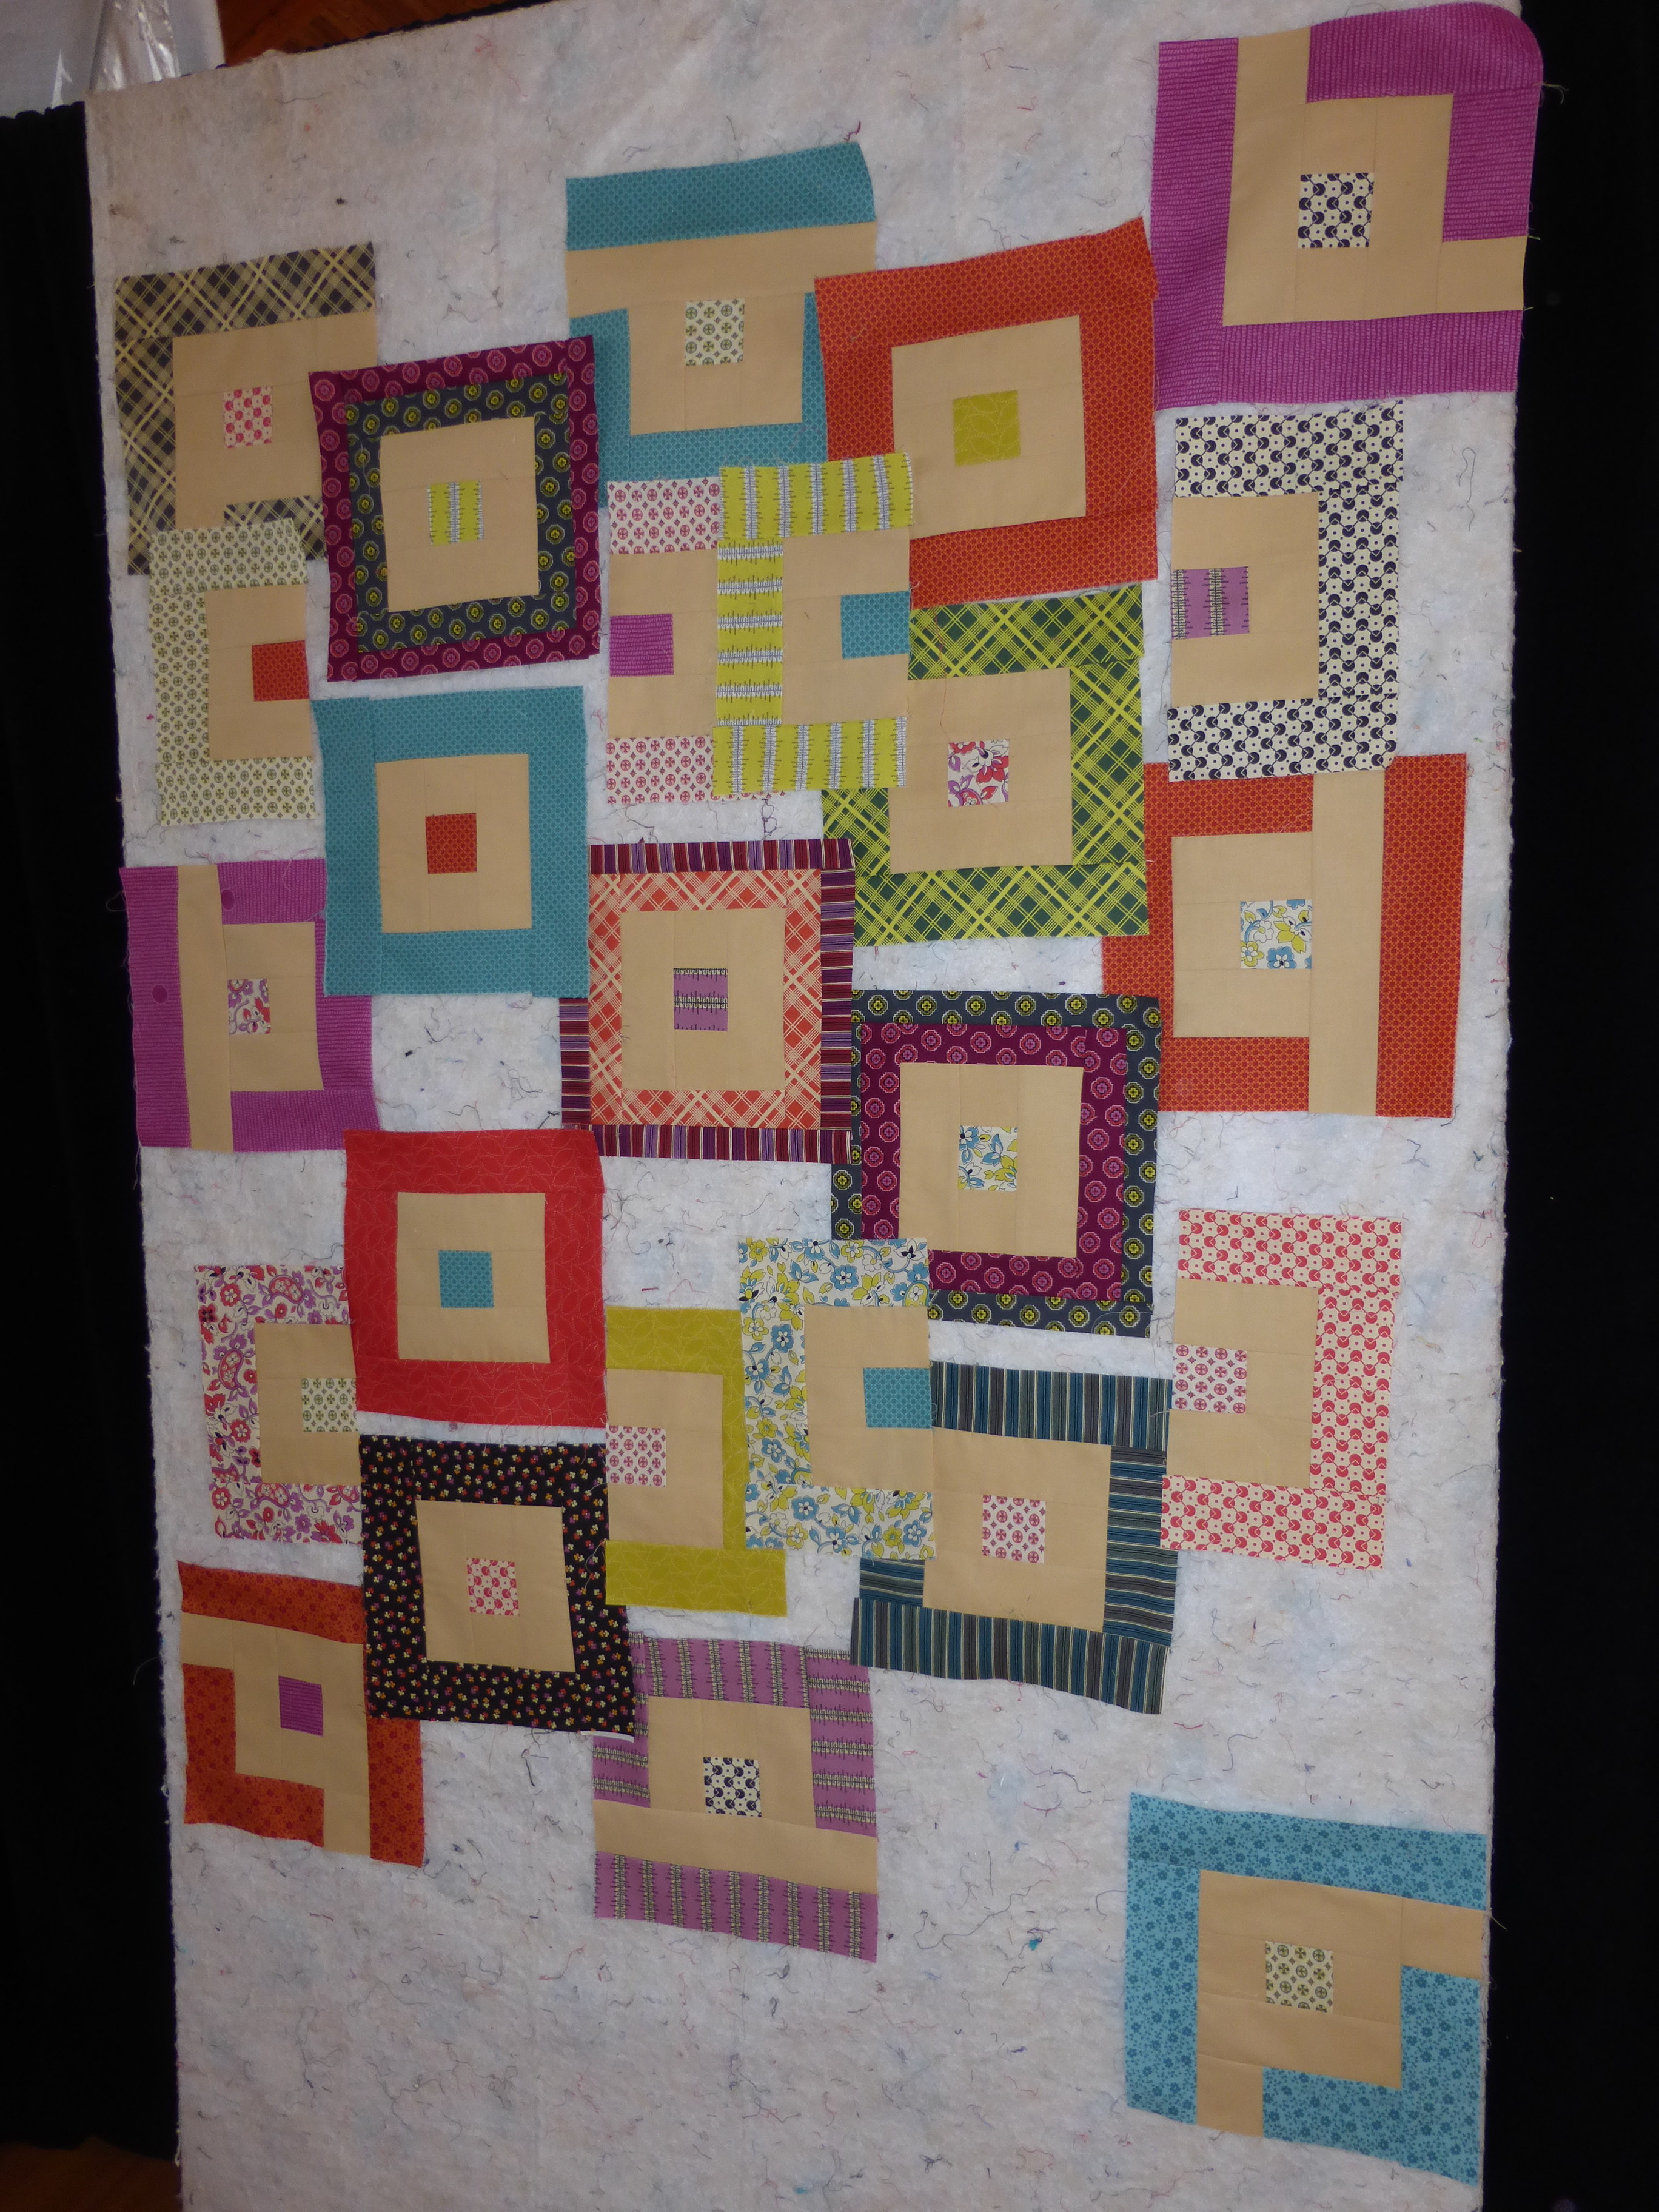
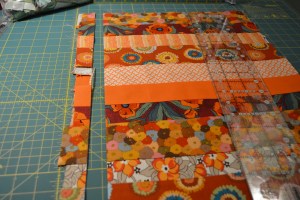
One of the block designs is a log cabin block.  This block uses one of the 3 1/2″ wide strips with other fabric scraps.  The center is a 3 1/2″ square bordered with 2″ strips.

DSC_0120 DSC_0121 DSC_0123

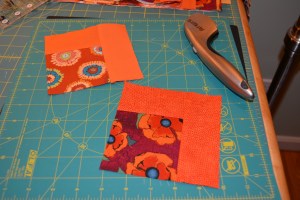
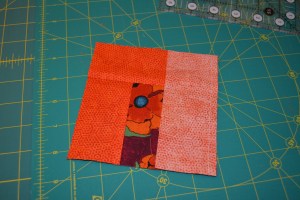
Sew the strips and then trim them to the correct size.  Use a square ruler to make sure your cuts are correct.  The center block will be 6 1/2″ square.

DSC_0125DSC_0126

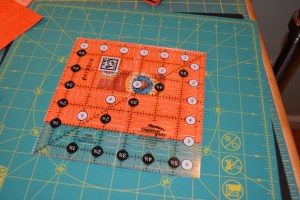
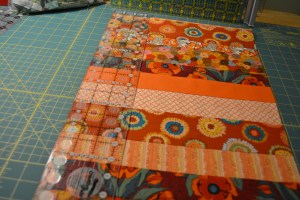
Then continue adding the 3 1/2″ wide pieced strips.  Sew then trim to the correct size as you go.  Once the block was larger than 6 1/2″ I got out my 12 1/2″ ruler to trim the block.

DSC_0127

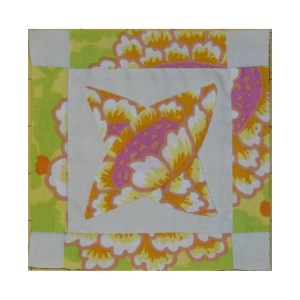
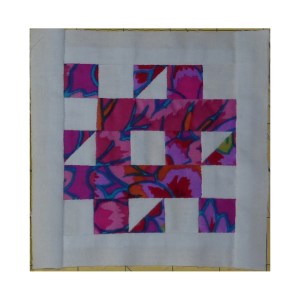
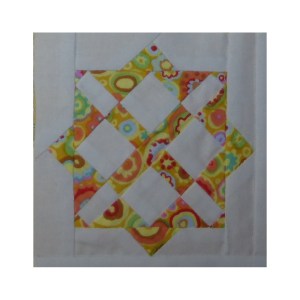
The block will be 12 1/2″ square when completed.  These are two of the blocks:

.DSC_0128 DSC_0131

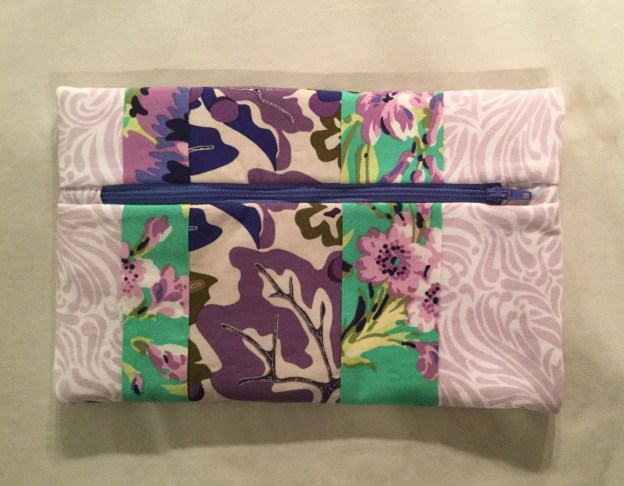
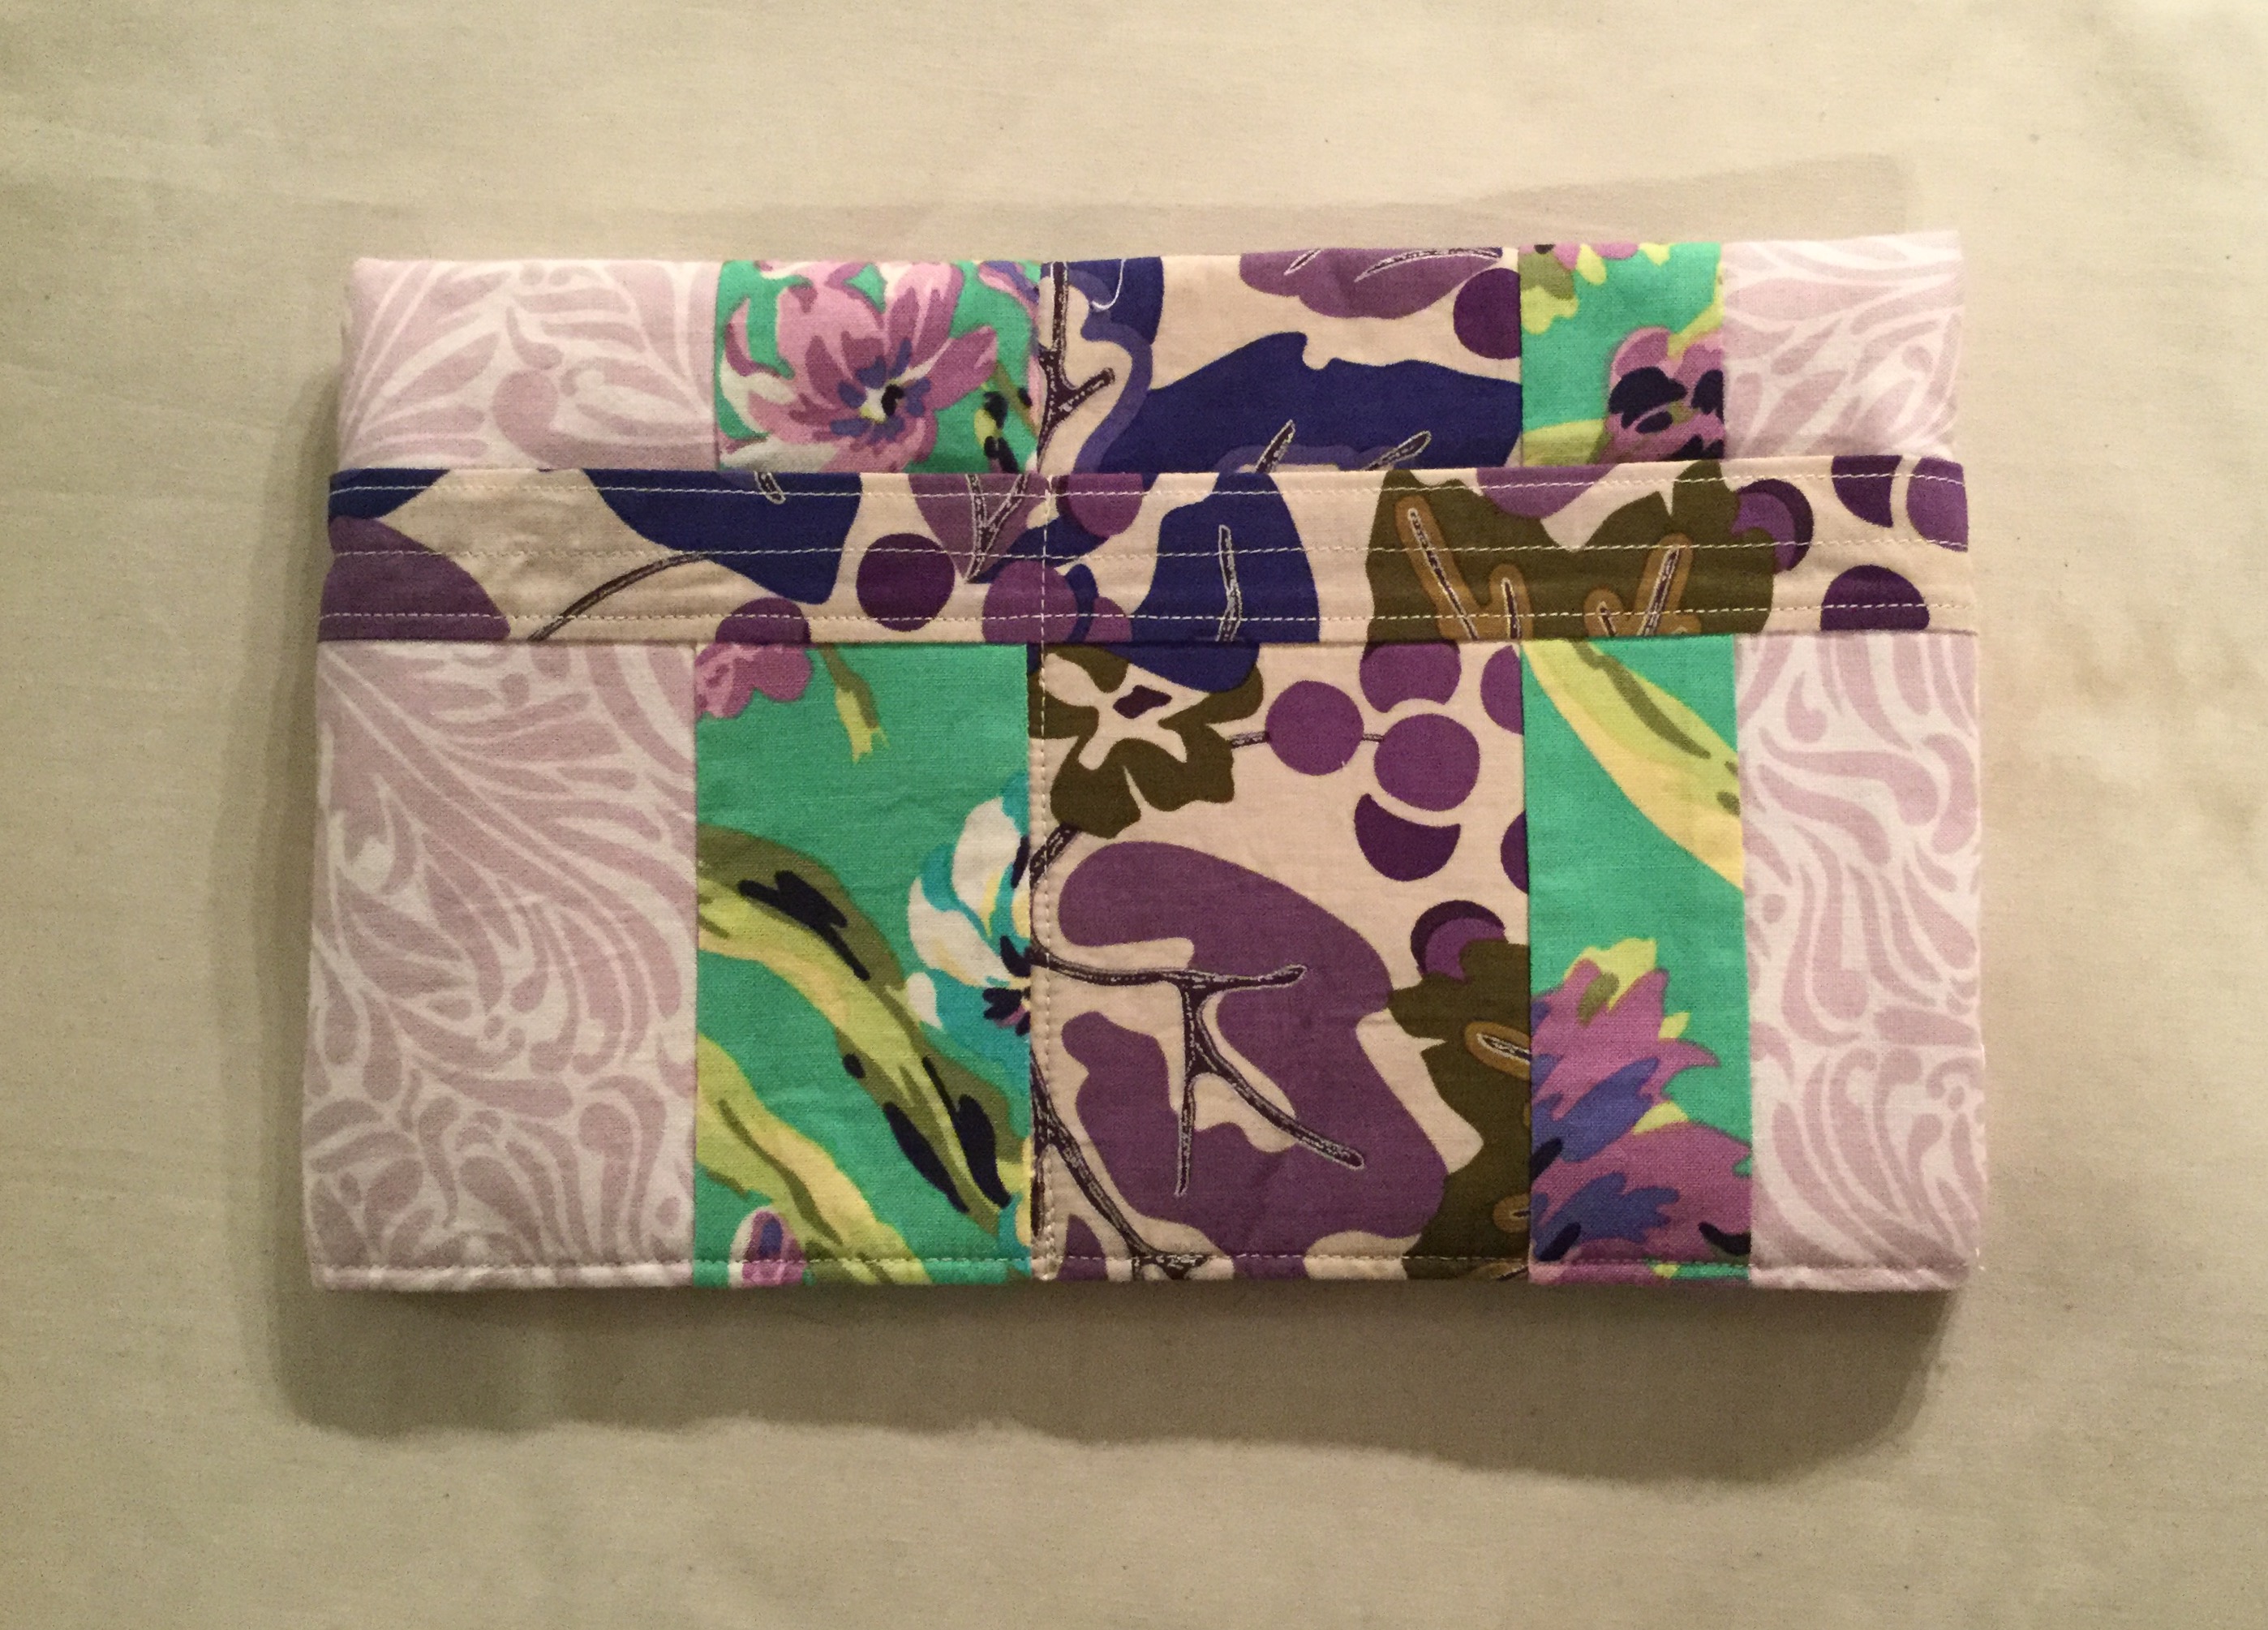
Here are some made with purple and green strips.

DSC_0004 DSC_0005

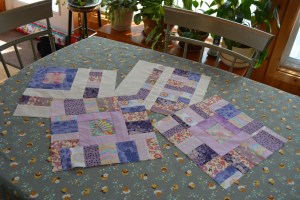
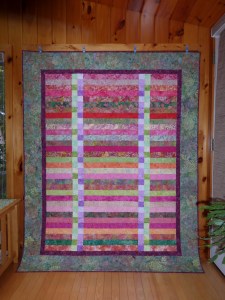
Of course I got carried away and will be making a lot of these blocks, so I will make my own quilt with these blocks.   Usually I would use all different colors, but I really love the idea of using strips that are in the same color group. The finished blocks are sublimely wonderful.

Holiday Cheer Gift Bag

Here is a quick pattern for a Holiday Gift Bag.  This little pouch is a good size for a bottle of wine or perhaps a bottle of Pear Vodka for your Hairdresser! Debi was VERY happy with her Pear Vodka.  Start with two coordinating pieces of fabric each 15″ x 18″ and one 20″ piece of ribbon.  Place the two pieces of fabric right sides together and sew a seam across the short edge on one side.

image

Open up the two pieces with the seam in the middle and fold in half lengthwise, right sides together.

image

Now sew seams as follows:

Start on the fabric you want on the outside edge about 4″ or so from the first seam sewn.  The starting point can be adjusted depending on the length of the neck of your gift bottle. Sew from this point towards the inside (lining) fabric and continue along until you get around the first corner.  Then STOP!  Leave a gap of a few inches, so you can turn everything right side out, and start sewing again until you get to the folded edge, and then stop.  Start again at the fold by the bottom of the outside fabric and continue towards where you first started, but STOP before you reach that point to leave an opening that is large enough for your ribbon. Don’t forget to secure your stitches when starting and stopping.

My stitching is a bit messy because my first ribbon gap was too high!

image

Now, reach inside the opening and scrunch the tube up until you reach the other end and pull it through so your tube is now right side out.  Adjust the corners and press the opening closed.  Sew along the bottom edge to close the opening.


Fold the lining inside of the bag (it is now a bag!). Find the ribbon opening on the side seam. Pin a safety pin to one end of your ribbon and run it through the hole, around the bag and out again.

image

Put your bottle in the bag, tie the ribbon and clip the ends. Debi said she liked the gift bag, too!

image

This pattern can be adjusted as needed to accommodate any gift!

Happy Holidays and Cheers!

Vintage Butterfly Applique Quilt

I have finished my vintage butterfly quilt.  I love the colors in this quilt! This is the quilt I made with my vintage 30’s butterfly applique blocks that were a gift from my Mother-in-Law’s friend.  As I mentioned in my last post her friend Pat gave me some “quilted fabric” that turned out to be wonderful quilt tops and blocks that her mother made in the 30s.

I saw Pat yesterday and she was very pleased with both quilts, but I could tell the Bow Tie quilt was calling to her, so I gave the finished quilt to her.  She is going to give it to her mother for Christmas.  He mother is in assisted living with short term memory loss.  But, her long term memory is fine so I imagine it will be quite exciting for her to see her old quilt top again.  At least I hope so!  Maybe she will be wondering when and how it turned from a quilt top to a finished quilt!

The Butterfly Treasure Quilt took all of my quilting attention for the last few weeks.  Both it and the wall hanging version are finished.  The wall hanging is made with some wonderful Kaffe Fassett prints, so it gives the 30s pattern a new look!  The pattern for both is also finished now and for sale at Craftsy.

treasure

back


Aunt Lucy is Quilted

Just an update regarding my Aunt Lucy Quilt.  I have finished quilting and binding her.  The fun thing about this quilt is that it has a wonderful collection of Reproduction Fabrics.  This was possible because I participated in a block of the month program at Quilter’s Common in Wakefield, MA.  Thus I did not have to purchase one bit of fabric more than required and still got this wonderful scrappy quilt.

The quilting was a bit of an adventure for me.  I printed patterns that I sized to fit the blocks and borders and used the laser light on my longarm machine to trace them.  This is the second time I have turned a quilt to do the borders.  I did a test run with a little panel quilt (that still needs a binding).  I am happy with the results.

finished-lucyquilted-medallion

I found the patterns I used in this quilt in May Covy’s Follow the Line’s Quilting Designs, Volume 5, Authentic Civil War Designs and More


Aunt Lucy’s Medallion Quilt

I have a soft spot in my heart for reproduction fabrics and patterns.  I love old quilts and enjoy reading about them and have a few old tops that I treasure.

lucy-medallion

I could not resist Collette’s block of the month at Quilter’s Common for this pattern.  I got a bit behind on finishing it but here is the top ready for quilting.  I was inspired by Collette to add the striped border.  I love how the Green jumps out now.  The picture before the outer blocks and border were added highlights the reds.  My blue/green border gives it another look altogether.

Piecing this top was a bit of a challenge and I feel that I have really improved my skills quite a bit.  So, I am glad I spent the time to fuss with all of these blocks.

!

Good Fortune in Chicopee

My Good Fortune Quilt with Denyse Schmidt’s Chicopee Fabric is finished!  I finished it a couple of weeks ago but have not found time to share this with everyone. This is the quilt top that I put together at the BMQG retreat in March.

I used Patricia Ritter’s Bauhaus pantograph for this quilt.  I know, I know, I should have just free motion quilted, but I am a big wimp and do not trust my skills for keeping things even and consistent.

I want more time to practice and play!  But, I am happy with what I have accomplished with this quilt.

good-fortune-chicopee G-F-C-back


Boston Modern Quilt Guild Retreat

I spent the weekend at the Franciscan Guest House in Kennebunk, ME at a retreat with the Boston Modern Quilt Guild.  Quite the quilting adventure.  The accommodations were a bit rustic, but that just added to the feeling of being away at Quilt Camp!  The Gymnasium we were working in was the best with lots of sunshine streaming in and plenty of goodies to munch on.

P1030568

I decided to use my Denyse Schmidt Chicopee 2 1/2 inch strips.  I hope Kate Spain does not mind that I used her Good Fortune pattern!  The pattern is quite intricate and one should not participate in Happy Hour when trying to puzzle through which sashing goes with which type of block … unless one has a seam ripper!

arrangecolums chicopee

I was amazed at the productivity of everyone.  I was happy to get my one project to quilt top stage, but people were going from fabric to quilt or going from project to project.  And, there was also lots of great improvisational piecing taking place.

I also have to thank Janis for inviting me on her road trip to Mardens.  My fabric haul was modest at 25.75 yards with an average cost of $3.30 a yard!  What an amazing place with lots of ultra modern fabric for no more than $4.50 a yard and then there were those bins with fabric for only $1.50 a yard … good designer fabric!  Woot Woot!!

mardens

The Happiest Quilt

I just love the colors in this quilt.  If this quilt does not make you happy I don’t know what will.

The fabric is a Hoffman Watermelon Bali Pops pack of 2 1/2 inch strips with two light green and two lavender fabrics substituted. Sorry to say that this color set has been “retired” and I could not find it even on e-bay. Perhaps Wildberry or Splash will make you just as happy!

The pattern is Champagne from Villa Rosa Designs.  The pattern was written with a pack of 2 1/2 inch strips in mind.  These patterns are very basic, printed on a post card, but are only $2.00.  I added borders to the quilt to make is a nice size for keeping warm while watching TV or reading.  Thanks to Colette at Quilters Common for help choosing the fabric for the borders.  She was right of course!


October Jane

October has been flying by with very mild weather and lots of beautiful color throughout the New England Area.  I managed to get all of my October Jane blocks finished and have gotten a start on the ones for November.

November will finally see more green!  Pat, our fearless leader at Quilters Common has been trying to get a mix of blocks each month … paper piecing, rotary cut, applique, and always one triangle, otherwise we would never get to them!  But, this means I have no idea what colors I will be using for fabric each month.  For the last two months the colors have been lots of yellow, orange and red, so I am happy to be picking out some green fabric for November.

Block M-8 ended up looking quite warped so I went ahead and added the sashing pieces.  I am following advice from Aunt Reen’s Blog for the sashing.  With the sashing in place it looks just fine now.